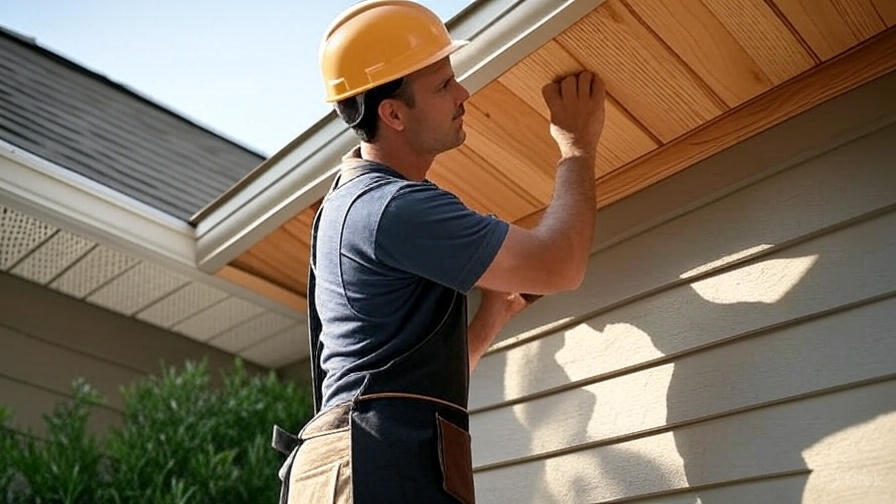
How to Install Wood Soffit?
Wood soffits protect your home’s eaves while adding classic architectural appeal. These horizontal panels span the gap between your home’s exterior wall and the roof’s edge, creating a finished look that enhances curb appeal. Installing wood soffit requires careful planning and attention to detail, but homeowners with basic carpentry skills can tackle this project successfully.
What You Need to Know About Wood Soffits
Wood soffits serve multiple purposes beyond aesthetics. They shield the roof’s underside from weather damage, prevent animals from entering your attic space, and provide ventilation when equipped with vents. Cedar, pine, and fir remain popular choices for residential installations due to their durability and workability.
The installation process involves measuring, cutting, and securing wood panels to a framework. You’ll work with fascia boards, lookouts, and wall plates to create a stable mounting system. Proper ventilation planning ensures adequate airflow while maintaining structural integrity.
Essential Tools for Wood Soffit Installation
Gather these tools before starting your project:
Measuring and Layout Tools:
- Tape measure (25-foot minimum)
- Chalk line
- Level (4-foot recommended)
- Speed square
- Pencil
Cutting Tools:
- Circular saw with fine-tooth blade
- Miter saw (optional but helpful)
- Jigsaw for vent cutouts
- Utility knife
Installation Tools:
- Drill with bits
- Screwdriver bits
- Hammer
- Nail gun (optional)
- Safety glasses
- Work gloves
Hardware and Materials:
- Wood soffit panels
- Galvanized screws (1¼-inch and 2½-inch)
- Finishing nails
- J-channel or receiving channel
- Soffit vents
- Wood filler
- Primer and paint or stain
- Caulk
Planning Your Wood Soffit Installation
Start by examining your home’s existing eave structure. Most homes have either open eaves (exposed rafters) or closed eaves (boxed construction). Open eaves require more preparation work since you’ll need to install blocking between rafters.
Measure the total linear footage of eaves requiring soffit installation. Calculate the width from the exterior wall to the fascia board edge. These measurements determine how much material you need. Add 10% extra for waste and mistakes.
Check local building codes for ventilation requirements. Most codes mandate one square foot of ventilation for every 150-300 square feet of attic space. Continuous ridge and soffit ventilation provides optimal airflow.
Preparing the Work Area
Safety comes first when working at height. Set up sturdy ladders on level ground. Use ladder stabilizers to prevent wall damage and improve stability. Have a helper spot you while working overhead.
Remove any existing damaged soffit material. Clean debris from the eave area and inspect the fascia board condition. Replace damaged fascia boards before installing new soffits. This ensures a solid mounting surface.
Examine the wall’s top plate where the soffit’s inner edge attaches. Install a horizontal furring strip if the wall lacks a suitable mounting surface. This strip, typically 1×2 lumber, provides consistent support along the wall’s length.
Installing the Support Framework
Begin framework installation by marking level lines on both the wall and fascia board. Use a chalk line to ensure straight, consistent marks. The soffit should slope slightly toward the fascia (about ¼ inch per 12 feet) to shed water effectively.
Install the wall mounting strip first. This strip, often called a wall cleat, runs horizontally along the house wall at the marked height. Secure it with 2½-inch screws into wall studs every 16 inches. Use a level to maintain consistent height.
Next, install the outer mounting strip along the fascia board’s inner face. This strip should align with the wall strip to create a level framework. Space fasteners every 12-16 inches for solid attachment.
For wide eaves (over 16 inches), install intermediate supports called lookouts. These perpendicular braces span between the wall and fascia strips, preventing soffit sagging. Space lookouts every 24 inches maximum.
Measuring and Cutting Wood Soffit Panels
Accurate measurements ensure professional-looking results. Measure each bay individually since dimensions often vary slightly. Record measurements clearly to avoid confusion during cutting.
Most wood soffit comes in standard widths, but you may need to rip panels to fit your specific dimensions. Use a circular saw with a fine-tooth blade for clean cuts. Support long panels properly to prevent binding and kickback.
Cut soffit panels about ⅛ inch shorter than the measured distance between mounting strips. This small gap allows for seasonal expansion and makes installation easier. Mark the back of each panel with its installation location.
For ventilated soffits, mark vent hole locations before cutting. Standard soffit vents require 4-inch or 6-inch diameter holes. Use a jigsaw with a fine blade for smooth cuts. Sand rough edges to prevent splinters.
Installing J-Channel or Receiving Channel
J-channel creates a neat edge detail and simplifies panel installation. Install J-channel along both the wall strip and fascia strip before mounting soffit panels. The channel’s opening should face the panel insertion direction.
Cut J-channel pieces with a fine-tooth saw or tin snips. Create neat corners by mitering cuts at 45-degree angles. Test-fit pieces before final installation to ensure proper alignment.
Secure J-channel with galvanized screws every 12 inches. Don’t overdrive screws, which can distort the channel and make panel insertion difficult. Leave slight gaps at joints to accommodate thermal expansion.
Some installations use receiving channels or dados cut directly into mounting strips. This method provides a clean appearance but requires precise cutting and fitting.
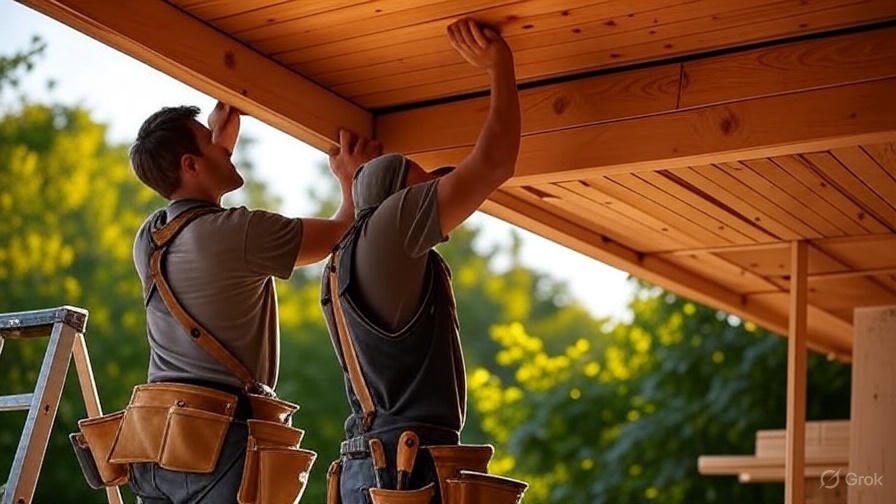
Installing Wood Soffit Panels
Start installation at one end of the eave run. Slide the first panel into the J-channels, ensuring it sits fully in both channels. The panel should move easily without forcing.
Secure panels with galvanized screws through the mounting strips. Drive screws into solid wood backing, not just the panel face. Use 1¼-inch screws for standard installations.
Space screws every 12-16 inches along both edges. Avoid overdriving screws, which can split the wood or create dimples requiring filling. Pre-drill screw holes in harder woods to prevent splitting.
Continue installing panels in sequence. Maintain consistent spacing and alignment as you progress. Check periodically with a level to ensure panels remain straight.
For inside corners, cut panels to fit snugly without gaps. Outside corners require careful measurement and cutting for neat joints. Consider using corner trim pieces to cover complex intersections.
Cutting and Installing Soffit Vents
Proper ventilation prevents moisture problems and extends your home’s lifespan. Calculate required vent area based on your attic square footage and local codes. Distribute vents evenly along the soffit length.
Mark vent locations on installed panels. Use manufacturer templates when available for consistent hole sizes. Standard rectangular vents measure 4×12 inches or 6×12 inches.
Cut vent openings with a jigsaw after drilling starter holes. Work slowly to prevent tear-out on the visible surface. Support the panel from behind during cutting.
Install vents according to manufacturer instructions. Most vents have flanges that sit against the panel surface with the vent body extending into the opening. Secure with screws provided.
Screen or louver vents prevent insect entry while allowing airflow. Choose vents that complement your home’s architectural style and color scheme.
Finishing and Sealing Wood Soffits
Wood soffits require proper finishing to resist weather and maintain appearance. Sand all surfaces with 120-grit sandpaper to smooth rough areas and prepare for coating.
Fill screw holes and minor gaps with exterior wood filler. Allow filler to cure completely before sanding smooth. This step creates a professional appearance and prevents water infiltration.
Apply primer to all wood surfaces before final coating. Use a high-quality exterior primer designed for your wood species. Prime cut ends and edges thoroughly since these areas absorb moisture readily.
Paint or stain soffits to match your home’s color scheme. Use premium exterior coatings for maximum durability. Apply thin, even coats rather than one thick application.
Caulk gaps between soffits and adjacent surfaces with paintable exterior caulk. Focus on joints where water might penetrate. Smooth caulk lines with your finger or a caulk tool.
Troubleshooting Common Installation Problems
Uneven surfaces create installation challenges. Use shims between mounting strips and structural members to create level surfaces. Tapered shims work better than multiple thin shims.
Sagging soffits indicate inadequate support. Add intermediate lookouts or reduce spacing between existing supports. Don’t ignore sagging since it worsens over time.
Gaps between panels usually result from measurement errors or wood movement. Fill small gaps with caulk or wood filler. Larger gaps may require panel replacement or trim strips.
Water stains suggest inadequate sealing or ventilation problems. Check caulk joints and vent installations. Ensure proper attic ventilation to prevent condensation issues.
Wind noise from vents indicates improper installation or damaged screens. Check vent mounting and replace damaged components promptly.
Maintenance Tips for Wood Soffits
Inspect soffits annually for damage, loose panels, or finish deterioration. Address problems promptly to prevent expensive repairs later. Look for signs of pest infiltration or water damage.
Clean soffits annually with mild detergent and water. Use a soft brush to remove dirt and cobwebs. Avoid pressure washing, which can drive water into joints and cause damage.
Recoat soffits every 3-5 years depending on exposure and coating quality. Sand lightly before recoating to ensure good adhesion. Prime any bare wood before applying finish coats.
Check vent screens regularly and clean as needed. Clogged vents reduce airflow and can cause moisture problems. Replace damaged screens promptly.
Trim vegetation that touches or grows close to soffits. Plant contact can damage finishes and create moisture problems. Maintain clearance for air circulation and easy inspection.
Cost Considerations and Project Timeline
Wood soffit installation costs vary by material quality, home size, and regional labor rates. DIY installation saves labor costs but requires tool investment and skill development.
Quality materials cost more initially but provide better durability and appearance. Cedar soffits cost more than pine but offer superior weather resistance. Factor in primer, paint, and hardware costs.
A typical single-story home requires 2-4 days for complete soffit installation. Complex rooflines or extensive repairs extend the timeline. Weather delays can affect outdoor work schedules.
Plan the project during mild weather with low wind conditions. Avoid installation during extreme temperatures when wood movement is pronounced.
Conclusion
Installing wood soffits enhances your home’s appearance while providing essential weather protection. This project requires careful planning, proper tools, and attention to detail, but motivated homeowners can achieve professional results.
Success depends on accurate measurements, quality materials, and proper installation techniques. Take time to prepare surfaces and install adequate support framework. Don’t rush the finishing steps since they determine long-term performance.
With proper installation and maintenance, wood soffits provide decades of service while maintaining your home’s architectural character. The investment in quality materials and careful workmanship pays dividends in durability and curb appeal.