How to Fix Wax Ring on Toilet?
You walk into your bathroom and notice water pooling around the base of your toilet. The smell hits you next – that unmistakable sewage odor that makes you wrinkle your nose. Your toilet rocks slightly when you sit down, and you hear an odd squelching sound when you shift your weight. These warning signs point to one common culprit: a failed wax ring.
The wax ring serves as a crucial seal between your toilet and the drain pipe below. When this seal breaks down, wastewater leaks onto your floor, creating unsanitary conditions and potential structural damage. The good news? You can replace a wax ring yourself with basic tools and some patience.
This comprehensive guide walks you through every step of the wax ring replacement process. You’ll learn to identify the problem, gather the right materials, remove your toilet safely, and install a new wax ring that will last for years to come.
What Is a Wax Ring and Why Does It Matter?
A wax ring creates a watertight seal between your toilet’s drain outlet and the floor flange. This circular gasket, made from moldable wax mixed with rubber or plastic, prevents sewer gases and wastewater from escaping into your bathroom.
The ring sits beneath your toilet, compressed between the toilet base and the flange that connects to your home’s drain system. Over time, the wax can dry out, crack, or shift out of position. When this happens, the seal fails and problems begin.
Most wax rings last 20 to 30 years under normal conditions. However, several factors can shorten this lifespan. Frequent toilet movement, temperature fluctuations, poor installation, and settling of your home’s foundation all contribute to premature wax ring failure.
Signs Your Wax Ring Needs Replacement
Water around the toilet base represents the most obvious sign of wax ring failure. This water often appears clean, but it actually contains sewage and bacteria. Don’t ignore even small amounts of moisture – the problem will only get worse.
Bad smells coming from around your toilet indicate sewer gases are escaping through the broken seal. These odors become more noticeable during humid weather or when your home’s air pressure changes.
A rocking or unstable toilet suggests the wax ring has compressed unevenly or shifted position. When you sit down, the toilet should feel solid and stable. Any movement indicates the need for immediate attention.
Strange sounds when using the toilet, such as gurgling or squeaking, can signal air entering the drain system through a compromised seal. These noises often accompany other symptoms.
Stains or discoloration on the floor around the toilet base show where sewage has been seeping out. Even if the area appears dry now, permanent damage may already be occurring to your subfloor.
Essential Tools and Materials
Before starting this project, gather all necessary tools and materials. Having everything ready prevents frustrating trips to the hardware store mid-project.
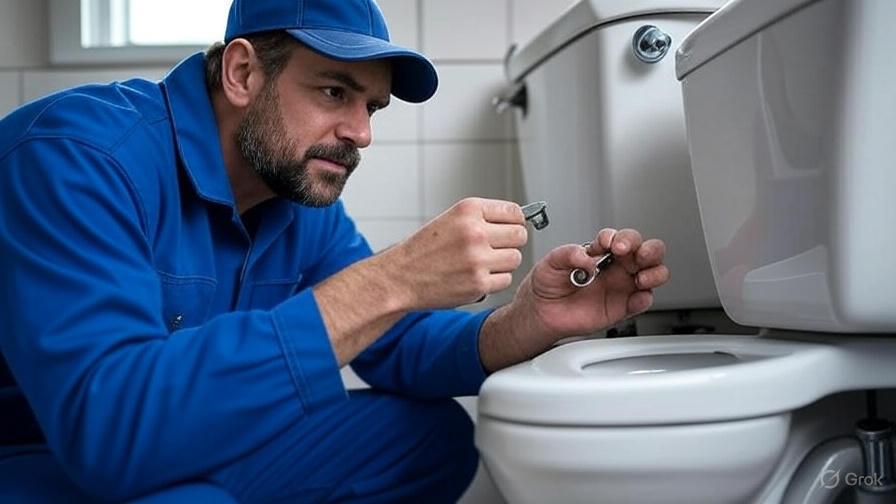
You’ll need basic hand tools including an adjustable wrench, screwdriver set, putty knife, and utility knife. A small pry bar helps remove stubborn bolts, while needle-nose pliers grab hard-to-reach items.
For the actual repair, purchase a new wax ring from any home improvement store. Standard wax rings work for most toilets, but measure your setup first. Some toilets require extra-thick rings or rings with plastic flanges attached.
New toilet bolts and washers ensure a secure connection. The old bolts often corrode or break during removal, so having replacements prevents delays. Buy brass or stainless steel bolts for better corrosion resistance.
Protective gear includes rubber gloves, safety glasses, and old clothes. This job gets messy, and you’ll be working with sewage-contaminated materials. A disposable tarp protects your bathroom floor.
Cleaning supplies such as disinfectant spray, paper towels, and trash bags help you clean up afterward. Keep these items handy throughout the project.
Preparing Your Workspace
Start by turning off the water supply to your toilet. The shut-off valve usually sits on the wall behind the toilet near floor level. Turn it clockwise until it stops completely.
Flush the toilet to empty the tank and bowl. Hold the handle down to remove as much water as possible. Some water will remain in the bowl trap – this is normal.
Remove remaining water using a plunger to force it down the drain, then use a sponge or towel to absorb what’s left. Getting the bowl as dry as possible makes the job cleaner and easier.
Clear the area around your toilet completely. Remove bathroom rugs, toilet paper holders, and anything else that might get in your way. You need room to work comfortably around all sides of the toilet.
Lay down protective covering on your bathroom floor. Old towels, plastic sheeting, or cardboard prevent damage and make cleanup easier. Focus on the areas where you’ll be working.
Take photos of your toilet’s current setup before disconnecting anything. These pictures serve as helpful references when reassembling everything later.
Removing the Toilet
Disconnect the water supply line from the toilet tank. The connection point sits at the bottom of the tank on the left side (usually). Use an adjustable wrench to loosen the nut, turning counterclockwise. Expect some water to spill out.
Remove the toilet tank if it’s a two-piece unit. Most tanks connect to the bowl with two or three bolts underneath. Remove these bolts carefully – they often corrode and may break. Lift the tank straight up and set it aside in a safe location.
Locate the toilet mounting bolts at the base of the toilet. These bolts extend up through the toilet base and secure it to the floor flange. You’ll see plastic caps covering the bolt heads – pry these off with a putty knife.
Remove the nuts from the mounting bolts using your adjustable wrench. Turn counterclockwise to loosen. If the bolts spin freely without coming loose, grip the bolt from underneath with pliers while turning the nut above.
Rock the toilet gently back and forth to break the wax seal. The toilet will feel stuck at first, but gentle persistence loosens it. Avoid using excessive force, which can crack the toilet base or damage the floor flange.
Lift the toilet straight up when it feels loose. Toilets are heavy and awkward to handle – get help if needed. Carry it to a safe location where it won’t get damaged or cause injury.
Inspecting and Cleaning the Flange
Examine the floor flange once the toilet is removed. This metal or plastic ring should sit flush with or slightly above your bathroom floor. Look for cracks, corrosion, or missing sections that need repair.
The flange connects your home’s drain pipe to the toilet. It must be solid and properly secured to provide adequate support. Loose or damaged flanges cause ongoing problems even with new wax rings.
Remove all old wax from the flange using a putty knife. Scrape thoroughly to eliminate every trace of the old ring. Wax residue prevents proper sealing and causes premature failure of your new ring.
Clean the flange thoroughly with disinfectant and let it dry completely. Any remaining debris or moisture interferes with the new wax ring’s ability to form a proper seal.
Inspect the mounting bolt slots in the flange. These slots hold the bolts that secure your toilet. Damaged or enlarged slots may not hold bolts properly, requiring flange repair or replacement.
Check that the flange sits at the correct height relative to your finished floor. The flange should be flush with the floor surface or up to 1/4 inch above it. Flanges that sit too low often cause wax ring problems.
Installing the New Wax Ring
Remove the new wax ring from its packaging and examine it carefully. Most rings have a plastic sleeve or funnel on one side – this side faces down toward the drain opening.
Position the wax ring carefully on the flange, centering it over the drain opening. The ring should sit evenly around the entire perimeter. Take your time with this step – proper positioning is crucial for a lasting seal.
Press the wax ring down gently to help it adhere to the flange. Don’t compress it too much at this stage – the toilet’s weight will do most of the compression work when you reinstall it.
Install new mounting bolts in the flange slots if needed. The bolts should stand straight up and align with the holes in your toilet base. Use washers under the bolt heads to prevent them from slipping through the slots.
Test-fit the bolts by holding your toilet above them. The bolts should pass through the toilet base holes easily without binding. Adjust bolt position if necessary before proceeding.
Some plumbers prefer installing the wax ring on the toilet bottom instead of the flange. This method works well but requires more careful handling during toilet installation.
Reinstalling the Toilet
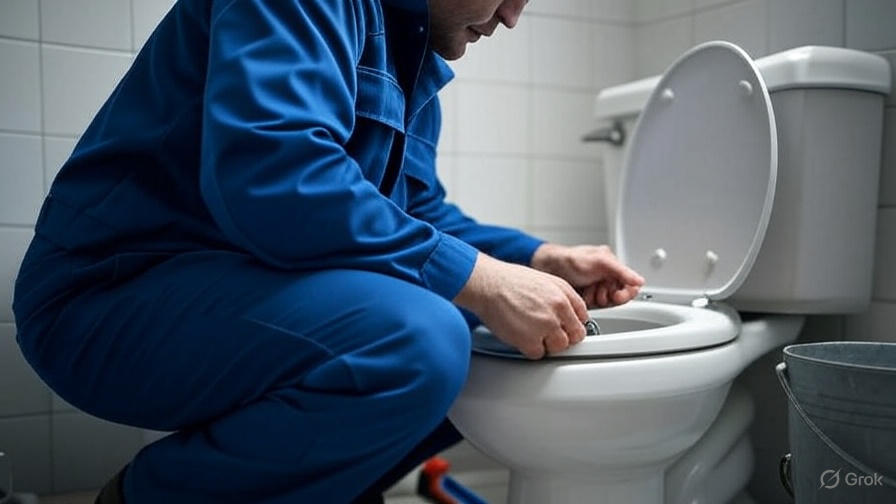
Lower the toilet carefully onto the new wax ring, aligning the bolt holes with the mounting bolts. Take your time and get the alignment right – you only get one chance to compress the wax ring properly.
Press down firmly on the toilet base while rocking it gently side to side. This motion helps the wax ring spread evenly and form a complete seal. You should feel the toilet settle into its final position.
Install washers and nuts on the mounting bolts, tightening them gradually in an alternating pattern. Snug them firmly but don’t overtighten – excessive pressure can crack the toilet base.
Check that the toilet sits level and stable. Place a level on top of the toilet tank or use shims under the base if needed. A rocking toilet will eventually damage the new wax ring.
Reconnect the water supply line to the toilet tank. Hand-tighten the connection first, then use a wrench to snug it firmly. Don’t overtighten – this can damage the threads or crack the tank.
Reinstall the toilet tank if you removed it earlier. Align the tank mounting holes with the bowl and install the connecting bolts. Tighten these bolts evenly to prevent tank cracking or leaking.
Testing Your Work
Turn the water supply back on by rotating the shut-off valve counterclockwise. Water should begin filling the toilet tank immediately. Listen for any unusual sounds that might indicate problems.
Let the tank fill completely, then flush the toilet several times. Watch carefully around the base for any signs of water leakage. Even small drops indicate the seal isn’t perfect.
Check the toilet’s stability by sitting on it and shifting your weight slightly. The toilet should feel solid and immovable. Any rocking motion suggests problems with the installation.
Inspect all connections for leaks, including the water supply line and tank-to-bowl connection. Tighten any loose connections carefully to prevent ongoing problems.
Run water in nearby sinks and showers to test the drain system. Listen for gurgling sounds from the toilet, which could indicate air entering through a poor seal.
Test the flush mechanism to ensure it works properly. The toilet should flush completely and refill without issues. Adjust the chain or flapper if needed.
Troubleshooting Common Problems
If water appears around the toilet base after reinstallation, the wax ring may not be sealing properly. This usually happens when the toilet isn’t pressed down firmly enough or sits too high above the flange.
A toilet that rocks or feels unstable often indicates uneven floor surfaces or problems with the flange mounting. Use plastic shims to level the toilet, but address underlying structural issues promptly.
Weak or incomplete flushes sometimes occur after wax ring replacement. This problem usually results from debris in the toilet trap or water level adjustments needed in the tank.
Sewer gas odors persisting after the repair suggest the new wax ring isn’t sealing completely. Double-check that you removed all old wax residue and that the new ring is positioned correctly.
Difficulty removing the old toilet often stems from corroded mounting bolts or an extremely compressed wax ring. Be patient and use penetrating oil on stubborn bolts. Sometimes cutting the bolts with a hacksaw becomes necessary.
Water supply connection leaks typically result from over-tightening or damaged threads. Use plumber’s tape on threaded connections and replace damaged supply lines promptly.
Maintenance Tips for Long-Lasting Results
Avoid using your toilet as a step stool or placing excessive weight on it. These actions can shift the toilet position and damage the wax ring seal over time.
Address toilet movement immediately if it develops. A slight rock can quickly become a major problem that ruins your new wax ring and damages your bathroom floor.
Monitor the area around your toilet base regularly for signs of moisture or unusual odors. Early detection prevents minor issues from becoming major repairs.
Keep the toilet bolts properly tightened but avoid over-tightening them. Check the bolt tension annually and snug them if needed. Replace corroded bolts before they fail completely.
Consider upgrading to a thicker wax ring if you experience repeated failures. Some installations benefit from extra-thick rings or alternative sealing systems.
Maintain proper ventilation in your bathroom to prevent excess moisture that can accelerate wax ring deterioration. Use exhaust fans during and after showers or baths.
When to Call a Professional
Some situations require professional plumber intervention rather than DIY repair. If your floor flange is severely damaged, cracked, or improperly positioned, professional repair ensures lasting results.
Toilets that continue leaking after multiple wax ring replacements often have underlying problems that need expert diagnosis. Persistent issues may indicate structural settling, improper installation, or incompatible components.
Major floor damage around the toilet requires professional assessment and repair. Water damage can compromise your bathroom’s structural integrity and create health hazards.
If you’re uncomfortable with any aspect of this repair or lack the necessary tools, professional installation ensures the job gets done right the first time.
Complex toilet configurations, such as wall-mounted units or systems with unusual drain connections, often require specialized knowledge and tools.
Cost Considerations and Final Thoughts
Replacing a toilet wax ring yourself costs between $10 and $30 for materials, compared to $150 to $300 for professional installation. The savings make this an attractive DIY project for many homeowners.
However, mistakes during installation can cause extensive water damage that costs thousands to repair. Weigh the potential savings against the risks based on your skill level and confidence.
Most homeowners can complete this project successfully with careful preparation and attention to detail. Take your time, follow the steps methodically, and don’t hesitate to seek help when needed.
A properly installed wax ring should last 20 to 30 years with normal use. This repair represents a long-term investment in your home’s comfort and sanitation.
Regular maintenance and prompt attention to problems extend the life of your toilet and prevent more serious issues. Your efforts today pay dividends for years to come.
Remember that every home’s plumbing situation is unique. Adapt these instructions to your specific circumstances while maintaining focus on creating a proper, lasting seal between your toilet and drain system.

