How to Apply Backsplash?
Installing a kitchen backsplash transforms your cooking space from ordinary to extraordinary. This comprehensive guide walks you through every step of the backsplash installation process, helping you achieve professional-looking results without hiring expensive contractors.
Essential Tools and Materials for Backsplash Installation
Before starting your backsplash project, gather all necessary tools and materials. Having everything ready prevents mid-project delays and ensures smooth installation.
Required Tools
Your tool list should include a tile cutter or wet saw for precise cuts. A notched trowel spreads adhesive evenly across surfaces. Level tools keep your tiles perfectly aligned. Rubber grout float applies grout between tiles smoothly. Spacers maintain consistent gaps between tiles. A bucket mixes grout and adhesive properly.
Safety equipment protects you during installation. Safety glasses shield your eyes from tile fragments. Work gloves prevent cuts from sharp tile edges. Dust masks filter harmful particles when cutting tiles.
Materials You’ll Need
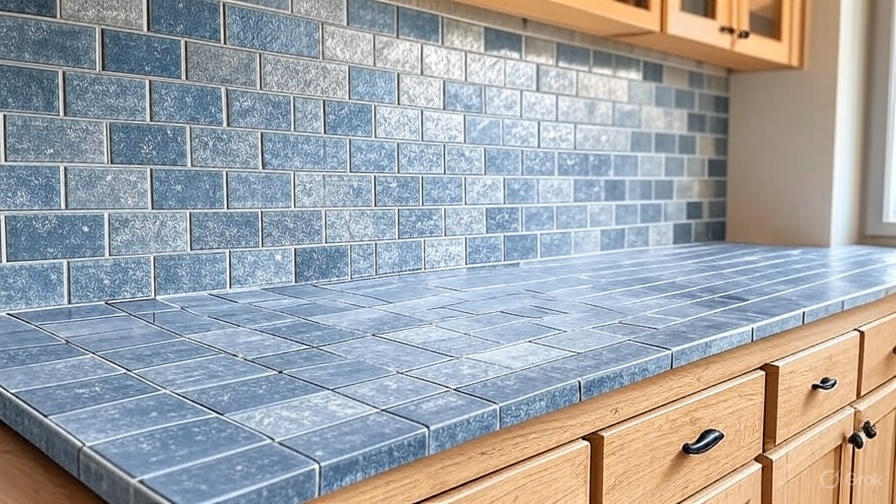
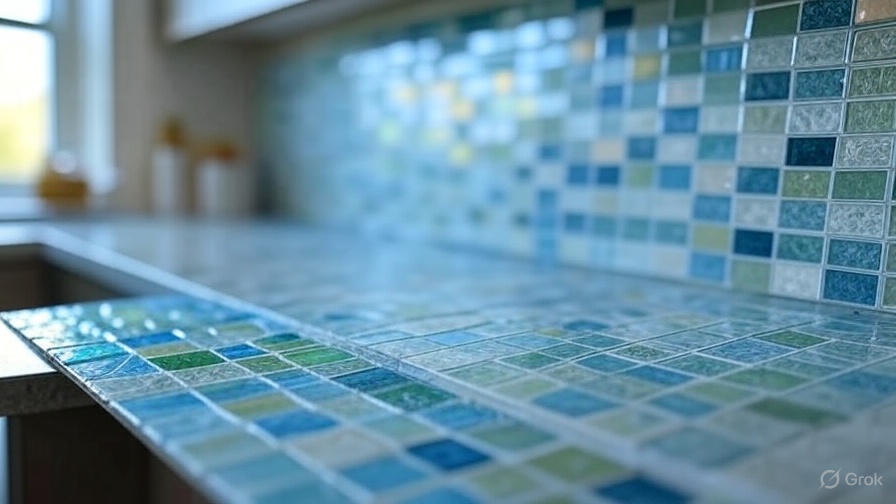
Tiles form the foundation of your backsplash design. Ceramic tiles offer durability and easy maintenance. Subway tiles create classic, timeless appeal. Natural stone tiles bring luxury and unique patterns. Glass tiles reflect light and make spaces appear larger.
Tile adhesive bonds tiles securely to walls. Pre-mixed adhesive saves time and ensures proper consistency. Grout fills spaces between tiles and prevents moisture penetration. Grout sealer protects against stains and water damage. Trim pieces finish edges professionally.
Preparing Your Kitchen Wall Surface
Wall preparation determines the success of your entire backsplash project. Properly prepared surfaces ensure tiles adhere correctly and last for years.
Cleaning the Installation Area
Remove all dirt, grease, and old adhesive from wall surfaces. Kitchen walls accumulate cooking residue that prevents proper tile adhesion. Use degreasing cleaners to eliminate stubborn grease buildup. Scrape off any loose paint or wallpaper completely.
Rinse walls thoroughly with clean water after cleaning. Allow surfaces to dry completely before proceeding. Moisture trapped behind tiles causes adhesion failure and potential mold growth.
Checking Wall Condition
Inspect walls for cracks, holes, or uneven surfaces. Fill small holes with spackling compound and sand smooth when dry. Large cracks require mesh tape and joint compound for proper repair.
Test wall flatness using a long straight edge. Variations greater than 1/8 inch over three feet require attention. Apply joint compound to low spots and sand high areas until walls are reasonably flat.
Protecting Surrounding Areas
Cover countertops with plastic sheeting or cardboard to prevent damage from falling tiles or adhesive. Remove outlet covers and switch plates carefully. Store screws in labeled containers for easy reassembly.
Turn off electricity to affected outlets and switches at the circuit breaker. This safety measure prevents electrical shock during installation.
Planning Your Backsplash Layout Design
Thoughtful layout planning creates visually appealing results and minimizes tile waste. Proper planning also identifies potential problems before installation begins.
Measuring and Calculating Tile Quantities
Measure the backsplash area accurately, including height and width dimensions. Calculate square footage by multiplying height times width for each section. Add 10-15% extra tiles for cuts, breakage, and future repairs.
Account for obstacles like outlets, switches, and windows in your measurements. Subtract their areas from total square footage calculations. Keep detailed sketches with all measurements labeled clearly.
Creating Reference Lines
Mark horizontal reference lines using a level to ensure straight tile rows. Start from the lowest point of your installation area. This approach prevents tiles from appearing crooked due to uneven countertops or cabinets.
Vertical reference lines help center tile patterns and create balanced layouts. Mark the center point of each wall section and work outward from there. This technique ensures equal partial tiles on both ends.
Test Fitting Tiles
Dry-fit several tiles along your reference lines before applying adhesive. This practice reveals potential alignment issues and helps refine your layout. Adjust reference lines if necessary to improve the overall appearance.
Consider how tile patterns will flow around corners and obstacles. Plan cuts to minimize the number of small, awkward pieces visible in prominent areas.
Step-by-Step Backsplash Installation Process
The actual installation requires patience and attention to detail. Work systematically to maintain consistent spacing and alignment throughout the project.
Applying Tile Adhesive
Start with the bottom row of tiles, working from your center reference line outward. Spread adhesive with a notched trowel, creating uniform ridges. Cover only the area you can tile within 15-20 minutes to prevent adhesive from drying out.
Hold the trowel at a 45-degree angle while spreading adhesive. This technique creates proper ridge height for optimal tile adhesion. Remove excess adhesive from trowel teeth frequently to maintain consistent coverage.
Installing the First Row
Place the first tile firmly against both reference lines. Twist slightly while pressing to ensure full contact with adhesive. Insert spacers at all four corners before placing adjacent tiles.
Check each tile for level and alignment before moving to the next one. Make adjustments immediately while adhesive remains workable. Remove excess adhesive from tile surfaces and joints promptly.
Continuing with Subsequent Rows
Install remaining rows systematically, maintaining consistent spacing throughout. Check alignment frequently using your level and reference lines. Small adjustments during installation prevent major problems later.
Work in sections that allow comfortable reach without overextending. Clean tools regularly to prevent dried adhesive buildup that affects performance.
Cutting Tiles for Perfect Fit
Measure each cut carefully before marking tiles. Use a pencil or marker that shows clearly on your tile surface. Double-check measurements to avoid costly mistakes.
Score ceramic tiles with a manual tile cutter for straight cuts. Snap tiles cleanly along the scored line. Use a wet saw for complex cuts around outlets or curved surfaces. This tool prevents chipping and produces smooth edges.
Working Around Kitchen Obstacles
Kitchen backsplashes typically include outlets, switches, and other obstacles that require careful planning and precise cuts.
Cutting Around Electrical Outlets
Turn off power to outlets before beginning work in those areas. Measure outlet locations carefully and transfer measurements to tiles. Mark cut lines clearly on tile surfaces.
Use a tile nipper or wet saw to cut outlet openings. Make relief cuts from the opening to tile edges for easier material removal. File rough edges smooth for professional appearance.
Test fit cut tiles around outlets before final installation. Gaps should be minimal but allow easy outlet cover replacement. Apply adhesive normally and install tiles with steady pressure.
Handling Inside and Outside Corners
Inside corners require careful measurement and cutting for tight fits. Measure each piece individually since walls are rarely perfectly square. Leave small gaps at corners for caulk application.
Outside corners benefit from trim pieces or bullnose tiles that create finished edges. These specialty pieces eliminate sharp tile edges and provide professional appearance. Install corner pieces first, then fit field tiles against them.
Installing Around Windows and Cabinet Edges
Window areas often require custom cuts and trim pieces. Measure carefully and create templates from cardboard for complex shapes. Test fit before cutting expensive tiles.
Cabinet edges may be uneven, requiring individual tile fitting. Use flexible spacers or adjust gaps slightly to accommodate variations. Caulk will hide minor irregularities at these transitions.
Grouting Your New Backsplash
Grouting completes the installation and provides water protection between tiles. Proper grouting technique ensures long-lasting, attractive results.
Mixing Grout Properly
Follow manufacturer instructions exactly when mixing grout. Use clean water and mixing containers to prevent contamination. Mix only the amount you can use within 30 minutes.
Achieve smooth, lump-free consistency similar to thick peanut butter. Properly mixed grout spreads easily but doesn’t run or sag in joints.
Applying Grout Between Tiles
Remove tile spacers before grouting begins. Use a rubber grout float held at 45-degree angle to force grout into joints. Work diagonally across tiles to prevent pulling grout out of joints.
Fill all joints completely, ensuring no voids remain. Excess grout on tile surfaces will be removed later, so focus on complete joint filling now.
Cleaning Excess Grout
Wait 10-15 minutes after grouting before beginning cleanup. Use a damp sponge to remove excess grout from tile surfaces. Rinse sponge frequently in clean water.
Work with light, circular motions to avoid pulling grout from joints. Change rinse water frequently to prevent spreading grout residue across clean tiles.
Finishing Touches and Final Steps
The final steps transform your installation from good to professional quality. Attention to detail during finishing makes the difference.
Caulking Edges and Corners
Apply painter’s caulk where backsplash meets countertops, cabinets, or other surfaces. Use caulk that matches your grout color for seamless appearance. Apply steady, even beads with a caulk gun.
Smooth caulk lines with your finger or a caulk tool immediately after application. Remove excess caulk before it dries. This step prevents water penetration and creates finished appearance.
Sealing Grout Lines
Natural stone tiles and some grout types require sealing for stain protection. Apply sealer according to manufacturer instructions after grout cures completely. This typically takes 24-72 hours depending on conditions.
Use applicator bottles or brushes to apply sealer only to grout lines. Avoid getting sealer on tile surfaces where it may cause discoloration or adhesion problems.
Reinstalling Electrical Components
Turn power back on at the circuit breaker before reinstalling outlet covers and switch plates. Test outlets with a circuit tester to ensure proper wiring connections.
Install outlet covers and switch plates carefully to avoid cracking surrounding tiles. Use appropriate screws that won’t penetrate too deeply into the wall.
Common Backsplash Installation Mistakes to Avoid
Learning from common mistakes saves time, money, and frustration during your project. These issues appear frequently in DIY installations.
Poor Surface Preparation
Rushing through wall preparation leads to adhesion failure and uneven tile installation. Take time to clean, repair, and level surfaces properly. This investment pays dividends in final results.
Skipping primer on certain wall surfaces causes adhesive failure. Follow adhesive manufacturer recommendations for surface preparation and primer application.
Inadequate Planning
Starting installation without proper layout planning creates alignment problems and awkward cuts. Spend adequate time measuring, marking reference lines, and test fitting tiles.
Failing to account for tile thickness when planning around outlets and switches creates problems during installation. Measure carefully and plan electrical component adjustments accordingly.
Incorrect Adhesive Application
Spreading too much adhesive at once leads to drying before tiles can be installed. Work in manageable sections to maintain adhesive workability.
Using the wrong trowel size creates adhesion problems. Follow tile manufacturer recommendations for trowel notch size based on tile dimensions.
Grout Application Errors
Waiting too long to clean excess grout makes removal difficult and may damage tile surfaces. Clean excess grout promptly while still workable.
Inconsistent grout joint widths create unprofessional appearance. Use spacers consistently and check alignment frequently during installation.
Maintenance Tips for Your New Backsplash
Proper maintenance keeps your backsplash looking beautiful for years. Regular care prevents stains and damage that require expensive repairs.
Daily Cleaning Routine
Wipe down backsplash surfaces daily with mild soap and water. This simple step prevents grease and food residue buildup that becomes difficult to remove later.
Use microfiber cloths that won’t scratch tile surfaces. Avoid abrasive cleaners that can damage grout or tile finishes.
Deep Cleaning Methods
Deep clean grout lines monthly using appropriate cleaning solutions. Baking soda paste removes most stains safely. Commercial grout cleaners handle stubborn discoloration.
Steam cleaning provides chemical-free deep cleaning for most tile types. Test in inconspicuous areas first to ensure compatibility with your specific tiles.
Preventing Stains and Damage
Address spills immediately to prevent staining, especially on natural stone surfaces. Blot liquids rather than wiping to avoid spreading stains.
Reapply grout sealer annually on natural stone installations. This preventive maintenance protects against stains and water damage.
Conclusion
Installing a kitchen backsplash requires careful planning, proper tools, and attention to detail. Following this comprehensive guide helps you achieve professional results while saving money on contractor costs. Take time during each step to ensure quality results that will enhance your kitchen for years to come.
Remember that patience during installation prevents costly mistakes and rework. Your new backsplash will become a focal point that adds value and beauty to your kitchen space.
The satisfaction of completing this project yourself makes the effort worthwhile. With proper technique and attention to detail, your DIY backsplash installation will rival professional work at a fraction of the cost.