How to Attach a Headboard to a Metal Bed Frame?
Metal bed frames offer durability and modern style, but they often lack the cozy appeal of a traditional headboard. Many homeowners struggle with connecting headboards to metal frames, thinking the process requires professional help or special equipment. The truth is, you can easily attach most headboards to metal bed frames using basic tools and the right technique.
This comprehensive guide walks you through every step of the installation process, from measuring your frame to securing the final bolts. You’ll learn about different attachment methods, troubleshoot common problems, and discover professional tips that ensure a rock-solid connection.
Why Attach a Headboard to Your Metal Bed Frame?
Headboards transform the entire look of your bedroom. They create a focal point behind your bed and provide comfortable back support when you’re reading or watching TV. A bare metal frame can make your sleeping area feel cold and unfinished, while a well-chosen headboard adds warmth and personality to the space.
Beyond aesthetics, headboards serve practical purposes. They prevent pillows from sliding off the bed during the night and protect your wall from scuff marks. Some headboards include built-in storage or lighting features that enhance your bedroom’s functionality.
The attachment process might seem daunting at first glance, but most metal frames come with pre-drilled holes designed specifically for headboard installation. Once you understand the basic principles, the job becomes straightforward and manageable.
Tools and Materials You’ll Need
Before starting your project, gather these essential tools and materials:
Essential Tools:
- Drill with various bit sizes
- Level (2-foot minimum)
- Tape measure
- Screwdriver set
- Socket wrench set
- Pencil for marking
- Safety glasses
- Work gloves
Hardware and Materials:
- Headboard mounting brackets (usually included with headboard)
- Bolts and washers (1/4-inch or 5/16-inch most common)
- Metal drill bits
- Thread-locking compound (optional but recommended)
- Rubber washers to prevent scratching
Most headboards come with their own mounting hardware, but check the contents before you begin. Some manufacturers include universal brackets that work with various frame types, while others provide frame-specific hardware.
Understanding Different Metal Bed Frame Types
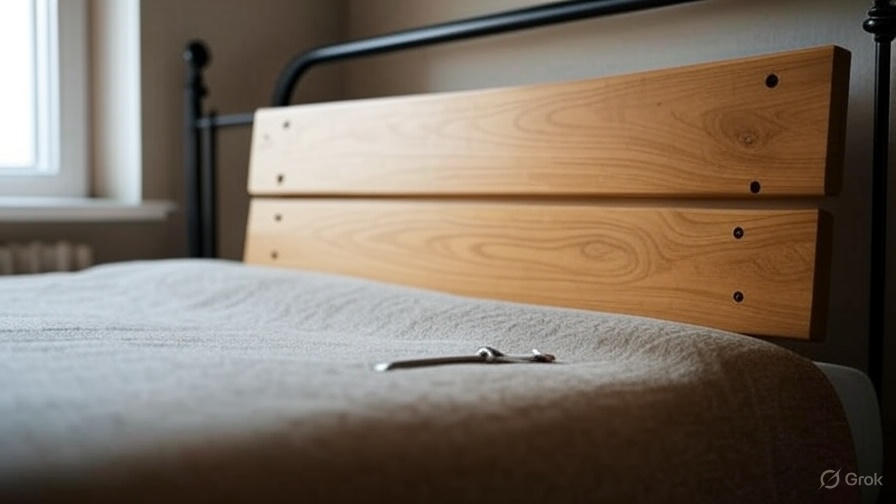
Metal bed frames come in several styles, and each requires a slightly different approach for headboard attachment. Platform frames typically have a solid metal headboard rail with pre-drilled mounting holes. These frames make installation simple because the holes align with standard headboard bracket spacing.
Adjustable metal frames feature telescoping side rails that extend to fit different mattress sizes. These frames often have multiple sets of holes to accommodate various headboard widths. The key is identifying which holes provide the best support for your specific headboard.
Industrial-style frames may have thicker metal construction with larger mounting holes. These frames can support heavier headboards but might require longer bolts or specialized hardware. Decorative metal frames sometimes incorporate curved or ornate elements that can complicate the attachment process.
Step-by-Step Installation Process
Step 1: Measure Your Bed Frame
Start by measuring the distance between the mounting holes on your metal bed frame. Most standard frames have holes spaced 2-3 inches apart, but this can vary by manufacturer. Use your tape measure to record the exact spacing, as this measurement determines which holes on your headboard brackets you’ll use.
Measure the height of the mounting holes from the floor. This measurement helps you position the headboard at the correct height for both appearance and comfort. The top of your headboard should sit 14-16 inches above your mattress surface for optimal aesthetics.
Step 2: Position the Headboard
Place your headboard against the wall behind your bed frame. The headboard should be centered on the wall and aligned with your mattress. Use your level to ensure the headboard sits perfectly straight – even a slight tilt will be noticeable once the bed is made.
Mark the position lightly with a pencil so you can return the headboard to the exact same spot after measuring. This step prevents confusion later when you’re working with brackets and hardware.
Step 3: Align the Mounting Brackets
Most headboards use adjustable mounting brackets that slide horizontally to match your bed frame’s hole spacing. Loosen the bracket adjustment screws and position each bracket to align with the corresponding holes in your metal frame.
Test the fit by holding the brackets against the frame holes. The brackets should slide easily into position without forcing or bending. If the alignment feels tight, double-check your measurements and adjust the bracket spacing accordingly.
Step 4: Mark Drill Points
With the brackets properly positioned, mark the screw holes on your headboard. Use a pencil to make small dots at each mounting point. These marks guide your drilling and ensure accurate hole placement.
Remove the brackets temporarily and double-check your marks with a ruler or tape measure. The holes should be evenly spaced and level with each other. Uneven mounting points will create stress on the headboard and potentially cause damage over time.
Step 5: Drill Pilot Holes
Put on your safety glasses and drill pilot holes at each marked point. Use a drill bit that’s slightly smaller than your mounting screws – typically 1/8-inch for standard headboard hardware. Pilot holes prevent the wood from splitting and make screw insertion easier.
Drill slowly and steadily to maintain control. Stop frequently to clear wood chips from the bit and hole. Deep pilot holes (about 3/4 the length of your screws) provide the best holding power without risking breakthrough on the headboard’s front surface.
Step 6: Attach Brackets to Headboard
Secure the mounting brackets to your headboard using the provided screws. Start all screws by hand to prevent cross-threading, then tighten with a screwdriver. Don’t overtighten – this can strip the wood or crack the headboard material.
Check that each bracket sits flush against the headboard surface. Raised or tilted brackets won’t align properly with the bed frame and can create stability problems.
Step 7: Connect to Metal Frame
With the brackets attached to your headboard, position the entire assembly against your bed frame. Align the bracket holes with the frame mounting points and insert the bolts from the back side of the frame.
Thread the bolts by hand first to ensure proper alignment. Once all bolts are started, use your socket wrench to tighten them gradually. Work in a crisscross pattern, tightening each bolt a little at a time to maintain even pressure.
Step 8: Final Adjustments and Testing
After all bolts are snug, check the headboard for any movement or wobbling. Gently push and pull on different sections to test the connection strength. A properly installed headboard should feel completely solid with no give or flex.
Use your level one final time to verify that the headboard remains straight. Small adjustments can be made by slightly loosening and repositioning the brackets, but major corrections might require starting over with new pilot holes.
Alternative Attachment Methods
Clamp-On Brackets
Some headboards use clamp-on brackets instead of bolt-through connections. These brackets grip the metal frame rails without requiring holes or permanent modifications. Clamp-on systems work well for rental properties or situations where you want to avoid drilling.
The installation process for clamp brackets is simpler but requires careful attention to the clamp tension. Too loose, and the headboard will shift or fall. Too tight, and you might damage the frame or bracket components.
Universal Mounting Plates
Universal mounting plates provide a solution when your headboard brackets don’t align with your frame’s holes. These plates attach to the frame using existing holes, then provide new mounting points positioned to match your headboard.
This method adds a step to the installation process but offers flexibility for unusual frame and headboard combinations. The plates distribute weight across multiple frame mounting points, potentially providing stronger support than direct bracket attachment.
Welded Connection Points
For permanent installations with heavy headboards, some homeowners opt for welded connection points. This method requires metalworking skills and equipment but creates the strongest possible connection.
Welded connections work especially well with custom or handmade headboards that don’t use standard mounting systems. The process involves welding tabs or brackets directly to the bed frame at positions that match the headboard design.
Troubleshooting Common Installation Problems
Misaligned Holes
When headboard brackets don’t align with frame holes, resist the urge to force the connection. Instead, measure both the bracket spacing and frame hole spacing again. Small discrepancies can often be resolved by adjusting the brackets or using different holes on the frame.
For larger alignment issues, universal mounting plates or custom brackets might be necessary. Some manufacturers offer adjustment kits specifically designed to solve common alignment problems.
Stripped or Damaged Holes
Over-tightened bolts can strip the threads in metal frame holes, making secure connections impossible. If this happens, you have several repair options. Thread repair kits can restore damaged threads in many cases, or you can use slightly larger bolts with new threads.
For severely damaged holes, drilling them out completely and using through-bolts with nuts and washers provides a strong alternative connection method.
Headboard Height Issues
Sometimes the mounting holes on your frame place the headboard too high or low for good proportions. Frame modifications might be necessary, or you can use offset brackets that adjust the headboard position vertically.
Custom brackets can be fabricated by local metal shops if commercial solutions don’t meet your needs. This approach works especially well for unique frame designs or custom headboards.
Weight Distribution Problems
Heavy headboards can stress bed frame mounting points beyond their design limits. If you notice frame flexing or bolt loosening, the headboard weight might exceed the frame’s capacity.
Distribute the load by using additional mounting points or reinforcing brackets. Some frames can be strengthened with additional cross-braces or support legs specifically designed for heavy headboard applications.
Safety Considerations and Best Practices
Always wear safety glasses when drilling, especially when working with metal components. Metal shavings can fly unexpectedly and cause serious eye injuries. Work gloves protect your hands from sharp edges and provide better grip on tools and hardware.
Check all connections periodically, especially during the first few weeks after installation. Temperature changes and normal use can cause bolts to loosen slightly. A quick tightening every few months prevents problems before they develop.
Use thread-locking compound on critical bolts to prevent gradual loosening. This blue liquid hardens after application and keeps bolts tight while still allowing removal for future adjustments or repairs.
Ensure your headboard doesn’t interfere with wall outlets, light switches, or window treatments. Plan the installation height carefully to avoid conflicts with existing room features.
Maintenance and Long-Term Care
Regular maintenance keeps your headboard attachment secure and stable over years of use. Check all bolts and connections every six months, tightening any that have loosened. This simple step prevents small problems from becoming major repairs.
Clean the mounting area occasionally to prevent dust and debris buildup that can interfere with proper bolt seating. A damp cloth removes most accumulation, but avoid getting moisture on metal components that might rust.
Inspect the headboard itself for signs of stress or damage at the mounting points. Cracks in wood headboards or bent metal brackets indicate excessive stress that needs attention before failure occurs.
Keep spare hardware in a small container labeled with your headboard model. Replacement bolts and washers are inexpensive but can be difficult to find when you need them quickly.
Professional Installation vs. DIY
Most headboard installations fall well within the capabilities of average DIY enthusiasts. The tools required are common, and the techniques are straightforward. However, certain situations might warrant professional help.
Consider professional installation for expensive or antique headboards where mistakes could cause significant damage. Complex custom installations or situations requiring frame modifications also benefit from professional expertise.
The cost of professional installation typically ranges from $75-150, depending on your location and the complexity of the job. This investment makes sense for high-value headboards or when you’re uncomfortable with the technical requirements.
Conclusion
Attaching a headboard to a metal bed frame transforms your bedroom’s appearance and comfort without requiring advanced skills or expensive tools. The process becomes straightforward once you understand the basic principles of alignment, proper hardware selection, and secure fastening techniques.
Take time to measure carefully and test-fit components before final installation. This approach prevents most common problems and ensures a professional-looking result. Remember that a properly installed headboard should feel completely solid and remain stable for years with minimal maintenance.
The satisfaction of completing this project yourself, combined with the improved aesthetics and functionality of your bedroom, makes the effort worthwhile. Your new headboard installation will serve as both a practical improvement and a source of personal accomplishment every time you enter your bedroom.
With patience and attention to detail, you can achieve results that rival professional installation while saving money and gaining valuable DIY experience. The techniques you learn during this project apply to many other home improvement tasks, making this an excellent introduction to furniture assembly and mounting projects.

