How to Refinish a Bathtub?
Your bathtub shows its age through chips, stains, and that dingy appearance that no amount of scrubbing can fix. Instead of spending thousands on a complete bathroom renovation, bathtub refinishing offers an affordable solution that can make your old tub look brand new again.
Refinishing a bathtub involves applying a new coating over the existing surface, creating a fresh, glossy finish that rivals factory-new tubs. This process costs significantly less than replacement and takes only a few days to complete. You can tackle this project yourself with the right tools, materials, and techniques.
Why Refinish Your Bathtub Instead of Replacing It
Bathtub replacement requires extensive demolition work, plumbing modifications, and potentially retiling the entire bathroom. These projects often cost between $3,000 and $8,000, not including the weeks of disruption to your daily routine.
Refinishing costs roughly $300 to $600 for a DIY project, compared to $1,500 to $3,000 for professional refinishing services. The process takes 2-3 days instead of weeks, and you avoid the mess and expense of demolition.
A properly refinished bathtub can last 10-15 years with normal use, making it an excellent investment for homeowners planning to stay in their homes or those preparing to sell.
Essential Tools and Materials for Bathtub Refinishing
Success depends on having the right equipment and materials before you begin. Here’s what you’ll need:
Safety Equipment:
- Respirator mask (N95 minimum)
- Safety glasses
- Rubber gloves
- Protective clothing
- Ventilation fan
Cleaning and Preparation Tools:
- Tub and tile cleaner
- Sandpaper (220-grit and 400-grit)
- Steel wool (fine grade)
- Razor blade scraper
- Clean rags
- Vacuum cleaner
- Tack cloth
Repair Materials:
- Bathtub repair compound
- Putty knife
- Caulk remover
- New caulk
- Caulk gun
Refinishing Supplies:
- Bathtub refinishing kit
- Primer (if not included in kit)
- Topcoat finish
- Foam rollers
- High-quality paintbrushes
- Paint tray
- Plastic sheeting
- Painter’s tape
Step-by-Step Bathtub Refinishing Process
Step 1: Prepare the Workspace
Remove all bathroom accessories, including shower curtains, soap dispensers, and decorative items. Clean the entire bathroom to prevent dust and debris from settling on your freshly refinished surface.
Cover floors, walls, and fixtures with plastic sheeting. Secure the plastic with painter’s tape, ensuring complete coverage of surrounding areas. Open windows and set up ventilation fans to maintain proper airflow throughout the process.
Turn off the bathroom’s heating and cooling vents to prevent dust circulation during the refinishing process.
Step 2: Remove Old Caulk and Hardware
Use a caulk remover tool or razor blade to carefully remove all old caulk around the bathtub. Take your time with this step, as any remaining caulk residue will interfere with the new finish.
Remove the bathtub drain cover, overflow plate, and any other removable hardware. Clean these pieces separately and set them aside for reinstallation later.
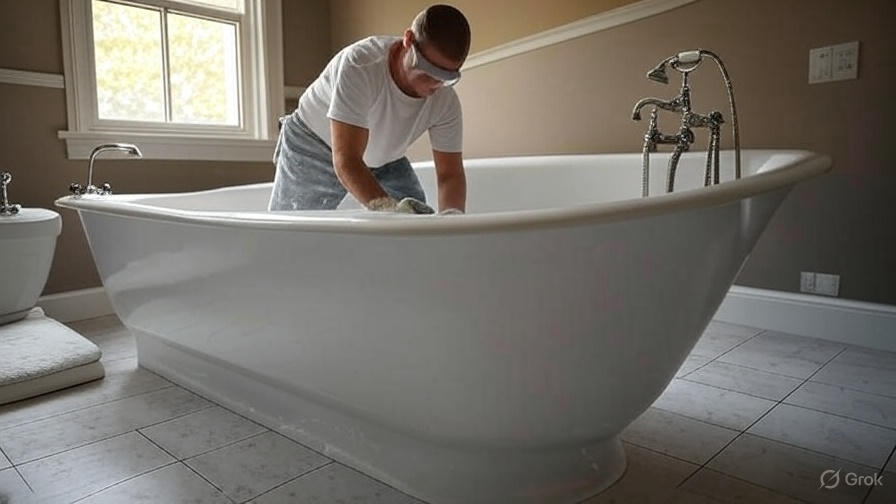
Step 3: Deep Clean the Bathtub Surface
Apply a strong bathroom cleaner to the entire bathtub surface. Let it sit for 10-15 minutes to break down soap scum, mineral deposits, and other buildup.
Scrub the surface thoroughly with a non-abrasive pad, paying special attention to areas with heavy staining or discoloration. Rinse completely with clean water and dry with clean towels.
For stubborn stains, use a mixture of baking soda and water to create a paste. Apply this paste to stained areas and let it sit for 20 minutes before scrubbing.
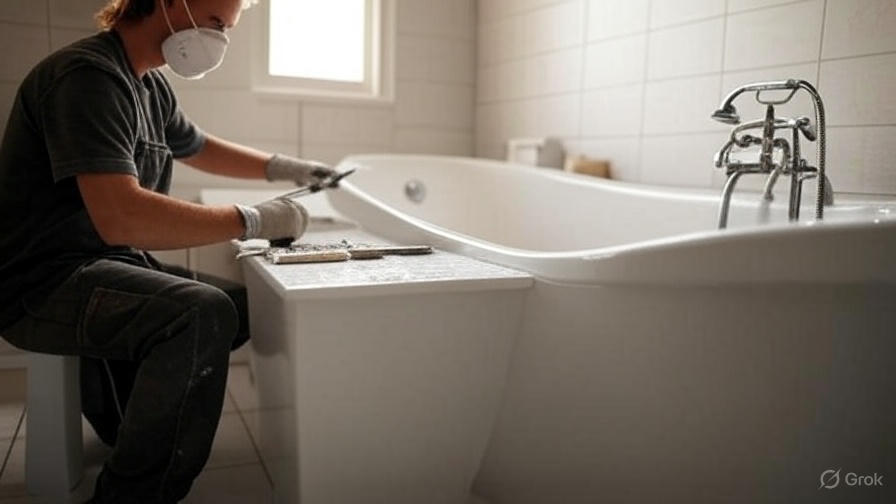
Step 4: Sand the Bathtub Surface
Begin with 220-grit sandpaper to remove the glossy finish from the bathtub surface. Sand in circular motions, working systematically across the entire tub. The goal is to create a slightly rough surface that will help the new coating adhere properly.
Pay special attention to areas with chips, scratches, or other damage. These areas may need extra sanding to create a smooth foundation for repairs.
After completing the initial sanding, switch to 400-grit sandpaper for a final smoothing pass. This finer grit will create the ideal surface texture for the primer and topcoat.
Step 5: Fill Chips and Repair Damage
Inspect the bathtub surface for chips, cracks, or other damage. Use bathtub repair compound to fill these areas, following the manufacturer’s instructions carefully.
Apply the repair compound with a putty knife, slightly overfilling each damaged area. Allow the compound to cure completely according to the package directions.
Once cured, sand the repaired areas smooth with 400-grit sandpaper. The goal is to create a seamless surface that blends with the surrounding bathtub material.
Step 6: Final Cleaning and Preparation
Vacuum the entire bathtub to remove all sanding dust and debris. Use a tack cloth to wipe down the surface, removing any remaining particles that could interfere with the finish.
Clean the surface one final time with a degreasing cleaner to remove any oils or residues. Allow the surface to dry completely before proceeding to the next step.
Step 7: Apply Primer (If Required)
Some refinishing kits include primer, while others have self-priming topcoats. Check your kit instructions to determine if primer application is necessary.
If primer is required, apply it using a foam roller in thin, even coats. Work quickly but carefully, maintaining a wet edge to prevent lap marks. Allow the primer to dry according to the manufacturer’s specifications.
Step 8: Apply the Refinishing Coating
Mix the refinishing coating according to the kit instructions. Many products require mixing two components, so follow the directions precisely for proper curing.
Apply the first coat using a foam roller, working in small sections to maintain control. Roll in one direction, then cross-roll at 90 degrees for even coverage. Avoid overworking the material, as this can create streaks or bubbles.
Allow the first coat to dry completely before applying the second coat. Most refinishing projects require 2-3 coats for optimal durability and appearance.
Step 9: Final Coat and Finishing Touches
Apply the final coat using the same technique as previous coats. Take extra care with this coat, as it will be the visible surface of your finished bathtub.
Remove any dust particles or imperfections immediately using a clean brush or lint-free cloth. Work carefully to avoid disturbing the wet coating.
Allow the final coat to cure completely according to the manufacturer’s instructions. This typically takes 24-48 hours, depending on temperature and humidity conditions.
Common Mistakes to Avoid During Bathtub Refinishing
Inadequate Surface Preparation Skipping or rushing the cleaning and sanding process leads to poor adhesion and premature coating failure. Spend adequate time on preparation for long-lasting results.
Poor Ventilation Refinishing products contain strong chemicals that require proper ventilation. Inadequate airflow can cause health problems and affect the coating’s curing process.
Applying Coats Too Thick Thick coats may look better initially but are more prone to running, sagging, and poor durability. Apply multiple thin coats instead of one thick coat.
Rushing the Curing Process Using the bathtub before the coating has fully cured can damage the finish. Follow the manufacturer’s curing time recommendations completely.
Ignoring Temperature and Humidity Extreme temperatures or high humidity can affect coating performance. Work in conditions within the manufacturer’s specified ranges.
Maintenance Tips for Your Newly Refinished Bathtub
Daily Care Rinse the bathtub after each use to prevent soap scum buildup. Use a squeegee or soft cloth to remove excess water, which helps prevent water spots and mineral deposits.
Weekly Cleaning Clean your refinished bathtub weekly with a non-abrasive cleaner. Avoid harsh chemicals, abrasive cleaners, or scrubbing pads that could damage the new finish.
Monthly Deep Cleaning Perform a deeper cleaning monthly using a gentle bathroom cleaner. Focus on areas prone to buildup, such as around the drain and along the waterline.
Avoid Damaging Products Never use bleach, ammonia, or other harsh chemicals on a refinished bathtub. These products can cause discoloration, etching, or complete coating failure.
Avoid dropping heavy objects or using abrasive materials in the bathtub, as these can chip or scratch the new finish.
Troubleshooting Common Refinishing Problems
Bubbles in the Finish Bubbles typically result from applying coats too thick or working in high humidity. Small bubbles may level out as the coating cures, but large bubbles require sanding and recoating.
Streaks or Lap Marks These occur when you overlap wet and dry areas during application. Work quickly to maintain a wet edge, and consider using a brush to blend problem areas while the coating is still wet.
Poor Adhesion If the coating peels or chips shortly after application, the surface preparation was inadequate. Remove the failed coating, prepare the surface properly, and start over.
Uneven Color or Gloss This problem usually stems from inconsistent application or inadequate mixing of two-part products. Ensure thorough mixing and consistent application techniques.
Cost Analysis: DIY vs Professional Refinishing
DIY Refinishing Costs:
- Refinishing kit: $50-150
- Tools and supplies: $100-200
- Safety equipment: $50-100
- Total: $200-450
Professional Refinishing Costs:
- Labor and materials: $400-800
- Premium finishes: $600-1,200
- Total: $400-1,200
Bathtub Replacement Costs:
- New bathtub: $500-2,000
- Installation labor: $1,500-3,000
- Plumbing modifications: $300-800
- Tile work: $500-1,500
- Total: $2,800-7,300
The DIY approach saves considerable money while providing satisfactory results for most homeowners. Professional refinishing offers better durability and appearance but costs significantly more than DIY methods.
When to Call a Professional
Consider professional refinishing services if your bathtub has extensive damage, if you’re uncomfortable working with chemical products, or if you lack the time for proper preparation and application.
Professionals have access to commercial-grade products and spray equipment that can provide superior results compared to DIY kits. They also carry insurance and warranties that protect your investment.
Antique or specialty bathtubs may require professional expertise to preserve their value and appearance. Cast iron tubs, in particular, benefit from professional refinishing techniques.
Environmental Considerations and Safety
Bathtub refinishing products contain volatile organic compounds (VOCs) that can be harmful if inhaled. Always work in well-ventilated areas and wear appropriate respiratory protection.
Dispose of used materials according to local regulations. Many communities have specific requirements for chemical waste disposal.
Consider low-VOC or water-based refinishing products if you’re concerned about environmental impact or have family members with chemical sensitivities.
Long-Term Results and Expectations
A properly refinished bathtub can look like new for 10-15 years with proper care. The key factors affecting longevity include surface preparation quality, product choice, application technique, and ongoing maintenance.
Professional refinishing typically lasts longer than DIY projects due to superior products and application expertise. However, DIY refinishing can provide excellent results when done correctly.
Plan for touch-ups every 5-7 years to maintain the appearance of high-traffic areas. Small chips or scratches can be repaired without refinishing the entire bathtub.
Conclusion
Bathtub refinishing offers an affordable, effective way to transform an old, worn bathtub into an attractive bathroom centerpiece. With proper preparation, quality materials, and careful application, you can achieve professional-looking results at a fraction of the cost of replacement.
The key to success lies in thorough surface preparation, following manufacturer instructions precisely, and maintaining proper working conditions throughout the process. Take your time with each step, and don’t rush the curing process.
Your newly refinished bathtub will provide years of reliable service and enhanced bathroom aesthetics. With proper maintenance and care, you’ll enjoy the benefits of this cost-effective home improvement project for many years to come.
Remember that refinishing is a skill that improves with practice. Even if your first attempt isn’t perfect, you’ll have gained valuable experience for future projects. The money saved compared to replacement makes refinishing an attractive option for budget-conscious homeowners who want to improve their bathroom’s appearance without breaking the bank.