How to Wire a 3-Way Light Switch?
Installing a three-way light switch gives you the convenience of controlling a single light fixture from two different locations. This setup works perfectly for hallways, staircases, large rooms, and bedrooms where you want to turn lights on or off from multiple spots. While the wiring process might seem complex at first, breaking it down into clear steps makes the job manageable for most DIY enthusiasts.
What Is a Three-Way Switch System?
A three-way switch system uses two switches to control one light fixture or group of lights. Unlike standard single-pole switches that simply turn lights on and off, three-way switches work together to complete or break the electrical circuit. Each switch can change the light’s state regardless of the other switch’s position.
The term “three-way” refers to the three terminals on each switch, not the number of switches in the circuit. These terminals include one common terminal and two traveler terminals. The switches communicate through traveler wires that carry the electrical signal between them.
Essential Components for Three-Way Switch Wiring
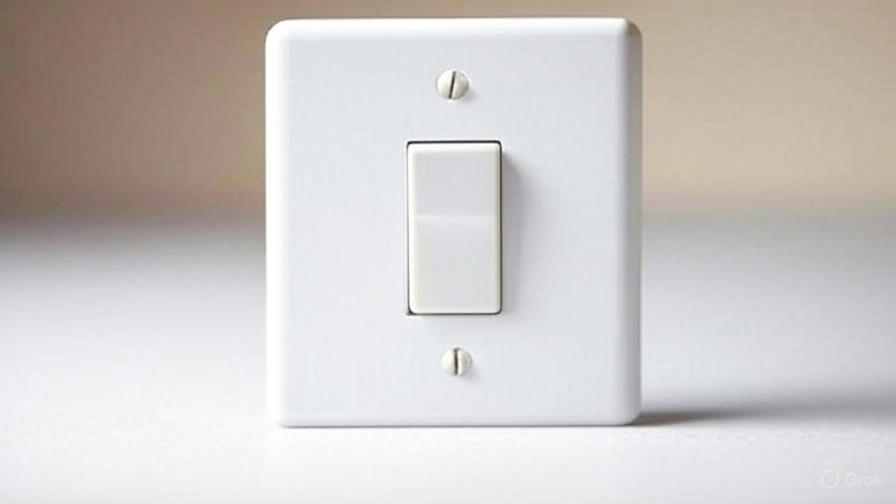
Before starting your installation, gather all necessary materials and tools. You’ll need two three-way switches, which look different from standard switches. Three-way switches have three screw terminals instead of two, and they don’t have “ON” or “OFF” markings since their position depends on the other switch’s state.
Your wire requirements include 14-gauge or 12-gauge electrical wire, depending on your circuit’s amperage. You’ll need a three-wire cable (containing black, white, red, and ground wires) to run between the switches. Standard two-wire cable runs from the power source to the first switch and from the second switch to the light fixture.
Essential tools include wire strippers, electrical tape, wire nuts, a voltage tester, screwdrivers, and a drill with appropriate bits. Safety equipment like safety glasses and work gloves protect you during installation.
Safety Precautions Before Starting
Turn off the power at the circuit breaker before beginning any electrical work. Never assume a switch is off by looking at its position – always test with a voltage tester to confirm no electricity flows through the wires. Mark the circuit breaker with tape so others don’t accidentally restore power while you work.
Check local electrical codes and permit requirements in your area. Some jurisdictions require permits for electrical work, and many specify that only licensed electricians can perform certain installations. When in doubt, consult with local authorities or hire a professional electrician.
Inspect existing wiring for damage, proper gauge, and code compliance. Old or damaged wiring should be replaced before installing new switches. If you discover aluminum wiring, cloth-wrapped wiring, or other outdated electrical systems, consider having a professional evaluate your electrical setup.
Planning Your Three-Way Switch Layout
Decide where to place your switches based on traffic patterns and convenience. Common locations include opposite ends of hallways, top and bottom of staircases, or multiple entrances to a room. The switches should be easily accessible but not in locations where they might be accidentally activated.
Map out your wire routing path between switches and to the light fixture. Consider the easiest path through walls, ceilings, or crawl spaces. Measure distances to determine how much cable you’ll need, and add extra length for connections inside electrical boxes.
Determine whether you have adequate electrical boxes at each switch location. Three-way switches require boxes large enough to accommodate additional wires and connections. You might need to install new boxes or upgrade existing ones to larger sizes.
Step-by-Step Wiring Instructions
Start by installing electrical boxes at both switch locations if they’re not already present. Run your cables between the power source, switches, and light fixture according to your planned layout. Label each wire at both ends to avoid confusion during connections.
At the first switch location, connect the incoming hot wire (usually black) from the power source to the common terminal on the switch. This terminal is typically darker colored or marked “COM.” Connect the two traveler wires (usually red and black from the three-wire cable) to the two brass traveler terminals on the switch.
Run the three-wire cable between the two switch locations. At the second switch, connect the two traveler wires to the traveler terminals. Connect the wire going to the light fixture to the common terminal on the second switch.
Connect all neutral wires together with wire nuts. The neutral wire from the power source connects to the neutral wire going to the light fixture. The neutral wire in the three-wire cable between switches typically isn’t used in basic three-way wiring but should be connected to maintain code compliance.
Connect all ground wires to each switch’s ground terminal and to each other using wire nuts or approved grounding methods. Proper grounding protects against electrical shock and ensures safe operation.
Common Wiring Configurations
The most common three-way wiring method has power entering at the first switch location. This configuration requires two-wire cable from the power source to the first switch, three-wire cable between the switches, and two-wire cable from the second switch to the light fixture.
An alternative configuration brings power directly to the light fixture first. This setup uses three-wire cable from the fixture to each switch location. While less common, this configuration works well when the light fixture location provides easier access to the power source.
Some installations require power to enter at the second switch location. This setup reverses the standard configuration but follows the same basic principles. Always ensure the hot wire connects to a common terminal and traveler wires connect to traveler terminals.
Testing Your Installation
After completing all connections, restore power at the circuit breaker and test your switches. Both switches should control the light fixture, and the light should turn on and off regardless of either switch’s position. If the light doesn’t work, turn off the power and check your connections.
Use a voltage tester to verify proper wiring. With the light turned on, you should read voltage between the hot and neutral wires at the fixture. When the light is off, no voltage should be present at the fixture.
Test both switches multiple times to ensure reliable operation. The light should respond to either switch, and there should be no flickering, sparking, or unusual sounds during operation.
Troubleshooting Common Problems
If your light doesn’t turn on at all, check for loose connections at all wire nuts and terminals. Verify that power is reaching the circuit and that you haven’t accidentally connected wires to wrong terminals. Make sure all connections are tight and properly insulated.
When the light works from only one switch, you likely have traveler wires connected incorrectly. The traveler wires must connect to traveler terminals on both switches, not to common terminals. Swap the traveler wire connections on one switch to correct this problem.
Flickering lights often indicate loose connections or poor wire contact. Check all wire nuts and terminal connections for tightness. Ensure no bare wire is exposed outside of wire nuts or terminals.
Advanced Three-Way Switch Options
Smart three-way switches offer remote control and automation features. These switches often require neutral wires at both locations and may need special compatibility between switch models. Many smart switches also work with voice assistants and home automation systems.
Dimmer three-way switches allow you to control both on/off and brightness levels from either location. Only one switch in a three-way dimmer setup should be a dimmer switch – the other should be a standard three-way switch unless specifically designed for dual-dimmer operation.
Occupancy sensors can be integrated into three-way switch systems to provide automatic lighting control. These sensors detect movement and automatically turn lights on when someone enters the area and off when the space is vacant.
Maintenance and Safety Tips
Inspect your three-way switches annually for signs of wear, damage, or overheating. Look for discolored switch plates, burning smells, or switches that feel hot to the touch. These symptoms indicate potential electrical problems that require immediate attention.
Replace switches that operate inconsistently or require excessive force to activate. Worn switches can create electrical arcing, which poses fire risks and reduces system reliability. Quality switches typically last many years with normal use.
Keep spare switches and basic electrical supplies on hand for quick repairs. Three-way switches have specific wiring requirements, so ensure replacement switches match your original specifications.
When to Call a Professional
Complex wiring situations often require professional expertise. If your installation involves running new circuits, upgrading electrical panels, or working with unusual wiring configurations, consider hiring a licensed electrician. Professionals have the tools, knowledge, and experience to handle challenging installations safely.
Local electrical codes vary significantly between jurisdictions. Professional electricians stay current with code requirements and can ensure your installation meets all applicable standards. This compliance protects your safety and may be required for insurance coverage.
If you encounter unexpected wiring during your installation, stop work and consult with an electrician. Unusual wire colors, multiple circuits in one box, or aluminum wiring require special handling techniques that professionals understand.
Cost Considerations and Planning
Three-way switch installations typically cost less when performed as DIY projects, but factor in the value of your time and the importance of safety. Basic materials usually cost between $30-60 for standard switches, while smart switches can cost $100-200 or more.
Professional installation costs vary based on location, complexity, and electrician rates. Simple installations might cost $150-300, while complex runs requiring new wiring can cost significantly more. Get multiple quotes for comparison.
Consider long-term benefits when planning your installation. Quality switches and proper installation provide years of reliable service and can increase your home’s value and convenience.
Final Thoughts
Installing three-way light switches provides excellent convenience and functionality for your home’s lighting system. The process requires attention to detail, proper safety precautions, and basic electrical knowledge, but most homeowners can complete the installation successfully.
Take time to plan your layout carefully, gather quality materials, and follow proper wiring techniques. Don’t rush the installation – careful work prevents problems and ensures safe, reliable operation for years to come.
Remember that electrical work involves inherent risks, and there’s no shame in calling a professional when you encounter situations beyond your comfort level. Your safety and your family’s safety should always be the top priority in any electrical project.

