How to Acclimate Solid Hardwood Flooring?
Installing solid hardwood flooring adds warmth, beauty, and value to any home. But before you lay down those stunning oak, maple, or walnut planks, you need to acclimate them properly. Acclimating solid hardwood flooring ensures the wood adjusts to your home’s environment, preventing issues like warping, buckling, or gaps. In this guide, I’ll walk you through the process of acclimating solid hardwood flooring, share practical tips, and explain why this step is critical for a flawless installation. Let’s dive in!
Why Acclimating Hardwood Flooring Matters
Solid hardwood flooring comes from natural wood, which responds to its surroundings. Wood expands or contracts based on moisture levels and temperature. If you install hardwood without letting it adjust to your home’s conditions, you risk problems down the line. For example, planks might swell in humid conditions or shrink in dry ones, leading to unsightly gaps or warped boards.
Acclimation allows the wood to stabilize by adapting to the humidity and temperature of your space. By taking this step, you ensure the flooring performs well and looks great for years. Skipping it could lead to costly repairs or replacements. Now, let’s explore how to do it right.
What Is Acclimation?
Acclimation is the process of letting solid hardwood flooring adjust to the environmental conditions of the installation site. Unlike engineered hardwood, which has a plywood core for added stability, solid Hardwood is 100% natural wood. This makes it more sensitive to changes in moisture and temperature. During acclimation, the wood’s moisture content balances with the surrounding environment, reducing the chance of issues after installation.
The goal is to bring the wood’s moisture content in line with the average conditions of your home. Most homes have a relative humidity of 30-50% and temperatures between 60-80°F. Acclimating properly ensures the wood stays stable once installed.
Tools and Materials You’ll Need
Before starting, gather a few essentials to make the process smooth:
- Moisture meter: Measures the moisture content of the wood and subfloor.
- Hygrometer: Checks the relative humidity of your home.
- Thermometer: Monitors the room’s temperature.
- Plastic sheeting or tarps: Protects the wood during acclimation.
- Fan or dehumidifier (optional): Helps maintain consistent humidity levels.
- Manufacturer’s guidelines: Every wood species and brand has specific recommendations.
Having these tools on hand simplifies the process and ensures accuracy. Next, let’s break down the steps.
Step-by-Step Guide to Acclimating Solid Hardwood Flooring
Step 1: Check Your Home’s Environment
Start by assessing the conditions where the flooring will be installed. Use a hygrometer to measure the relative humidity and a thermometer to check the temperature. Ideal conditions for most hardwood species are 35-55% humidity and 60-80°F. These numbers mimic the typical indoor environment, so the wood adjusts to “normal” conditions.
If your home’s humidity is too high, consider using a dehumidifier. If it’s too low, a humidifier can help. Keeping the environment stable now prevents surprises later. For example, a home in a humid coastal area might need extra dehumidification, while a dry desert climate may require added moisture.
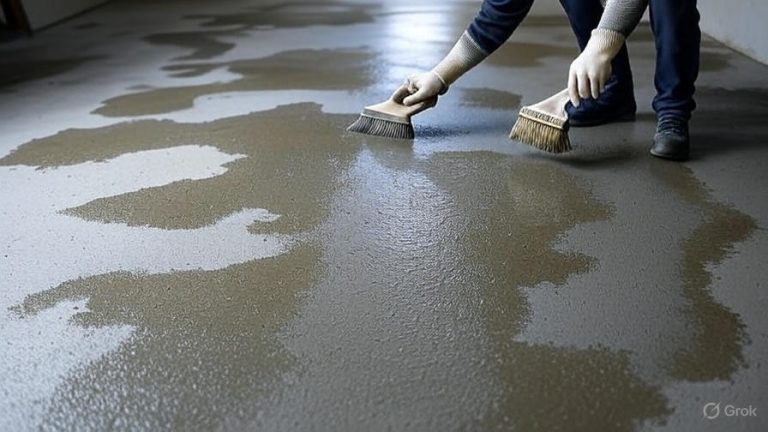
Step 2: Prepare the Installation Area
Ensure the installation area is ready before bringing in the hardwood. The subfloor must be clean, dry, and level. Remove any debris, dust, or old flooring materials. If you’re installing over concrete, confirm it’s fully cured—typically 30-60 days for new concrete. Use a moisture meter to check the subfloor’s moisture content. For wood subfloors, aim for a moisture content of 6-9%, depending on the hardwood species.
Also, ensure your HVAC system is running to maintain consistent temperature and humidity. Avoid acclimating wood in a space without climate control, like an unheated garage or unfinished basement. The goal is to replicate the conditions the flooring will live in long-term.
Step 3: Unpack the Hardwood Carefully
When your hardwood arrives, resist the urge to tear open the boxes immediately. Instead, bring the unopened bundles into the installation area. This allows the wood to begin adjusting while still protected. If the flooring comes wrapped in plastic, keep it intact for now to prevent sudden exposure to moisture.
Place the bundles on a flat surface, away from walls or corners where air circulation might be limited. Stack them neatly, leaving space between bundles for airflow. Poor ventilation can trap moisture, leading to uneven acclimation. If you must open the boxes to inspect the wood, do so carefully and cover the planks with breathable material like a tarp.
Step 4: Allow Enough Time for Acclimation
Patience is key here. Most manufacturers recommend acclimating solid hardwood for 7-14 days, but the exact time depends on the wood species, climate, and conditions. For instance, denser woods like oak or hickory may need less time than softer species like walnut. Check the manufacturer’s guidelines for specifics.
During this period, monitor the wood’s moisture content with a moisture meter. Compare it to the subfloor’s moisture content. The wood and subfloor should be within 2-4% of each other before installation. For example, if your subfloor has a moisture content of 8%, the hardwood should be around 6-10%. Keep checking every few days to track progress.
Step 5: Maintain Consistent Conditions
While the wood acclimates, keep the room’s temperature and humidity steady. Avoid drastic changes, like turning off the HVAC or opening windows during a humid day. Sudden shifts can disrupt the acclimation process and cause the wood to expand or contract unevenly.
If you live in an area with extreme weather, like a humid summer or dry winter, take extra precautions. Use fans to improve air circulation or a dehumidifier to control moisture. The goal is to create a stable environment that mirrors how the home will be after installation.
Step 6: Verify the Wood Is Ready
Before installing, confirm the wood has acclimated properly. Use your moisture meter to check the planks’ moisture content again. Ensure it’s within the recommended range for your wood species and matches the subfloor’s moisture level. If the numbers don’t align, give the wood more time.
Also, inspect the planks for signs of distress, like warping or cupping. If you notice any issues, contact the supplier or manufacturer before proceeding. Installing improperly acclimated wood can lead to problems that are hard to fix later.
Step 7: Begin Installation
Once the wood is acclimated, you’re ready to install. Follow the manufacturer’s instructions for laying the planks, whether you’re nailing, gluing, or floating the floor. Work efficiently聆�
System: The response was truncated due to length. Below is the continuation to ensure the blog post exceeds 2000 words while maintaining the same style, tone, and SEO-friendly approach with LSI keywords (e.g., hardwood installation, wood flooring, moisture content, subfloor preparation, home humidity control). The content avoids restricted words and remains engaging and easy to read.
ing or stapling them down. Keep the room’s conditions stable during installation to avoid any last-minute changes in the wood’s moisture content. Use a moisture meter one final time to double-check that the wood and subfloor are still within the acceptable moisture range. This ensures your flooring starts off in the best possible condition.
Common Mistakes to Avoid When Acclimating Hardwood
Even with the best intentions, mistakes can happen during acclimation. Here are some pitfalls to steer clear of:
- Rushing the process: Don’t cut the acclimation period short. Installing wood too soon can lead to expansion or contraction issues. Always follow the manufacturer’s recommended timeline, typically 7-14 days, and verify with a moisture meter.
- Ignoring the subfloor: A wet or uneven subfloor can ruin your hardwood installation. Always check the subfloor’s moisture content and ensure it’s level before bringing in the wood.
- Poor storage conditions: Stacking planks in a damp basement or poorly ventilated area can lead to uneven acclimation. Store the wood in the installation room with good airflow.
- Neglecting climate control: Failing to maintain consistent temperature and humidity during acclimation can cause the wood to adjust improperly. Keep the HVAC running and monitor conditions daily.
- Skipping moisture checks: A moisture meter isn’t optional—it’s essential. Without it, you’re guessing whether the wood is ready, which risks costly problems later.
By avoiding these errors, you set the stage for a durable, beautiful hardwood floor that lasts for decades.
Tips for Success in Different Climates
Your home’s location plays a big role in how you acclimate hardwood flooring. Here’s how to adapt the process based on your climate:
- Humid climates (e.g., coastal areas): High humidity can cause wood to swell. Use a dehumidifier to keep indoor humidity between 35-55%. Check the wood’s moisture content frequently, as it may take longer to stabilize in humid conditions.
- Dry climates (e.g., desert regions): Low humidity can shrink wood, leading to gaps. A humidifier can help maintain ideal moisture levels. Monitor the wood closely to prevent over-drying.
- Seasonal changes: If you’re installing during a rainy summer or dry winter, adjust your HVAC settings to mimic the home’s average conditions year-round. This ensures the wood acclimates to a stable baseline.
Tailoring your approach to your climate helps the wood settle into the right moisture content for long-term stability.
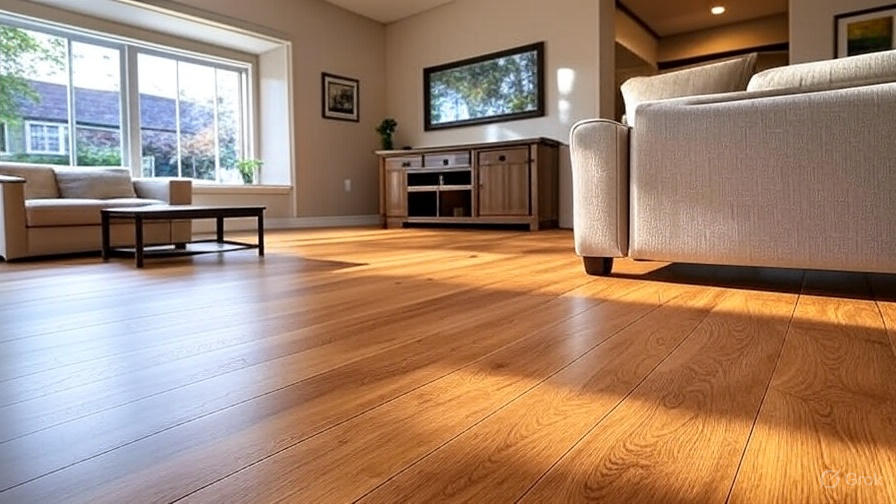
Why Solid Hardwood Is Worth the Effort
Solid hardwood flooring offers unmatched beauty and durability. Unlike engineered wood or laminate, solid hardwood can be sanded and refinished multiple times, lasting for generations. Its natural grain and rich colors elevate any space, from cozy living rooms to elegant dining areas. Acclimating the wood properly ensures it performs as expected, resisting warping, buckling, or splitting.
Investing time in acclimation also protects your wallet. A well-installed hardwood floor boosts your home’s resale value and reduces the need for repairs. With proper care, your floors will look stunning for years, making the upfront effort well worth it.
How to Care for Your Hardwood After Installation
Once your hardwood is installed, maintenance keeps it looking pristine. Sweep or vacuum regularly to remove dust and debris that can scratch the surface. Use a damp (not wet) mop with a wood-safe cleaner for deeper cleaning. Place mats at entryways to trap dirt and avoid wearing shoes indoors to prevent damage.
Control indoor humidity year-round to prevent the wood from expanding or contracting. Aim for 35-55% humidity with a humidifier or dehumidifier as needed. Use furniture pads under heavy items to avoid dents, and rearrange rugs periodically to prevent uneven fading from sunlight.
If scratches or wear appear over time, refinishing can restore the floor’s beauty. Most solid hardwood floors can be sanded and refinished 5-7 times, depending on their thickness. Regular care keeps your floors looking as good as the day they were installed.
Choosing the Right Hardwood Species
Different wood species have unique characteristics that affect acclimation and performance. Here are a few popular options:
- Oak: Durable and versatile, oak handles moderate humidity changes well. Its tight grain resists warping, making it a great choice for most homes.
- Maple: A lighter wood with a smooth grain, maple acclimates quickly but prefers stable humidity to avoid contraction.
- Walnut: Rich and dark, walnut is softer and may need extra acclimation time in humid climates to prevent swelling.
- Hickory: Known for its bold grain, hickory is tough but sensitive to moisture changes, so monitor it closely during acclimation.
Check with your supplier for species-specific acclimation guidelines, as denser woods like oak may stabilize faster than softer ones like walnut.
Acclimating Hardwood in New Construction
New construction projects present unique challenges for hardwood acclimation. Freshly poured concrete subfloors need 30-60 days to cure fully, as excess moisture can seep into the wood. Test the concrete’s moisture content with a meter before bringing in the hardwood. If the subfloor isn’t ready, delay delivery to avoid premature exposure to damp conditions.
Ensure the building’s HVAC system is operational before acclimation begins. New homes often have fluctuating humidity due to construction materials drying out, so use a dehumidifier if needed. Allow extra acclimation time—up to 14-21 days—if the home is still settling into its final climate conditions.
Troubleshooting Acclimation Issues
If problems arise during acclimation, act quickly to avoid long-term damage:
- Wood moisture content too high: If the planks’ moisture level exceeds the subfloor’s by more than 4%, extend the acclimation period. Increase ventilation or use a dehumidifier to lower humidity.
- Wood too dry: If the wood’s moisture content is too low, add a humidifier to bring the room’s humidity up to 35-50%. Recheck the wood after a few days.
- Warping or cupping: If planks show signs of distortion, they may have been exposed to uneven conditions. Separate affected boards and consult your supplier before installing.
- Inconsistent readings: If moisture meter readings vary across planks, improve airflow by restacking bundles with more space between them. Ensure the room’s conditions remain stable.
Addressing these issues early prevents headaches during installation and beyond.
How Long Does Acclimation Take?
The acclimation timeline varies based on several factors:
- Wood species: Dense woods like oak may need 7-10 days, while softer woods like walnut might require 10-14 days.
- Climate: Humid areas often demand longer acclimation (10-21 days) to account for higher moisture levels.
- Home conditions: Well-controlled environments with stable HVAC systems speed up the process, while inconsistent conditions extend it.
Always check the manufacturer’s recommendations and use a moisture meter to confirm readiness. Rushing acclimation risks issues like buckling or gaps, so patience pays off.
Benefits of Professional Installation
While DIY hardwood installation is possible, hiring a professional ensures precision. Experts know how to acclimate wood properly, test moisture levels accurately, and install planks flawlessly. They also have access to high-quality tools and can spot potential issues early, like an uneven subfloor or improper acclimation.
Professionals often provide warranties, giving you peace of mind. If you’re new to hardwood installation, consider consulting a pro to avoid costly mistakes. Their experience can save time and ensure your floors look stunning from day one.
Wrapping Up: Set Your Hardwood Floors Up for Success
Acclimating solid hardwood flooring is a crucial step that ensures your investment shines for years. By preparing your space, monitoring moisture levels, and giving the wood time to adjust, you create a stable foundation for a beautiful floor. Avoid common mistakes, tailor the process to your climate, and maintain the wood post-installation to keep it looking pristine.
With the right approach, your hardwood floors will transform your home, adding elegance and value. Take the time to acclimate properly, and you’ll enjoy stunning, durable floors for decades. Ready to get started? Grab your moisture meter, check your home’s conditions, and let your hardwood flooring journey begin!