
How to Install a Shower Spout?
Installing a new shower spout can transform your bathroom’s appearance while fixing leaks and improving water flow. This comprehensive guide walks you through every step of the shower spout installation process, from preparation to final testing. You’ll learn professional techniques that save money and ensure a watertight seal.
What You Need to Know Before Starting
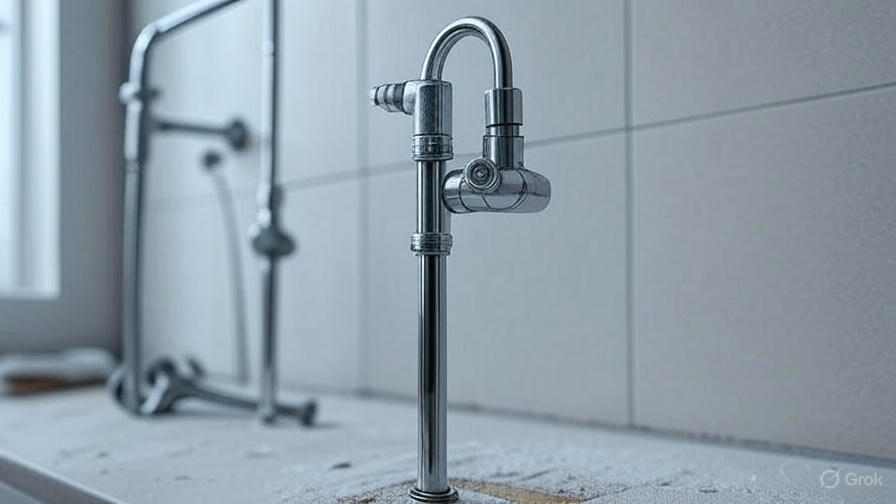
A shower spout connects to your bathroom’s water supply system and directs water flow during bathing. Most spouts attach to a threaded nipple that extends from the wall plumbing. The installation process requires basic plumbing skills but doesn’t demand professional expertise.
Modern shower spouts come in various styles: slip-on types, threaded models, and compression fittings. Each type requires slightly different installation methods. Slip-on spouts slide over a copper pipe stub, while threaded versions screw directly onto pipe threads. Compression fittings use a collar mechanism to secure the connection.
Before beginning your project, shut off the main water supply to prevent flooding. This safety step protects your bathroom from water damage during the installation process. Test your water shutoff by turning on bathroom faucets to ensure complete drainage.
Essential Tools and Materials
Gather these tools before starting your shower spout replacement:
- Pipe wrench or channel lock pliers
- Adjustable wrench
- Hacksaw or pipe cutter
- Measuring tape
- Level
- Screwdriver set
- Safety glasses
- Work gloves
- Flashlight or headlamp
Required materials include:
- New shower spout
- Pipe thread compound or Teflon tape
- Plumber’s putty (if needed)
- Sandpaper or emery cloth
- Clean rags
- Bucket for water collection
Quality tools make the installation process smoother and reduce the risk of pipe damage. Invest in a good pipe wrench, as this tool handles most of the heavy work during spout removal and installation.
Removing Your Old Shower Spout
Start by examining your existing spout to determine its attachment method. Look for a setscrew underneath the spout or visible threads where it connects to the wall pipe. Slip-on spouts typically have a small screw on the bottom, while threaded models twist off counterclockwise.
For slip-on spouts, locate the setscrew beneath the spout using your flashlight. This screw may be hex-head or Phillips-head. Loosen the screw completely but don’t remove it entirely – you’ll need it for the new spout installation. Once loose, the spout should slide off the pipe stub easily.
Threaded spouts require a different approach. Grip the spout with your pipe wrench and turn counterclockwise. Apply steady pressure while turning to avoid pipe damage. If the spout resists turning, apply penetrating oil and wait 15 minutes before trying again. Old mineral deposits often cause spouts to stick.
Clean the exposed pipe stub thoroughly after removing the old spout. Use sandpaper or emery cloth to remove rust, mineral buildup, and old thread compound. A clean surface ensures proper sealing and prevents leaks in your new installation.
Measuring and Preparing the Pipe
Accurate measurements prevent installation problems and ensure your new spout fits properly. Measure the pipe stub length from the wall surface to the pipe end. Most shower spouts require a specific pipe extension length for proper installation.
Standard slip-on spouts need a pipe stub extending 3/4 inch from the finished wall surface. If your pipe extends too far, mark the cutting point and use a hacksaw or pipe cutter to trim it. Make straight, clean cuts to ensure the spout slides on smoothly.
For threaded connections, examine the pipe threads carefully. Count the threads and measure their diameter to match your new spout specifications. Standard shower supply pipes use 1/2-inch NPT (National Pipe Thread) connections, but verify this measurement before purchasing your spout.
Clean the pipe threads with a wire brush if you’re installing a threaded spout. Remove all old thread compound and debris to ensure a tight seal. Apply fresh pipe thread compound or wrap the threads with Teflon tape, following the thread direction.
Installing Different Spout Types
Slip-On Spout Installation
Slip-on spouts offer the easiest installation method for most homeowners. Start by sliding the new spout over the clean pipe stub. The spout should fit snugly against the wall surface without gaps. If the spout doesn’t sit flush, the pipe stub may need trimming.
Position the spout so it points straight down and aligns with your bathtub. Use a level to check the spout’s horizontal alignment. Once positioned correctly, tighten the setscrew firmly but don’t overtighten. Excessive force can crack the spout or damage internal components.
Test the connection by turning on the water supply slowly. Watch for leaks around the pipe connection and setscrew area. Minor adjustments may be needed to achieve a watertight seal.
Threaded Spout Installation
Begin threaded spout installation by wrapping the pipe threads with Teflon tape. Start wrapping from the pipe end and work toward the wall, following the thread direction. Use 3-4 layers of tape for optimal sealing.
Thread the spout onto the pipe by hand initially. Turn clockwise until hand-tight, then use your pipe wrench to tighten further. Stop when the spout points straight down and sits flush against the wall. Avoid over-tightening, which can crack pipes or fittings.
Apply pipe thread compound to the threads if you prefer this sealing method over Teflon tape. Use a thin, even coating and avoid getting compound inside the pipe where it could affect water flow.
Compression Fitting Installation
Compression fittings use a collar and ring system to create watertight seals. Slide the compression nut over the pipe first, followed by the brass ring (ferrule). Insert the pipe into the spout fitting until it bottoms out.
Position the spout correctly, then slide the brass ring and compression nut forward. Thread the nut onto the spout fitting by hand until snug. Use wrenches to tighten the connection – hold the spout body with one wrench while tightening the compression nut with another.
Tighten until the connection feels secure but don’t overdo it. Compression fittings seal through pressure, not extreme tightness. Over-tightening can damage the brass ring and cause leaks.
Testing Your Installation
After completing the installation, turn on your water supply gradually. Start with a partial opening to check for immediate leaks, then open fully once you’ve confirmed the basic connection integrity. Run water through the spout for several minutes to test flow rate and pressure.
Check all connection points for moisture or dripping. Pay special attention to where the spout meets the wall and any visible pipe connections. Small leaks often appear as moisture rather than obvious drips, so inspect carefully.
Test the spout’s operation by switching between different flow settings if your model has multiple functions. Some spouts include diverter valves that direct water to overhead showers or handheld units. Verify all functions work properly.
Let water run for 10-15 minutes during your initial test. This extended run identifies leaks that might not appear immediately and helps settle the new connections.
Troubleshooting Common Installation Issues
Spout Won’t Sit Flush Against Wall: This usually indicates the pipe stub extends too far from the wall. Measure and trim the pipe to the correct length. For threaded spouts, you might need a pipe nipple extension or reduction.
Water Leaks from Connection Point: Check your sealing method. Threaded connections need proper thread compound or Teflon tape application. Slip-on spouts require tight setscrew connections. Compression fittings need proper tightening without overdoing it.
Low Water Pressure: Debris inside the new spout can restrict flow. Remove the spout and check for manufacturing residue or installation debris. Clean thoroughly and reinstall.
Spout Points Wrong Direction: Threaded spouts sometimes end up pointing sideways when tightened properly. You may need a different length nipple or pipe extension to achieve correct positioning and proper tightness simultaneously.
Loose Connection: If your spout feels wobbly, check the setscrew tightness on slip-on models or re-examine the threaded connection. Some movement is normal, but excessive looseness indicates installation problems.
Maintenance Tips for Long-Lasting Performance
Regular cleaning extends your shower spout’s lifespan and maintains optimal performance. Clean mineral deposits monthly using white vinegar and a soft brush. Soak removable aerators in vinegar solution to dissolve calcium buildup.
Inspect connections annually for signs of wear or corrosion. Look for water stains on walls around the spout, which indicate hidden leaks. Early detection prevents extensive water damage and costly repairs.
Lubricate moving parts on multi-function spouts with plumber’s silicone grease. This maintenance keeps diverter valves operating smoothly and prevents stuck mechanisms.
Replace worn washers and O-rings before they fail completely. These inexpensive parts prevent major leaks and water waste. Keep spare parts on hand for quick repairs.
Safety Considerations and Professional Help
Work safely around water and electrical systems in your bathroom. Turn off electricity to the area if you’ll be working near outlets or light fixtures. Wet conditions create electrocution risks that require careful attention.
Wear safety glasses when cutting pipes or using power tools. Metal shavings and debris can cause serious eye injuries. Use proper ventilation when applying chemical pipe compounds or cleaners.
Consider professional installation for complex plumbing configurations or if you discover damaged supply pipes during removal. Licensed plumbers have specialized tools and experience handling unexpected complications.
Don’t attempt repairs on gas-heated systems without proper training. Natural gas connections require professional expertise and local code compliance.
Cost Savings and Value Benefits
DIY shower spout installation typically costs $30-100 in materials, compared to $150-300 for professional installation. You’ll save $100-200 in labor costs while gaining valuable plumbing experience.
Quality spouts improve your bathroom’s appearance and can increase home value. Modern designs with water-efficient features appeal to environmentally conscious buyers and reduce utility costs.
New spouts eliminate leaks that waste water and increase bills. A dripping spout can waste hundreds of gallons annually, making replacement a smart financial decision.
Learning basic plumbing skills builds confidence for future home improvement projects. The techniques you learn during spout installation apply to other bathroom and kitchen fixture work.
Wrapping Up Your Installation Project
Installing a shower spout requires patience and attention to detail, but most homeowners can complete this project successfully. Take your time during each step, especially when measuring and sealing connections. Proper preparation and quality materials ensure years of reliable performance.
Remember that small leaks often worsen over time, so address any connection issues immediately. A properly installed spout should provide decades of trouble-free service with minimal maintenance.
Your new shower spout enhances both function and style in your bathroom. The installation skills you’ve developed will serve you well in future plumbing projects, making this both a practical improvement and a learning experience that builds your home maintenance capabilities.