How a 3-Way Switch Works?
A 3-way switch is a clever electrical device that lets you control a single light or set of lights from two different locations. Think of it as the ultimate convenience for your home—flip a switch at the bottom of the stairs to turn on the hallway light, then turn it off from the top. This setup is common in homes, offices, and even outdoor spaces. But how does a 3-way switch actually work? Let’s dive into the details, break down the wiring, and explore why this system is so useful. By the end, you’ll have a solid grasp of 3-way switches, their components, and how to install or troubleshoot them.
What Is a 3-Way Switch?
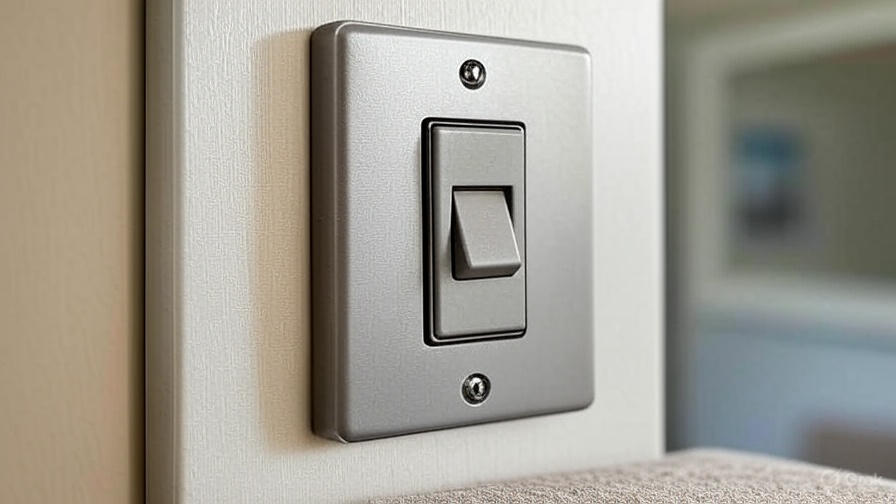
A 3-way switch controls one light or group of lights from two separate locations. Unlike a standard single-pole switch, which has a simple on/off function, a 3-way switch creates a circuit that allows either switch to toggle the light. You’ll often find these in stairwells, hallways, or large rooms with multiple entry points. The beauty of a 3-way switch lies in its flexibility—flip either switch, and the light changes state.
To make this happen, a 3-way switch uses three terminals: one common terminal and two traveler terminals. These connect through a series of wires to form a circuit that communicates between the two switches and the light fixture. The setup might sound complex, but it’s straightforward once you see how the pieces fit together.
Why Use a 3-Way Switch?
Before we get into the nuts and bolts, let’s talk about why 3-way switches are so practical. They add convenience and safety to your home. Imagine walking into a dark basement and turning on the light from the top of the stairs, then turning it off when you reach the bottom. No fumbling in the dark. They also save energy by making it easy to turn off lights from multiple locations, so you’re not leaving them on unnecessarily.
Another perk? 3-way switches work with a variety of lighting types, from traditional incandescent bulbs to modern LEDs. They’re also compatible with dimmers and smart home systems, giving you even more control. Whether you’re upgrading your home or troubleshooting an issue, knowing how a 3-way switch works is a valuable skill.
Components of a 3-Way Switch System
To understand a 3-way switch, you need to know the key players in the system. Here’s a quick rundown:
- 3-Way Switches: These are the two switches that control the light. Each has three terminals: one common (usually marked with a darker screw) and two travelers (often brass-colored screws).
- Traveler Wires: These are the wires that connect the two switches. They carry the electrical signal between the switches, allowing either one to control the light.
- Common Wire: This wire connects the common terminal of one switch to the power source or the light fixture, depending on the setup.
- Neutral Wire: This completes the circuit and is typically connected at the light fixture or in a junction box.
- Ground Wire: For safety, this wire grounds the system to prevent electrical shocks.
- Light Fixture: The device (light bulb, LED panel, etc.) that the switches control.
Each component plays a role in making the 3-way switch system work seamlessly. Now, let’s see how they come together in the wiring.
How a 3-Way Switch Circuit Works
A 3-way switch circuit is like a conversation between two switches. When you flip one switch, it sends a signal through the traveler wires to change the light’s state. The key is the traveler wires—they act as messengers, carrying the electrical current between the switches. Here’s a step-by-step look at how it works:
- Power Enters the Circuit: Electricity flows from the power source (your home’s electrical panel) to the common terminal of the first 3-way switch.
- Traveler Wires Carry the Signal: The first switch sends the current through one of the two traveler wires to the second switch. Which traveler wire is used depends on the position of the switch.
- Second Switch Completes the Circuit: The second switch’s common terminal connects to the light fixture. When the circuit is complete (based on the switches’ positions), the light turns on. If the circuit is broken, the light turns off.
- Toggle Either Switch: Flipping either switch changes which traveler wire carries the current, toggling the light on or off.
The magic happens because the switches work together. No matter which switch you flip, the circuit either completes or breaks, turning the light on or off. This setup ensures you can control the light from either location without needing to touch the other switch.
Wiring a 3-Way Switch: A Simple Breakdown
Now that you know the basics, let’s walk through the wiring process. If you’re installing a 3-way switch or troubleshooting one, understanding the wiring is key. Here’s a common setup, often called the “power-to-switch” configuration:
- Power to First Switch:
- The hot wire (usually black) from the power source connects to the common terminal of the first switch.
- Two traveler wires (often red and black) connect the traveler terminals of the first switch to the traveler terminals of the second switch.
- A neutral wire (usually white) runs through the junction box but doesn’t connect to the switch—it’s typically tied to the neutral at the light fixture.
- A ground wire (bare or green) connects to the ground terminal on the switch.
- Traveler Wires Between Switches:
- The two traveler wires link the first switch to the second. These wires carry the electrical signal, allowing either switch to control the light.
- Second Switch to Light:
- The common terminal of the second switch connects to the hot wire of the light fixture.
- The neutral wire from the light fixture connects to the neutral wire in the junction box, completing the circuit.
- The ground wire connects to the light fixture’s ground terminal.
This setup assumes the power source enters the first switch. In some cases, the power might go to the light fixture first, then to the switches (called a “switch-to-light” configuration). The principles remain the same, but the wiring order changes slightly.
Pro Tip: Label Your Wires
When working with 3-way switches, label the wires as you go. It’s easy to mix up the common and traveler wires, especially in older homes with non-standard wiring colors. Use electrical tape or a marker to keep track.
Tools and Materials for Installing a 3-Way Switch
If you’re ready to install or replace a 3-way switch, gather these tools and materials:
- Two 3-way switches
- 14/3 or 12/3 electrical cable (with two traveler wires, a neutral, and a ground)
- Wire strippers
- Screwdrivers (flathead and Phillips)
- Voltage tester
- Electrical tape
- Wire nuts
- Junction box (if needed)
Always turn off the power at the circuit breaker before working on electrical projects. Use a voltage tester to confirm the wires are not live.
Step-by-Step Guide to Installing a 3-Way Switch
Ready to wire a 3-way switch? Follow these steps for a standard power-to-switch setup:
- Turn Off the Power: Shut off the circuit breaker and use a voltage tester to ensure the wires are not live.
- Run the Cables:
- Run a 14/3 or 12/3 cable from the power source to the first switch box.
- Run another 14/3 cable between the first and second switch boxes.
- Run a cable from the second switch box to the light fixture.
- Connect the First Switch:
- Attach the hot wire from the power source to the common terminal.
- Connect the two traveler wires to the traveler terminals.
- Connect the ground wire to the ground terminal.
- Connect the Second Switch:
- Attach the traveler wires from the first switch to the traveler terminals of the second switch.
- Connect the hot wire to the light fixture to the common terminal.
- Connect the ground wire to the ground terminal.
- Wire the Light Fixture:
- Connect the hot wire from the second switch to the light’s hot terminal.
- Connect the neutral wire to the light’s neutral terminal.
- Connect the ground wire to the light’s ground terminal.
- Secure Everything:
- Use wire nuts to secure connections.
- Tuck wires neatly into the junction boxes and attach the switches.
- Install cover plates.
- Test the Circuit:
- Turn the power back on.
- Test both switches to ensure they control the light correctly.
If the switches don’t work as expected, double-check your connections. A common mistake is swapping the common and traveler wires.
Troubleshooting Common 3-Way Switch Issues
Even with a proper setup, things can go wrong. Here are some common problems and fixes:
- Light Doesn’t Turn On: Check if the power is on and the bulb is working. Use a voltage tester to confirm power is reaching the switches.
- One Switch Doesn’t Work: The traveler or common wires might be loose or incorrectly connected. Verify the wiring at both switches.
- Light Flickers: This could indicate a loose connection or a faulty switch. Tighten all connections and replace the switch if needed.
- Switch Feels Warm: A warm switch might mean it’s overloaded or faulty. Turn off the power and inspect the wiring or replace the switch.
If you’re unsure, consult a licensed electrician. Safety always comes first.
3-Way Switches and Smart Home Integration
Want to bring your 3-way switch into the 21st century? Many smart switches, like those from Lutron or TP-Link, are compatible with 3-way setups. These let you control lights via a smartphone app, voice assistant, or even a schedule. Some smart switches replace only one of the 3-way switches, while others require a specific companion switch for the second location. Check the manufacturer’s instructions to ensure compatibility with your wiring.
Smart switches often need a neutral wire, which older homes might not have in the switch box. If your setup lacks a neutral, look for smart switches designed for no-neutral installations.
Safety Tips for Working with 3-Way Switches
Electricity is no joke. Follow these safety tips:
- Always turn off the power at the breaker before working on wiring.
- Use a voltage tester to confirm wires are not live.
- Never work on electrical systems in wet conditions.
- If you’re unsure about any step, call a professional electrician.
Common Variations of 3-Way Switch Setups
While we’ve covered the standard setup, there are variations:
- 4-Way Switches: For controlling a light from three or more locations, a 4-way switch is added between the two 3-way switches. It has four terminals and acts as a middleman, passing the signal along.
- Power-to-Light Setup: In this configuration, power goes to the light fixture first, then to the switches. The wiring changes slightly, but the concept remains the same.
- Dimmer Switches: You can use a 3-way dimmer switch in place of one of the 3-way switches to adjust brightness. Ensure the dimmer is rated for 3-way use.
Each variation follows the same core principles but adjusts the wiring to suit the setup.
Benefits of Understanding 3-Way Switches
Learning how a 3-way switch works empowers you to tackle home improvement projects with confidence. You can save money on electrician fees, troubleshoot issues, and even upgrade to smart lighting. Plus, it’s satisfying to know how your home’s electrical system ticks. Whether you’re a DIY enthusiast or just curious, this knowledge is a practical addition to your skill set.
FAQs About 3-Way Switches
Can I use a regular switch instead of a 3-way switch?
No, a regular single-pole switch won’t work in a 3-way setup. It lacks the traveler terminals needed to communicate with the second switch.
Do 3-way switches require special wiring?
Yes, you need 14/3 or 12/3 cable with two traveler wires, a neutral, and a ground. Standard 14/2 cable won’t work for a 3-way circuit.
Can I add a dimmer to a 3-way switch?
Yes, but you need a 3-way-compatible dimmer. Install it in place of one of the 3-way switches, and ensure it’s rated for your light type (e.g., LED or incandescent).
Why is my 3-way switch not working?
Check for loose connections, incorrect wiring, or a faulty switch. Use a voltage tester to trace the issue.
Wrapping It Up
A 3-way switch is a simple yet powerful tool for controlling lights from multiple locations. By connecting two switches with traveler wires and a common terminal, you create a flexible circuit that makes your home more convenient and efficient. Whether you’re installing a new switch, troubleshooting an issue, or upgrading to a smart system, understanding how a 3-way switch works is key. With the right tools, a bit of patience, and a focus on safety, you can master this electrical setup and light up your space with ease.
