How to Adjust Glass Shower Door Pivot Hinge?
Your glass shower door hangs crooked, scrapes against the frame, or refuses to close properly. These common problems often stem from misaligned pivot hinges that need adjustment. Rather than calling an expensive repair service, you can fix most pivot hinge issues yourself with basic tools and patience.
Glass shower doors rely on precision-engineered pivot hinges to swing smoothly and seal properly. When these hinges fall out of alignment, your door becomes a daily frustration. This comprehensive guide walks you through the entire adjustment process, from identifying problems to achieving perfect door alignment.
What Are Glass Shower Door Pivot Hinges?
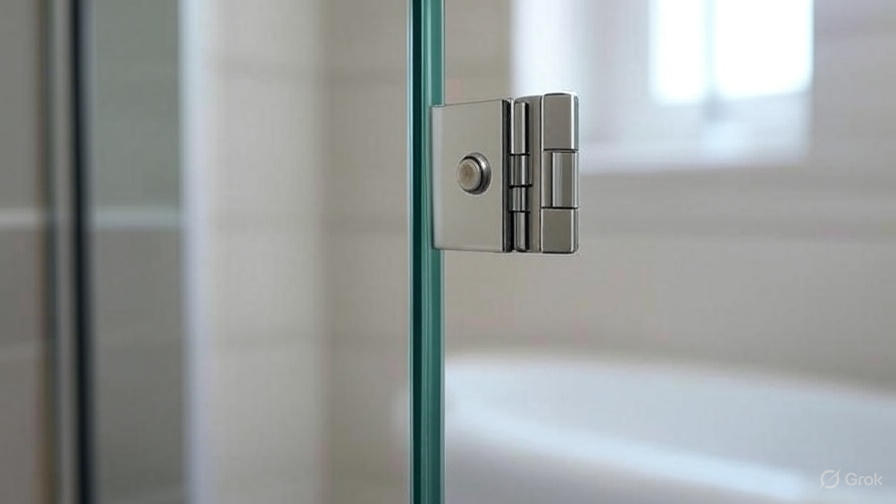
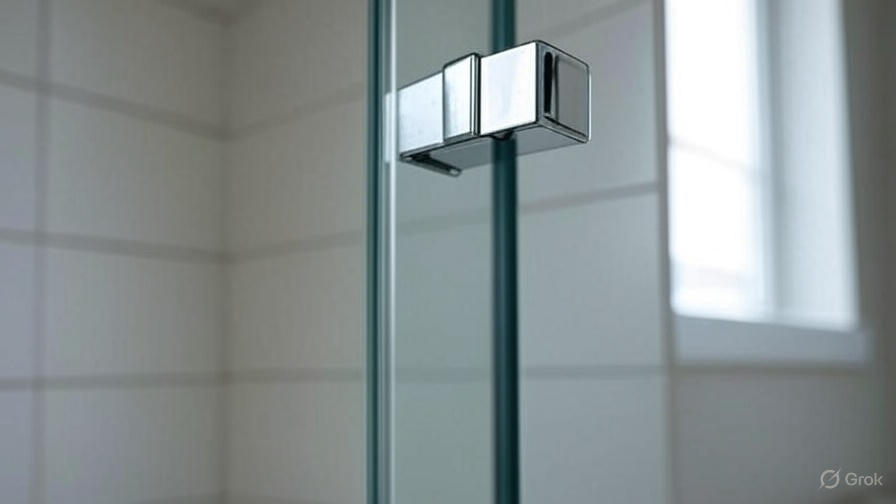
Pivot hinges serve as the mechanical heart of frameless glass shower doors. These specialized hardware pieces allow heavy glass panels to swing open and closed while supporting substantial weight. Unlike traditional door hinges that mount to the side of a frame, pivot hinges attach to the top and bottom of the glass door.
The top pivot hinge connects to the header or ceiling mount, while the bottom pivot hinge anchors to the shower base or floor. This design creates a clean, modern appearance while providing the structural support needed for thick glass panels weighing 50 to 100 pounds or more.
Most pivot hinges feature adjustable components that allow for fine-tuning the door’s position. These adjustment mechanisms compensate for settling in the building structure, manufacturing tolerances, and installation variations. Without proper adjustment, even the highest-quality pivot hinges will cause door operation problems.
Common Signs Your Pivot Hinges Need Adjustment
Glass shower doors telegraph adjustment problems through several obvious symptoms. Recognizing these signs early prevents minor issues from becoming major repairs.
A door that won’t close completely represents the most common adjustment problem. The glass panel stops short of the frame, leaving gaps that allow water to escape. This issue typically results from the door hanging too low or angling away from the closing position.
Scraping sounds during door operation indicate the glass contacts the frame, threshold, or adjacent surfaces. These metal-on-glass or glass-on-metal contacts can scratch expensive glass panels and damage hardware finishes. The scraping often occurs because the door hangs at the wrong angle or sits too high in the opening.
Difficult door operation signals alignment problems even when the door appears to close properly. You shouldn’t need excessive force to open or close a properly adjusted shower door. Hard-to-operate doors stress the pivot hinges and can lead to premature hardware failure.
Water leakage around the door perimeter points to sealing problems caused by poor alignment. When the door doesn’t sit flush against the frame and threshold, water escapes even with proper weatherstripping. These leaks can damage flooring and create mold conditions.
Visible gaps between the door and frame reveal alignment issues that affect both appearance and function. These gaps often appear uneven, with wider spaces at the top or bottom of the door. Consistent gap width around the entire door perimeter indicates proper adjustment.
Tools and Materials You’ll Need
Successful pivot hinge adjustment requires specific tools and materials. Gathering everything before starting saves time and prevents project delays.
A high-quality level ensures accurate door positioning during adjustment. Choose a 24-inch or longer level for best results when checking door alignment. Digital levels provide precise readings and work well in tight shower spaces.
An adjustable wrench fits most pivot hinge adjustment nuts and bolts. A 10-inch wrench provides good leverage without being too bulky for shower enclosure work. Some hinges require specific wrench sizes, so check your hardware before starting.
Phillips and flathead screwdrivers handle most hinge screws and adjustment mechanisms. Magnetic tip screwdrivers prevent dropped screws in wet shower areas. Keep multiple sizes available since hinge hardware varies between manufacturers.
Penetrating oil loosens stuck adjustment screws and pivots. Apply oil 15-20 minutes before attempting adjustments on older hardware. This preparation prevents stripped screws and damaged threads.
A flashlight or headlamp illuminates adjustment points in dimly lit shower areas. LED lights provide bright, cool illumination that won’t heat up glass surfaces. Hands-free lighting allows you to work while maintaining visibility.
Safety glasses protect your eyes from glass chips and metal debris during adjustment work. Even minor adjustments can create small particles that pose eye injury risks.
Masking tape marks glass surfaces to prevent scratches from tools. Apply tape around adjustment areas where tools might contact the glass. Remove tape immediately after completing adjustments to prevent adhesive residue.
Safety Precautions Before Starting
Glass shower door adjustment involves working with heavy glass panels and metal hardware. Proper safety precautions prevent injuries and property damage.
Never attempt adjustments alone when working with heavy glass doors. Have a helper available to support the door if it becomes unstable during adjustment. Glass doors can shift unexpectedly when pivot points move.
Inspect the glass panel for cracks, chips, or other damage before starting adjustments. Stressed glass can shatter during adjustment procedures. Replace damaged glass before attempting any hinge modifications.
Clear the work area of soap bottles, razors, and other bathroom items that could cause injuries if dropped. Wet surfaces increase slip and fall risks, so ensure good footing throughout the adjustment process.
Turn off electrical circuits to any lighting or ventilation fans in the immediate work area. Water and electrical components don’t mix safely, and adjustment work can splash water unexpectedly.
Test water temperature before starting if you need to run water during the adjustment process. Hot water can cause rapid thermal expansion in glass and metal components, affecting adjustment accuracy.
Step-by-Step Adjustment Process
Examining the Current Door Position
Start your adjustment process by carefully observing how the door currently operates. Open and close the door several times while watching for binding points, unusual sounds, or irregular movement patterns. Note where the door contacts the frame during operation and identify any scraping locations.
Check the door’s resting position when fully closed. Use your level to determine if the door hangs plumb (perfectly vertical) and sits level across the top. Mark any high or low spots with removable tape for reference during adjustments.
Examine the gaps around the door perimeter. Measure gap widths at multiple points along the top, bottom, and sides. Consistent gap measurements indicate good alignment, while varying gaps show adjustment needs.
Test the door’s sealing performance by running water and observing any leakage points. Mark problem areas with tape so you can verify improvement after adjustments.
Locating the Adjustment Points
Most glass shower door pivot hinges include multiple adjustment mechanisms. The top hinge typically allows for lateral movement and angle adjustment, while the bottom hinge provides height and alignment control.
Top pivot hinges often feature a threaded adjustment collar or set screws that control the door’s side-to-side position. These adjustments move the entire door left or right within the opening. Look for hex screws, thumbscrews, or adjustment nuts on the hinge body.
Bottom pivot hinges usually include height adjustment mechanisms that raise or lower the door. These adjustments take the form of threaded posts, adjustment screws, or removable shims. Some bottom hinges also provide lateral adjustment to fine-tune door position.
Wall-mounted pivot points may include additional adjustment features. These adjustments typically control the angle at which the door hangs and can correct doors that lean away from or into the shower opening.
Document the current position of all adjustment mechanisms before making changes. Take photos or make sketches showing screw positions and alignment marks. This documentation allows you to return to the starting position if adjustments don’t improve operation.
Making Height Adjustments
Height adjustment corrects doors that hang too high or low in the opening. Start with small adjustments and test door operation frequently to avoid overcorrection.
Locate the height adjustment mechanism on the bottom pivot hinge. This adjustment typically consists of a threaded rod or screw that raises or lowers the door when turned. Some systems use removable shims or spacers instead of threaded adjustments.
Support the door weight while making height adjustments. Have your helper hold the door or use a temporary support to prevent the door from dropping unexpectedly. Glass doors can fall quickly once pivot pressure releases.
Turn height adjustment screws in small increments, typically quarter-turns or less. Test door operation after each adjustment to evaluate improvement. The door should clear the threshold by 1/8 to 1/4 inch when properly adjusted.
Check that height adjustments don’t create binding at the top of the door. Raising the door too much can cause interference with the top track or frame. Maintain consistent gaps at both the top and bottom of the door.
Verify that height adjustments don’t affect door sealing. The door should still contact weatherstripping and sealing surfaces properly after height changes. Some doors require simultaneous height and angle adjustments to maintain proper sealing.
Correcting Lateral Alignment
Lateral adjustments move the door left or right to center it properly in the opening. These adjustments correct doors that bind on one side or create uneven gaps.
Identify the lateral adjustment mechanism on your pivot hinge system. Top hinges typically provide the primary lateral adjustment, though some systems include adjustments at both the top and bottom pivot points.
Loosen lateral adjustment screws slightly before attempting to move the door. Most adjustment mechanisms require some pressure relief before the door will shift position. Don’t remove screws completely unless necessary for major repositioning.
Move the door in small increments while testing operation. Lateral adjustments often require multiple small movements rather than one large correction. Check gap consistency on both sides of the door after each adjustment.
Ensure lateral adjustments don’t create new problems at the opposite side of the door. Moving the door away from one binding point can create interference at another location. Balance adjustments to optimize overall door operation.
Tighten lateral adjustment hardware securely after achieving proper positioning. Loose adjustment screws allow the door to drift out of position over time. Check screw tightness periodically as part of routine maintenance.
Fine-Tuning Vertical Alignment
Vertical alignment ensures the door hangs perfectly plumb and operates smoothly throughout its swing arc. This adjustment corrects doors that lean or twist in the opening.
Use your level to check door alignment in the closed position. The door should read perfectly vertical along its entire height. Mark any deviation points for reference during adjustment.
Locate vertical alignment adjustments on both the top and bottom pivot hinges. These adjustments typically control the angle at which the door hangs by moving one pivot point relative to the other.
Make vertical alignment adjustments in very small increments. These adjustments have significant leverage effects, so small changes create large corrections. Test door operation frequently during vertical alignment procedures.
Check that vertical alignment corrections don’t interfere with door closing. A perfectly plumb door that won’t close properly needs further adjustment to balance alignment with function.
Verify that vertical alignment improvements maintain proper weatherstrip contact. The door should seal consistently along its entire perimeter after alignment corrections.
Troubleshooting Specific Problems
Door Won’t Close Completely
Doors that stop short of full closure usually suffer from height or alignment problems. The glass panel contacts the frame, threshold, or adjacent surfaces before reaching the closed position.
Check for obvious interference points by slowly closing the door while watching for contact locations. Mark these spots with tape and examine the clearance requirements. Most doors need 1/8 to 1/4 inch clearance around all edges.
Height adjustments often solve partial closing problems. Lower doors that contact the threshold or raise doors that bind at the top of the frame. Make adjustments gradually while testing closure after each change.
Lateral alignment problems can prevent complete closure when the door angles away from the frame. Adjust the door toward the frame side while maintaining proper gap consistency along the opposite edge.
Check weatherstripping for interference with door closure. Compressed or displaced weatherstrip can block door movement. Adjust or replace weatherstripping that prevents proper closure.
Door Scrapes During Operation
Scraping indicates direct contact between moving parts and stationary surfaces. These contacts can damage glass and hardware while creating annoying operational noise.
Identify scraping locations by listening carefully during door operation. Different scraping sounds indicate different contact types. Metal-on-glass contacts sound different from glass-on-rubber weatherstrip contacts.
Height adjustments eliminate most scraping problems at the top and bottom of the door. Raise doors that scrape the threshold or lower doors that contact the top frame during operation.
Lateral adjustments correct side scraping by moving the door away from contact points. Balance these adjustments to avoid creating scraping on the opposite side of the door.
Check pivot hinge alignment if scraping occurs throughout the door’s swing arc. Misaligned pivots can cause the door to follow an irregular path that creates multiple contact points.
Uneven Gaps Around Door
Consistent gap width around the door perimeter indicates proper adjustment. Uneven gaps affect both appearance and sealing performance.
Measure gap widths at multiple points along each edge of the door. Use consistent measurement points to track improvement during adjustments. Record measurements for comparison after completing adjustments.
Top-heavy gap patterns (wider at top, narrower at bottom) usually indicate the door leans outward. Adjust pivot angles to bring the top of the door closer to the frame.
Bottom-heavy gap patterns suggest the door leans inward. Adjust pivots to move the bottom of the door away from the frame while maintaining top closure.
Side-to-side gap variations require lateral adjustments to center the door properly in the opening. Move the door toward the wide gap side while monitoring the opposite edge for new problems.
Door Difficult to Operate
Properly adjusted shower doors should open and close with minimal effort. Hard-to-operate doors indicate binding, misalignment, or hardware problems.
Check all pivot points for lubrication needs. Dry or corroded pivots increase operating effort significantly. Apply appropriate lubricant to pivot bearings and adjustment mechanisms.
Examine door tracks and guides for obstruction or damage. Soap buildup, mineral deposits, and debris can increase operating resistance. Clean all contact surfaces thoroughly.
Verify that adjustments haven’t created new binding points. Over-adjustment in one area can cause problems elsewhere in the door system. Back off excessive adjustments while maintaining proper alignment.
Test door operation throughout its full swing arc. Problems that appear only at certain door positions indicate specific interference points that need correction.
Maintenance Tips for Long-Term Performance
Regular maintenance prevents adjustment problems and extends pivot hinge life. Simple maintenance procedures take little time but provide significant benefits.
Clean pivot hinges monthly with appropriate cleaners. Remove soap scum, mineral deposits, and debris that can interfere with proper operation. Use non-abrasive cleaners that won’t damage hardware finishes.
Lubricate pivot points every six months with appropriate lubricants. Use silicone-based lubricants that won’t attract dirt or react with rubber seals. Avoid petroleum-based products that can damage weatherstripping.
Check adjustment hardware tightness during routine cleaning. Vibration and normal operation can loosen adjustment screws over time. Retighten loose hardware before it allows significant door movement.
Inspect weatherstripping condition during maintenance procedures. Replace worn or damaged weatherstrip before it affects door sealing. Proper weatherstrip condition reduces adjustment frequency by maintaining consistent sealing pressure.
Monitor door operation for early signs of adjustment needs. Address minor problems promptly before they become major issues. Early intervention prevents expensive repairs and extends hardware life.
When to Call a Professional
Some pivot hinge problems exceed DIY repair capabilities and require professional attention. Recognizing these situations prevents damage and ensures safe operation.
Cracked or damaged glass requires immediate professional replacement. Never attempt to adjust doors with damaged glass panels. Stressed glass can shatter unexpectedly during adjustment procedures.
Severely corroded or damaged hardware needs professional replacement. Attempting to adjust badly deteriorated hardware can cause sudden failure and injury. Replace problem hardware before attempting adjustments.
Structural problems with the shower frame or building require professional evaluation. Settlement, water damage, or frame distortion can make proper door adjustment impossible without addressing underlying issues.
Multiple failed adjustment attempts indicate problems beyond basic alignment issues. Professional technicians have specialized tools and experience that can solve complex pivot hinge problems.
Safety concerns about heavy glass handling warrant professional assistance. Glass shower doors represent significant injury risks if they fall or shatter during adjustment procedures.
Cost Considerations and Prevention
Understanding adjustment costs helps you make informed decisions about DIY versus professional service. Prevention strategies reduce future adjustment needs and associated expenses.
Professional pivot hinge adjustment typically costs $150 to $300 depending on problem complexity and local service rates. Simple adjustments cost less than major realignment procedures that require hardware replacement.
DIY adjustment costs include only tool purchases and materials. Most homeowners already own basic tools needed for simple adjustments. Specialized tools for complex adjustments may justify professional service for one-time repairs.
Prevention through regular maintenance significantly reduces adjustment frequency and costs. Monthly cleaning and semi-annual lubrication prevent most common adjustment problems. This maintenance takes less time than major adjustment procedures.
Quality hardware reduces adjustment frequency compared to budget components. Investing in quality pivot hinges during initial installation pays dividends through reduced maintenance and longer service life.
Proper installation prevents many adjustment problems from developing. Professional installation may cost more initially but reduces future adjustment and repair expenses.
Conclusion
Adjusting glass shower door pivot hinges requires patience, proper tools, and systematic approaches to achieve professional results. Most homeowners can successfully complete basic adjustments with careful attention to safety and proper procedures.
Start with simple visual inspection and measurements to identify specific problems before attempting adjustments. Make small incremental changes while testing door operation frequently. This approach prevents over-adjustment and maintains door functionality throughout the process.
Document your adjustment process with photos and measurements. This documentation helps you track progress and provides reference information for future maintenance needs. Proper records also assist professional technicians if complex problems develop.
Regular maintenance prevents most adjustment problems while extending hardware life. Simple cleaning and lubrication procedures take minimal time but provide significant long-term benefits. Address minor problems promptly before they require major adjustments.
Know when to seek professional help for complex problems or safety concerns. Professional technicians have specialized tools and experience that ensure safe, effective repairs for difficult situations.
With proper knowledge and techniques, you can maintain smooth-operating shower doors that provide years of reliable service. These skills save money while giving you the satisfaction of successful home maintenance projects.

