How to Fix Low Water Pressure in Kitchen Sink?
Weak water flow from your kitchen faucet can transform simple tasks into frustrating ordeals. Washing dishes takes forever, filling pots becomes a waiting game, and rinsing vegetables feels impossible. This common household problem affects millions of homeowners, but the good news is that most causes have straightforward solutions you can tackle yourself.
Water pressure issues in kitchen sinks stem from several factors, ranging from simple clogs to more complex plumbing problems. Before calling a plumber and spending hundreds of dollars, you can diagnose and fix many of these issues using basic tools and techniques. This comprehensive guide walks you through every step of troubleshooting and repairing low water pressure in your kitchen sink.
Common Causes of Low Kitchen Sink Water Pressure
Kitchen sink water pressure problems don’t appear overnight. They develop gradually as debris accumulates, components wear out, or mineral deposits build up in your plumbing system. Identifying the root cause helps you apply the most effective solution.
Clogged aerators top the list of culprits behind reduced water flow. These small screens at the tip of your faucet catch sediment and debris from your water supply. Over time, mineral deposits, rust particles, and other contaminants block the tiny holes, restricting water flow significantly.
Blocked faucet cartridges create another common pressure problem. These internal components control water flow and temperature mixing. When debris or mineral buildup affects the cartridge, water struggles to pass through, resulting in weak pressure from your kitchen tap.
Corroded or damaged water supply lines also reduce pressure. Old galvanized pipes develop rust and scale buildup that narrows the pipe’s interior diameter. This restriction forces water to squeeze through smaller spaces, dramatically reducing the pressure that reaches your faucet.
Water shut-off valves play a crucial role in maintaining proper pressure. These valves, located under your sink or near your water meter, control water flow to your fixtures. Partially closed valves restrict water flow even when your faucet operates perfectly.
Quick Diagnostic Steps
Start your diagnosis by checking if the pressure problem affects hot water, cold water, or both. Turn on your kitchen faucet and test each temperature setting separately. If only hot water shows low pressure, your water heater or hot water lines likely cause the issue. Cold water pressure problems typically indicate issues with your main water supply or faucet components.
Compare your kitchen sink pressure with other faucets in your home. Run water in bathroom sinks, shower heads, and other fixtures. If multiple fixtures show low pressure, your main water supply line or municipal water pressure might be the culprit. When only your kitchen sink experiences problems, focus on faucet-specific solutions.
Check your water meter and main shut-off valve. These components, usually located near your street or property line, control water flow to your entire home. Verify that valves are fully open and that your water meter shows normal readings.
Examine the area under your kitchen sink for visible leaks or damage. Water stains, dripping sounds, or moisture indicate problems with supply lines or connections. These issues can reduce pressure by allowing water to escape before reaching your faucet.
Solution 1: Clean the Faucet Aerator
The aerator cleaning process requires minimal tools and takes about fifteen minutes. Start by locating the aerator at the tip of your faucet spout. This small, round component typically screws onto the end of your faucet and contains a mesh screen that filters your water.
Remove the aerator by turning it counterclockwise with your fingers or pliers. Some aerators screw off easily by hand, while others require gentle pressure from pliers wrapped in a cloth to prevent scratching. Be careful not to over-tighten or force the removal, as this can damage the threads.
Once removed, disassemble the aerator components carefully. Most aerators contain multiple parts: an outer housing, one or more screens, a rubber washer, and sometimes a flow restrictor. Lay these parts out in order to ensure proper reassembly later.
Soak all components in white vinegar for thirty minutes to dissolve mineral deposits. For stubborn buildup, use an old toothbrush to scrub the screens gently. Rinse thoroughly with clean water to remove all vinegar residue and loosened debris.
Inspect each component for damage before reassembly. Cracked screens or worn washers need replacement. Most hardware stores carry universal aerator repair kits that include common replacement parts.
Reassemble the aerator in reverse order, ensuring all components align properly. Screw the aerator back onto your faucet finger-tight, then turn an additional quarter-turn with pliers if needed. Test your water pressure to see if this simple fix resolved your problem.
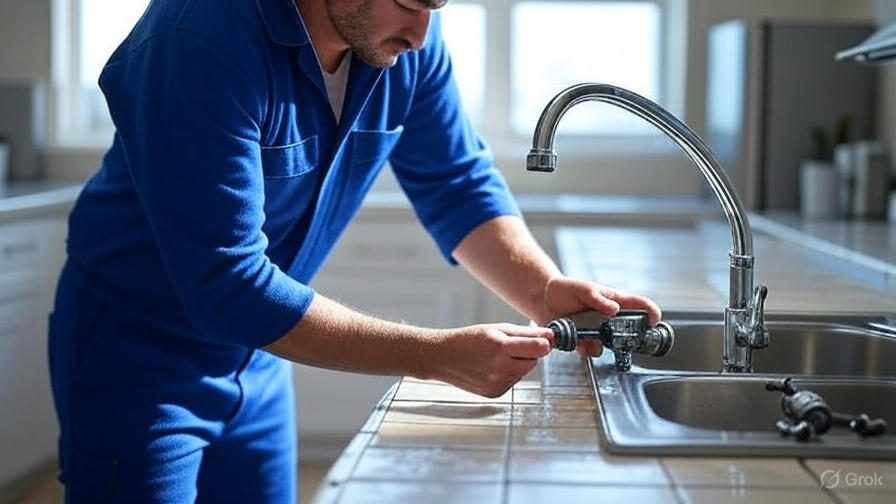
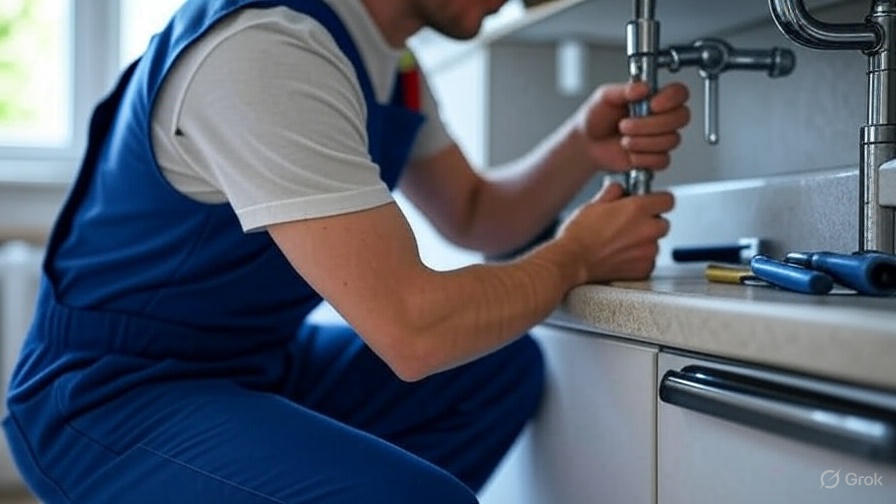
Solution 2: Replace or Clean the Faucet Cartridge
Faucet cartridge replacement addresses more complex internal blockages that aerator cleaning can’t fix. This process varies depending on your faucet type, but most follow similar basic steps.
Turn off water supply valves under your sink before starting any cartridge work. These valves, typically located on the wall or cabinet back, control hot and cold water flow to your faucet. Turn them clockwise until they stop to shut off water completely.
Remove your faucet handle to access the cartridge. Single-handle faucets usually have a screw hidden under a decorative cap on top of the handle. Two-handle faucets may have screws on each handle or behind the handles themselves.
Locate and remove the cartridge retaining mechanism. Some faucets use a packing nut that unscrews counterclockwise, while others have a retaining clip that pulls straight out. Take photos during disassembly to help with reassembly later.
Extract the cartridge using pliers or a specialized cartridge puller tool. Grip the cartridge stem firmly and pull straight up. Some cartridges require slight twisting motion during removal. If the cartridge resists, apply penetrating oil and wait a few minutes before trying again.
Clean the cartridge thoroughly or replace it entirely. For cleaning, soak in vinegar solution and scrub with a soft brush. Inspect for cracks, worn seals, or heavy mineral buildup that indicates replacement necessity.
Install the new or cleaned cartridge in the exact same orientation as removal. Align any tabs or grooves properly to ensure correct hot and cold water mixing. Replace the retaining mechanism and reassemble your faucet handle.
Solution 3: Check and Adjust Water Supply Valves
Water supply valves under your kitchen sink directly control pressure reaching your faucet. These valves, often overlooked during troubleshooting, can significantly impact water flow when partially closed or damaged.
Locate both hot and cold water supply valves under your sink. These typically attach to copper or flexible supply lines connecting to your faucet. The valves may be located on the wall, cabinet back, or cabinet floor.
Test each valve’s current position by attempting to turn them counterclockwise. Fully open valves should resist further turning, while partially closed valves will turn easily. If valves turn significantly, they were restricting your water flow.
Open both valves completely by turning counterclockwise until they stop. Don’t force them beyond their natural stopping point, as this can damage the valve mechanism. Most valves should turn smoothly with minimal resistance.
Inspect valve condition while you have access. Look for corrosion, leaks, or mineral buildup around valve stems. White or green deposits indicate mineral accumulation that may affect valve operation.
Test your faucet pressure after adjusting valves. If pressure improves but remains inadequate, consider replacing old or damaged supply valves. This job typically requires shutting off main water supply and may need professional assistance.
Solution 4: Clear Blocked Water Lines
Blocked water supply lines create pressure problems that simple faucet repairs can’t fix. These blockages develop slowly as mineral deposits, debris, and corrosion accumulate inside your pipes.
Start by identifying your supply line material and age. Older galvanized steel pipes are more prone to internal corrosion and blockages than newer copper or PEX lines. Homes built before 1960 often have galvanized supply lines that may need replacement.
Disconnect supply lines from your faucet to inspect for blockages. This requires shutting off water supply valves and using wrenches to remove the connection nuts. Have a bucket ready to catch any remaining water in the lines.
Examine the inside of disconnected supply lines for debris or mineral buildup. Shine a flashlight into the line opening to check for visible obstructions. Significant blockages appear as white mineral deposits or dark debris accumulations.
Flush supply lines by temporarily reconnecting them to water supply while leaving the faucet connection open. Direct the open end into a bucket and slowly open supply valves. This pressure washing technique can remove loose debris and minor blockages.
For stubborn blockages, use a small drain snake or flexible wire to break up deposits. Work carefully to avoid damaging pipe interiors, especially with older galvanized lines that may have thin walls from corrosion.
Consider professional help for extensive supply line problems. If multiple fixtures show pressure issues or your home has very old plumbing, whole-house pipe replacement might be necessary.
Solution 5: Address Water Heater Issues
Hot water pressure problems often trace back to your water heater rather than faucet components. Water heaters develop sediment buildup, component failures, and other issues that specifically affect hot water pressure.
Check your water heater’s age and maintenance history. Units over ten years old commonly develop internal problems that reduce hot water pressure. Lack of regular maintenance accelerates these issues significantly.
Inspect the hot water supply line from your water heater to your kitchen. Look for kinks, damage, or excessive length that might restrict flow. Hot water lines travel longer distances than cold lines in many homes, creating more opportunities for problems.
Examine your water heater’s shut-off valves and connections. These components, located near your water heater, can partially close or develop problems that reduce hot water pressure throughout your home.
Consider flushing your water heater to remove sediment buildup. This process involves connecting a garden hose to the drain valve and running water until it flows clear. Consult your water heater manual for specific flushing instructions.
Test hot water pressure at multiple fixtures after addressing water heater issues. If problems persist, internal water heater components like the dip tube or heating elements may need professional replacement.
When to Call a Professional Plumber
Some water pressure problems exceed DIY repair capabilities and require professional intervention. Recognizing these situations saves time, money, and potential damage from incorrect repairs.
Multiple fixture pressure problems throughout your home indicate main supply line issues. These problems often require specialized equipment and expertise to diagnose and repair effectively.
Old galvanized pipe replacement jobs need professional handling. These projects involve cutting into walls, soldering copper joints, or installing PEX systems that require proper tools and experience.
Water pressure problems combined with unusual noises, vibrations, or water quality changes suggest complex system issues. These symptoms may indicate failing pressure regulators, pump problems, or municipal supply issues.
Persistent leaks or pressure problems after attempting DIY repairs warrant professional assessment. Continuing to work on problematic plumbing can create more expensive damage.
Municipal water pressure issues require coordination with your water utility company. Professionals can properly test system pressure and communicate with utility providers to resolve supply problems.
Preventive Maintenance Tips
Regular maintenance prevents many water pressure problems from developing and extends your plumbing system’s lifespan. Simple monthly and annual tasks keep your kitchen sink flowing smoothly.
Clean your faucet aerator monthly, especially in areas with hard water. This quick maintenance prevents mineral buildup that causes gradual pressure reduction over time.
Inspect supply valves quarterly for leaks, corrosion, or operation problems. Operate valves periodically to prevent them from seizing in one position.
Schedule annual water heater maintenance including flushing and inspection. This service prevents sediment buildup that affects hot water pressure and reduces energy efficiency.
Monitor your home’s overall water pressure using a pressure gauge attached to an outdoor spigot. Normal residential pressure ranges from 40 to 60 PSI. Readings outside this range indicate system problems needing attention.
Consider installing a whole-house water filter system to reduce sediment and mineral content reaching your fixtures. These systems protect all your plumbing components from debris that causes blockages and wear.
Conclusion
Low water pressure in your kitchen sink disrupts daily routines and signals underlying plumbing issues that worsen over time. Most pressure problems stem from simple causes like clogged aerators or partially closed valves that you can fix yourself using basic tools and techniques.
Start with the easiest solutions first: clean your aerator, check supply valves, and inspect visible components for obvious problems. These quick fixes resolve the majority of kitchen sink pressure issues without requiring professional help or expensive repairs.
More complex problems like cartridge replacement or supply line blockages need careful attention but remain within most homeowners’ capabilities. Take photos during disassembly, work slowly, and don’t hesitate to seek professional help when problems exceed your comfort level.
Regular maintenance prevents most pressure problems from developing. Monthly aerator cleaning, quarterly valve inspection, and annual water heater service keep your kitchen sink flowing properly for years. These simple tasks cost far less than emergency plumbing repairs and protect your entire plumbing system’s performance.
Remember that water pressure problems often develop gradually, making early intervention crucial. Address minor pressure reductions promptly to prevent them from becoming major plumbing emergencies that require expensive professional repairs or complete system replacement.