How to Add a Closet to a Room?
If you’re tired of cramped spaces and nowhere to hang your clothes, you’re not alone. Many people deal with bedrooms and living spaces that lack proper storage solutions. The good news? Adding a closet to a room is totally doable, even if you’ve never done it before.
This guide will walk you through everything you need to know to create a functional, stylish closet space in your home. Whether you’re working with a spare corner or planning a major renovation, we’ve got you covered.
Why You Need a Closet Addition
Let’s start with the basics. A closet isn’t just nice to have. It’s essential for keeping your home organized and functional.
Think about what happens when you don’t have enough storage. Clothes pile up on chairs. Jackets hang on doorknobs. Shoes scatter across the floor. Life gets messy, literally.
A dedicated closet space changes everything. You’ll find your clothes faster. Your room will look cleaner. You’ll protect your garments from dust and damage. Plus, having proper storage actually increases the value of your home. Buyers look for closet space when they consider buying a property.
The right closet setup also protects what matters to you. Hanging clothes properly prevents wrinkles. Organized shelves keep items visible and accessible. You’ll know what you own and stop buying duplicates.
How Much Space Do You Actually Need?
Before you start building, figure out how much room you need for storage.
A basic closet should be at least 3 feet deep. This gives hangers enough space to swing open without hitting anything. The width should be at least 4 feet, but 6 feet is better. This lets you hang multiple outfits side by side.
Count your clothes honestly. How many hanging pieces do you have? How many folded items? Do you need space for shoes, bags, or seasonal decorations?
If you live alone and have a modest wardrobe, a 4-foot by 3-foot space works fine. For larger families or people with extensive wardrobes, aim for 6 feet wide and 4 feet deep, or even bigger.
Don’t forget vertical space. You can stack shelves above hanging rods. You can install shelving on walls. Going up makes a huge difference in total storage capacity.
Types of Closet Systems You Can Build
Not all closets are the same. Let’s explore your options.
Reach-In Closets
These are the most common type. They’re narrow, deep spaces where you walk in and grab what you need. They work great for small rooms because they don’t take up much floor space.
A reach-in closet typically has a single hanging rod with shelves above. You can also add lower shelves for folded items. This style is perfect for bedrooms where space is tight.
Walk-In Closets
Walk-ins give you more room to move around and see everything at once. You can have two walls of hanging space with a center aisle for walking.
Walk-ins need more square footage, but they’re amazing for organization. You can categorize clothes by type. You can create zones for different seasons. Everything stays visible and accessible.
Corner Closets
If you have a spare corner, why not use it? Corner closets fit snugly into the space you already have. They’re less intrusive than a full room addition.
A corner unit usually has hanging rods along two walls that meet at 90 degrees. This creates an L-shape that uses dead space efficiently.
Built-In Closet Systems
These are custom solutions that work with your room’s specific dimensions. You design them to fit your lifestyle and needs.
Built-ins can be simple or elaborate. You might install basic shelves and a rod, or you could add drawers, lighting, and organized compartments.
Planning Your Closet Layout
Good planning prevents expensive mistakes. Take time to design your space properly.
Step 1: Measure Everything
Use a tape measure to find the exact dimensions of where your closet will go. Measure width, depth, and height. Note any obstacles like pipes, electrical outlets, or windows.
Draw your measurements on paper. Make it to scale so you can visualize the space accurately.
Step 2: Decide on Your Layout
Will you use hanging rods, shelves, drawers, or a combination? Most closets work best with multiple storage types.
For typical clothing storage, plan on about 2 inches of rod space per outfit. If you have 20 outfits to hang, you need 40 inches of rod space.
Shelves work great for folded items, bags, and accessories. Space shelves 12-14 inches apart for most items. Shoes need less space, so you can put them on closer shelves.
Step 3: Create a Visual Plan
Sketch out your closet design. Draw where rods will go. Mark shelf locations. Show where doors will open.
You don’t need to be an artist. Simple boxes and lines work fine. This visual plan helps you order materials and prevents confusion during building.
Step 4: Check Local Codes
Some areas have building codes for closets. Check with your local building department before you start.
Requirements might cover door swing space, minimum dimensions, or ventilation. It’s better to know upfront than run into problems later.
Materials You’ll Need
The materials depend on your design, but here’s what most closet projects require.
Framing Materials
If you’re building a new closet, you’ll need:
- 2×4 lumber for the frame
- Wall studs (usually already there)
- Drywall or plywood for walls
- Wood screws or nails
Hanging and Storage
Stock up on:
- Closet rods (1-1.25 inch diameter is standard)
- Rod brackets and supports
- Shelving boards (plywood, MDF, or solid wood)
- Shelf brackets or a shelf rail system
- Hangers for your clothes
Finishing Touches
You’ll also want:
- Paint or wallpaper
- Trim and molding
- Door hardware
- Interior lighting (optional but helpful)
- Labels and organizing supplies
Tools
Basic tools include:
- Hammer and screwdriver set
- Power drill
- Tape measure
- Level
- Saw (circular or hand saw)
- Stud finder
- Sandpaper and paint brushes
Step-by-Step Installation Guide
Now let’s build your closet. Follow these steps carefully.
Step 1: Frame the Space
If you’re adding a closet in an open area, you need to build walls first.
Use 2×4 lumber to create the frame. Position vertical studs 16 inches apart. Add horizontal braces at the top and bottom. Make sure everything is square and level. Use a level tool to check.
Secure the frame to the floor and existing walls with strong fasteners. This creates a sturdy foundation for everything else.
Step 2: Install Drywall
Cover the frame with drywall sheets. Use drywall screws to attach them, spacing screws about 12 inches apart.
Fill the seams between sheets with joint compound. Let it dry, then sand smooth. Apply more coats as needed until seams are invisible.
Step 3: Install the Hanging Rod
The hanging rod is the core of your closet system.
Measure and mark where your rod brackets will go. The rod should be 60-65 inches from the floor for most clothes. Install brackets at the width you need, usually 48-60 inches apart.
Use heavy-duty fasteners. A filled closet rod experiences real weight. Cheap brackets will bend or pull loose. Spend money here.
Slide the rod through the brackets and secure it. Make sure it doesn’t wobble or sag.
Step 4: Install Shelves
Plan your shelf positions based on what you’ll store.
Use a shelf rail system or individual brackets. Mark where brackets go using a level. Make sure each pair of brackets is perfectly level, or items will roll off.
Cut shelf boards to fit your width. Attach them securely to the brackets. Test the weight capacity and make sure shelves don’t flex.
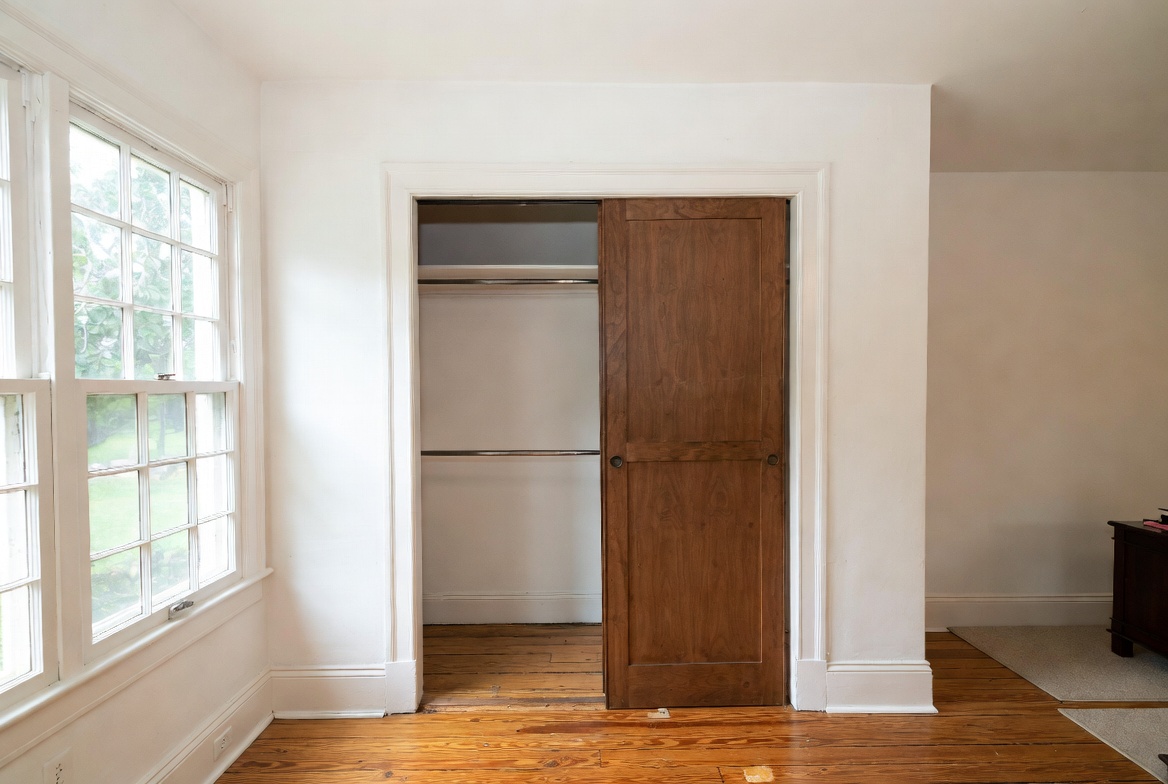
Step 5: Add the Door
Install a door to close off your closet (optional, but usually preferred).
Measure the opening. Standard closet doors are bi-fold, sliding, or hinged styles. Each has pros and cons.
Bi-fold doors use less space but have moving parts that can jam. Sliding doors glide smoothly but need clear wall space on both sides. Hinged doors swing open fully but take up room.
Follow the manufacturer’s instructions for your door type. Use a level during installation to ensure smooth operation.
Step 6: Paint and Finishing
Paint your closet the same color as your room or a complementary shade.
Light colors make small closets feel bigger. Bright colors create energy. Neutral tones are always safe choices.
Add trim around the door opening. Install any shelving accessories like shelf liners or dividers.
Step 7: Install Lighting
Good lighting helps you see everything in your closet.
A simple battery-operated light strip works great and costs very little. For permanent lighting, install a standard ceiling fixture or LED strips along the walls.
Position lights where they illuminate the hanging rods and shelves. Avoid harsh shadows.
DIY vs. Professional Installation
Should you build your closet yourself or hire someone?
DIY Advantages:
You save money. Professional installation costs thousands. If you do it yourself, you pay only for materials.
You have total control. You design exactly what you want without compromise.
You learn valuable skills. Building a closet teaches you basic carpentry, which helps with future projects.
You work at your own pace. No contractors on a schedule. No pressure to finish quickly.
DIY Disadvantages:
Mistakes happen. Poor measurement or installation means fixing problems later.
Tools cost money. If you don’t own basic tools, renting or buying adds expense.
It takes time. DIY projects move slower than professional work.
Some jobs are complicated. Electrical work or structural changes might need expertise.
Professional Advantages:
Experts get it right the first time. No guesswork or trial and error.
They work fast. A professional finishes in days. You take weeks.
They handle code issues. Professionals know building codes and avoid violations.
You get warranties. Professional work usually comes with guarantees.
Professional Disadvantages:
High cost. Labor makes up a big part of the bill.
Scheduling challenges. Coordinating with contractors takes planning.
Less control. You might not get exactly what you envisioned.
You depend on their expertise. A bad contractor creates bad results.
For small closet projects with no structural changes, DIY works well. For large additions or complex layouts, professionals are worth the investment.
Organizing Your New Closet
Building the closet is half the battle. Organizing it properly is the other half.
Sort Your Clothes
Before putting anything away, go through all your clothes. Keep items you actually wear. Donate or sell things that don’t fit or that you haven’t worn in a year.
Aim to keep 80 percent of your closet as active clothing you actually use.
Use Good Hangers
Cheap plastic hangers break. Quality hangers protect your clothes and use space efficiently.
Velvet or felt hangers grip fabric so clothes don’t slip. They also take up less space than bulky plastic hangers.
Organize by Category
Group similar items together. Put all pants in one section, shirts in another, dresses in a third section.
This makes getting dressed faster. You know exactly where to look.
Use Shelf Dividers
Dividers keep folded stacks neat and tidy. They prevent one item from tumbling into another when you grab something.
You can buy dividers or make them from cardboard.
Label Everything
Labels seem simple, but they help. Label shelves by season, type, or size.
This is especially helpful if multiple people share the closet.
Invest in Storage Boxes
Clear plastic boxes let you see contents without opening them. Store seasonal items, accessories, or rarely-used clothes in labeled boxes.
Stack boxes efficiently to use wall and shelf space.
Add Hooks
Hooks take advantage of vertical space. Install them inside the closet door or on available walls.
Use them for belts, scarves, bags, or pajamas.
Keep It Maintained
Organization isn’t a one-time project. Spend 10 minutes weekly keeping your closet tidy.
Return items to their spots. Remove empty hangers. Straighten folded stacks.
Regular maintenance prevents the closet from becoming a disaster.
Common Mistakes to Avoid
Learn from others’ mishaps. Here are mistakes people make with closet projects.
Not Measuring Twice
Measure more than once. Seriously. One mistake means redoing work.
Measure from multiple points. Check your math. Verify dimensions before cutting anything.
Ignoring Structural Issues
Pipes, electrical wires, and supports exist for reasons. Messing with them creates major problems.
Locate these items before you build. Plan around them.
Using Cheap Materials
Budget matters, but not on critical items. A hanging rod will break if you use cheap brackets.
Spend more on items that hold weight. Save money on paint and decorative items.
Crowding the Space
More storage isn’t always better. Cramming in too many rods and shelves makes the closet hard to use.
Leave breathing room. You need space to hang clothes without crowding. You need room to reach items.
Forgetting About Ventilation
Closets need air circulation. Mold and mildew develop in stagnant, humid spaces.
Leave a gap at the bottom of your door. Don’t seal it completely. Install a small vent if possible.
Poor Lighting
Don’t rely on the hallway light to see inside your closet. Install your own lighting.
You’ll actually use the closet more if you can see everything clearly.
Ignoring Your Lifestyle
Design your closet around how you actually live. If you wear mostly casual clothes, you need more casual hanging space.
If you work from home, you don’t need business clothes storage. If you’re a parent juggling multiple schedules, you need quick-access zones.
Match your storage to your reality.
Budget Planning
What will your closet project cost?
Basic Closet Addition: $200-500
Simple shelving and rods in an existing space. Materials only, DIY installation.
Mid-Range Closet: $500-1500
Quality materials, organized system, basic lighting. DIY installation with some finishing details.
Premium Closet: $1500-3000
Professional-grade components, excellent organization, custom features, DIY or professional installation.
Professional Installation: Add $2000-5000+
Labor costs depend on complexity and location.
Start with what you can afford. You can always expand later. Add shelves, upgrade hangers, install better lighting as your budget allows.
Maintenance and Care
Keep your closet in good shape long-term.
Dust Regularly
Dust collects on hanging rods and shelves. Wipe them down monthly to keep your clothes clean.
Check Hardware
Brackets and fasteners loosen over time. Check them every few months. Tighten anything that moves.
Monitor Weight
Overloaded shelves sag and eventually fail. Distribute weight evenly. Don’t pile everything on one shelf.
Watch for Moisture
If you notice dampness or smell mustiness, improve ventilation. Install a small dehumidifier if needed.
Update When Needed
Hangers wear out. Shelves crack. Doors get sticky. Replace worn parts promptly.
A well-maintained closet lasts for years.
Final Thoughts
Adding a closet to a room is an achievable project that makes real difference in your daily life. You gain organization, functionality, and peace of mind.
The project doesn’t have to be complicated or expensive. You can start simple and build from there. A basic system with one hanging rod and a few shelves works fine. You can add complexity as you grow.
The most important step is just starting. Make a plan. Measure carefully. Pick quality materials for key components. Take your time and do it right.
Once your closet is complete, maintain it properly. Keep it organized. Address problems quickly before they become expensive.
A good closet system makes every day easier. You find clothes faster. Your room looks cleaner. Your belongings last longer. That’s worth the effort.
Start your closet project this week. Your future self will thank you.

Hi, I’m Mary, the founder of Homygear.com. I’m passionate about creating a comfortable, smart, and beautiful home. I share practical insights and real-world experience on home gear that makes everyday life easier. Behind the scenes, my dedicated research team studies products in depth, and our writers craft honest reviews using trusted, authentic sources—so you can choose home gear with confidence.