How to Add a Bathroom Fan?
Bathroom fans are one of the most underrated home improvements you can make. If your bathroom gets steamy, smells bad, or feels humid, a bathroom exhaust fan can fix all those problems. Installing one is easier than you might think. This guide walks you through everything you need to know.
Why Your Bathroom Needs a Fan
Bathrooms create moisture. Showers, baths, and even sinks release steam into the air. Without proper ventilation, this moisture settles on walls, mirrors, and ceilings. Over time, it causes problems.
Moisture damage is real. It leads to mold growth, peeling paint, and warped wood. Mold can make you sick. It causes respiratory issues and allergies. Mold spreads fast and costs a fortune to remove.
A bathroom ventilation fan removes moisture before it becomes a problem. It pulls humid air out of the room and sends it outside. This keeps your bathroom dry and healthy. Your walls stay clean. Your ceilings stay intact. Your family stays healthy.
Odor removal is another benefit. Bathrooms can smell unpleasant. Good ventilation removes these odors immediately. Your whole house smells fresher.
Mold prevention matters. Mold loves warm, wet places. A bathroom exhaust fan creates an environment where mold cannot thrive.
Types of Bathroom Fans
Not all fans are the same. You have several options to choose from.
Standard Exhaust Fans
The most common type is a simple exhaust fan. It pulls air from the bathroom and pushes it through a duct to the outside. These fans are affordable and effective. They’re a great starting point if you’ve never installed one before.
Standard exhaust fans come in different sizes. Size matters. If your fan is too small, it won’t remove moisture fast enough. If it’s too big, it wastes energy. We’ll talk about sizing later.
Heat Recovery Ventilation Fans
Heat recovery fans do something special. They pull out humid air but capture the heat from that air. The heat warms incoming fresh air. This keeps your home from losing warmth. Heat recovery fans cost more, but they save energy over time.
If you live somewhere cold, a heat recovery fan makes sense. If you live somewhere warm, a standard fan works fine.
Energy Recovery Ventilation Fans
Energy recovery fans work like heat recovery fans, but they also manage moisture. They’re even more efficient. They cost the most, but they offer the best performance. These fans are ideal for people who really care about energy savings.
Combination Fans
Some fans combine an exhaust fan with lights or heaters. A bathroom exhaust fan with lights saves space and looks neat. Fans with heaters help you stay warm while bathing. Fans with night lights provide gentle illumination.
How to Size Your Bathroom Fan
Sizing your fan correctly ensures it works properly. Too small and it fails. Too big and you waste money.
Room size is the starting point. Multiply your bathroom’s length by its width by its height. This gives you the room’s total volume in cubic feet.
For example, a bathroom that’s 8 feet long, 6 feet wide, and 8 feet tall has a volume of 384 cubic feet. You need a fan that removes this volume about 6 times per hour. So you need 384 × 6 = 2,304 cubic feet per minute capacity.
Wait, that sounds wrong. Let me fix that. You need a fan rated in CFM. CFM stands for cubic feet per minute. The general rule is 1 CFM per square foot of bathroom space.
So if your bathroom is 50 square feet, get a fan rated for at least 50 CFM. For a 100 square foot bathroom, get a 100 CFM fan. It’s that simple.
If your bathroom gets a lot of moisture, add extra CFM. A bathroom with lots of showers needs a stronger fan. Add 25-30 CFM for heavy moisture areas.
Ductwork also affects performance. Long ducts reduce fan efficiency. If your duct runs 25 feet, choose a fan rated 10-15% higher than your calculated CFM.
Check the box. Every fan has a label listing its CFM rating. This tells you exactly how much air it moves.
Tools You’ll Need
Before you start, gather your tools. Having everything ready makes the job faster and easier.
- Drill with bits
- Screwdriver set (flathead and Phillips)
- Drywall saw or oscillating multi-tool
- Measuring tape
- Level
- Ductwork and clamps
- Electrical wire and connectors
- Wire stripper
- Insulated tape
- Caulk gun and caulk
- Safety glasses and gloves
- Flashlight or headlamp
- Ladder or step stool
Some jobs need special equipment. If you have to cut through wood framing, you might need a reciprocating saw. If your bathroom has textured ceilings, cover them before cutting. If the wiring is complicated, call a licensed electrician. There’s no shame in getting help.
Where to Install Your Bathroom Fan
Location matters. You want the fan in the right spot for maximum effectiveness.
Ceiling or Wall Placement
Most fans go in the ceiling. Ceiling placement is ideal because it pulls air upward where moisture rises. Moisture naturally moves up, so you’re working with physics.
Wall-mounted fans exist, but they’re less common. They work in tight spaces where ceiling space isn’t available. Wall fans pull air from the side, which is less efficient than ceiling placement.
Center the fan over the toilet or shower. This position captures moisture at the source. Don’t place it in a corner. Corner placement reduces suction efficiency.
Away from Obstructions
Keep the fan away from light fixtures and ceiling fans. These can interfere with airflow. They might also create noise problems.
Don’t install the fan directly above air returns from your home’s heating system. Return air pulls the exhaust back into your home. This defeats the purpose.
Ductwork Routing
Your ductwork can’t run through walls or attics unnecessarily. The duct needs to go straight outside. Short, straight ductwork moves air faster. Long, bent ducts slow airflow and reduce effectiveness.
If you live in a cold climate, insulate the ductwork. Uninsulated ducts lose heat through the walls. Insulation keeps warm air warm.
The exterior damper matters. This flapper prevents outside air from coming back in. Install it on the outside where the duct exits. It should open when the fan runs and close when it stops.
Installation Steps
Now comes the actual work. Don’t worry—it’s manageable.
Step 1: Turn Off Power
Safety first. Find the circuit breaker that controls the bathroom outlet or light. Switch it off. Test the outlet with a voltage tester to confirm power is gone. Electricity is dangerous. Respect it.
Step 2: Plan Your Ductwork Route
Walk through your attic or crawlspace. Map out the shortest path to the outside. Look for existing ducts and obstacles. Avoid sharp turns. Smooth bends work better.
If there’s no attic access, you might need to run the duct through a soffit or fascia board. This requires different techniques. A professional can help with this.
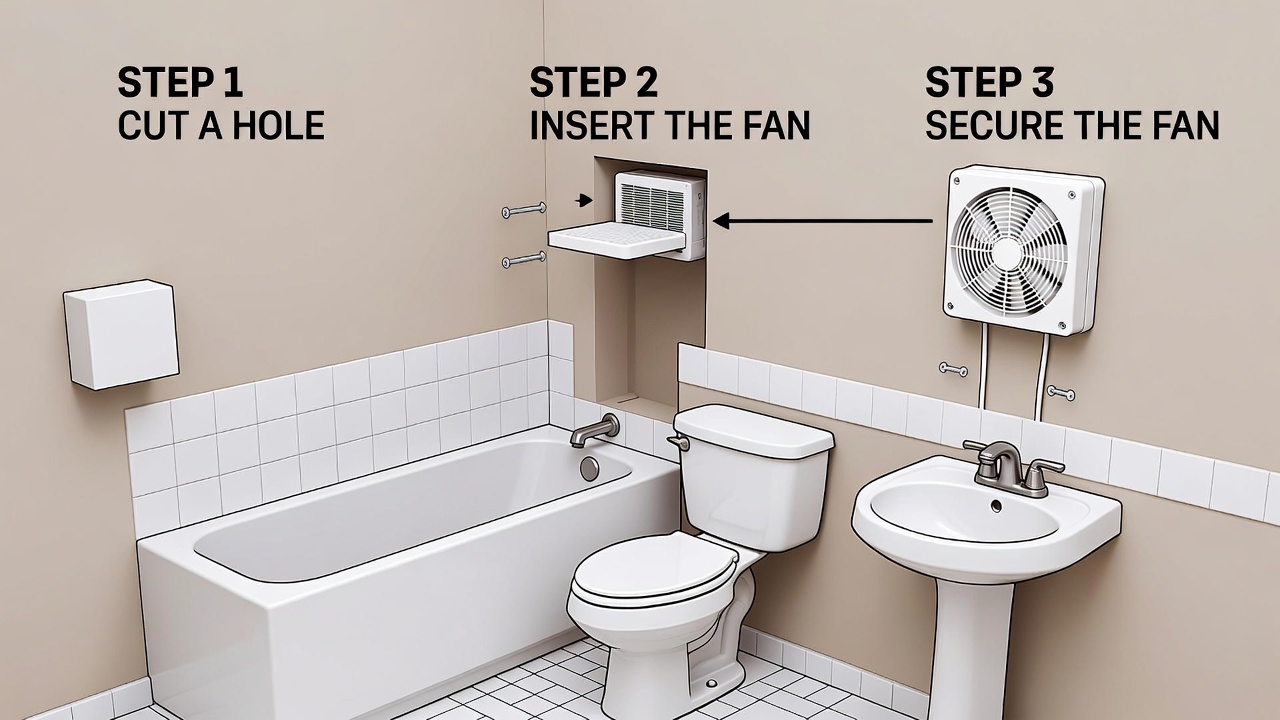
Step 3: Cut the Ceiling Hole
Measure your fan’s diameter. Most bathroom fans are 6 inches, but some are 8 inches. Mark the center point. Use a drywall saw to cut a hole slightly larger than the fan opening. Wear safety glasses. Drywall dust gets everywhere.
Support the cutout piece so it doesn’t fall into the bathroom below. Drywall pieces can hurt someone or damage fixtures.
Step 4: Run Your Ductwork
Connect the fan’s outlet to your ductwork. Use metal ductwork when possible. Flexible ductwork works but is less efficient. Flex ducts sag and accumulate lint.
Secure the duct with metal clamps. Don’t use tape alone—clamps hold it tight. Check that the duct slopes slightly downward toward the exit. This prevents condensation from pooling inside.
Run the duct to the exterior wall or roof. Take the shortest path possible. Avoid running ducts through unconditioned spaces. Insulate any ducts that pass through attic areas.
Step 5: Install the Fan Housing
Slide the fan unit up through the ceiling hole. The mounting bracket should rest on the ceiling joists. Most fans have adjustable brackets that fit between different joist spacing.
Secure the fan with the provided fasteners. Make sure it’s tight and level. A wobbly fan will vibrate and make noise.
Connect the ductwork to the fan outlet. Seal any gaps with foil tape. This prevents air leaks. Leaks reduce efficiency and increase energy bills.
Step 6: Wire the Fan
This is where you connect electricity. If you’re not comfortable with wiring, hire an electrician. Electrical mistakes are dangerous.
Most fans come with a power cord. You’ll either plug it in or wire it to a switch. If you’re wiring to a switch, connect the hot wire (usually black) to one switch terminal. Connect the neutral (white) to the neutral line. Connect the ground (green or bare copper) to the ground.
Use wire nuts to connect wires. Twist wires together tightly. Screw the nut over them. The connection should be strong. Tug gently to confirm it’s tight.
Step 7: Install the Trim Ring
The trim ring (also called a flange or trim collar) covers the gap between the fan and the ceiling. Slide it over the fan outlet. Secure it with the included fasteners or caulk. Match the ceiling color with caulk or paint the trim ring.
Step 8: Test the Fan
Turn the power back on. Flip the switch. The fan should run immediately. Listen for unusual noise. Hold a piece of paper near the inlet. It should pull toward the opening.
Check the exterior. The damper should open. You should feel air coming out. Confirm the damper closes when the fan stops.
Ductwork Considerations
Ductwork makes or breaks a ventilation system. Good ductwork ensures your fan works well. Bad ductwork wastes energy and creates noise.
Duct Sizing
Your duct diameter should match your fan’s outlet. A 6-inch fan needs 6-inch ductwork. Undersized ducts restrict airflow. Oversized ducts waste space and reduce velocity.
Duct Material Choices
Metal ducts are better than flexible ones. Metal is rigid, resists sagging, and resists damage. Flexible ducts are cheaper but less efficient.
Vinyl or plastic ducts absorb moisture. Never use them for exhaust air. They’ll get moldy and nasty. Metal ducts are the way to go.
Insulation for Cold Climates
If your climate gets cold, insulate the ductwork. Use R-8 or R-12 insulation. Wrap it around the outside of the duct. Secure it with foil tape.
Insulation prevents condensation inside the duct. Without insulation, warm, moist air hits cold ductwork. This causes dripping and water damage.
The Exterior Damper
The damper is crucial. It’s a flapper at the duct’s exterior exit. It opens when your fan runs. It closes when the fan stops.
Without a damper, outside air flows backward through your duct. This brings cold air (or warm air) into your home. The damper prevents this energy waste.
Check the damper annually. Clean out any debris or lint. Make sure it moves freely.
Connecting to Existing Switches
Many people want to connect their new fan to an existing light switch. This works well.
If your bathroom light switch isn’t controlled by a GFCI outlet, you can probably connect your fan to it. The switch sends power to the light. You can split that power to also control the fan.
Turn off the breaker. Remove the switch plate. Use a voltage tester to confirm power is off. Unbind the wires and loosen the switch.
Identify the incoming hot wire (usually black). You need to connect your fan to this wire. Use a wire nut to connect multiple wires. Wrap the connection with electrical tape.
Reassemble everything. Restore power. Test both the light and fan.
If you’re unsure, call a licensed electrician. Wiring mistakes cause fires. It’s not worth the risk.
Ventilation Standards and Building Codes
Your area has building codes. Codes specify how fans must be installed.
Most codes require exhaust air to exit outside the home. Some areas require dampers. Some require insulated ductwork. Some require specific duct materials.
Check with your local building department before installing. They tell you exactly what’s required. Some installations require permits. Permits ensure work is done safely.
If you’re selling your home later, proper installation protects you. Buyers want code-compliant improvements. Improper installation creates problems and liability.
Humidity and Moisture Levels
A good bathroom fan reduces humidity. The ideal humidity level is between 30% and 50%. Below 30% is dry. Above 50% invites mold.
Run your fan during and after showers. Leave it running for at least 20-30 minutes after bathing. This removes all the moisture.
Some fans have humidity sensors. They automatically turn on when moisture reaches certain levels. This is convenient and saves energy.
Continuous operation fans run all the time at low speed. They silently work in the background. These are great for bathrooms that always feel damp.
Noise Levels
Fan noise matters. A noisy fan bothers people and gets turned off. A quiet fan is used more.
Noise is measured in sones. One sone is the loudness of normal conversation. Half a sone is barely audible. Two sones is quite loud.
Look for fans rated 1 sone or less. They’re barely noticeable. These cost a bit more but are worth it.
Noise also comes from poor ductwork. Flex ductwork rattles. Ducts with sharp turns create whistling sounds. Metal ducts with smooth bends are quietest.
Vibration-dampening mounting brackets reduce noise transmission into the ceiling. These cost extra but really help.
Energy Efficiency
Bathroom fans use electricity. Efficient fans cost less to run.
Look for ENERGY STAR certified fans. These use less power while moving the same amount of air. Over time, they save you money.
CFM per watt is an efficiency measure. Higher numbers mean better efficiency. A good bathroom fan delivers at least 3-4 CFM per watt.
Run your fan only when needed. Don’t run it all day if nobody’s in the bathroom. Timers help. Set the timer for 15-30 minutes. The fan shuts off automatically.
Common Installation Mistakes
Learning from others’ mistakes prevents your own.
Undersized fans are the most common mistake. People buy the cheapest, smallest fan. It can’t handle moisture. Their problem never gets solved.
Ductwork ending in the attic is dangerous. Moisture goes into the attic instead of outside. This causes rot and mold in framing. Always run ducts outside the home.
Using flexible ductwork throughout creates problems. The duct sags. Lint collects. Airflow reduces. Use short sections of flex duct, but use metal ductwork for the main run.
Skipping the exterior damper wastes energy. Backward airflow defeats the purpose of the fan.
Not insulating cold climate ducts causes condensation. Water drips back into the bathroom. This defeats moisture removal. Insulate ducts in cold areas.
Improper electrical connections cause fires. If you’re not confident with wiring, hire a professional. It’s the safe choice.
Neglecting attic clearance creates fire hazards. Ducts passing through attic spaces need 6 inches of clearance from insulation. Heat buildup can ignite materials.
Maintenance and Care
Your bathroom fan needs minimal maintenance, but some care keeps it running well.
Clean the intake cover monthly. Dust and hair collect there. Remove the cover. Use a vacuum or brush to clean it. Reinstall when clean.
Check the ductwork quarterly. Look in the attic. Confirm the duct is connected securely. Verify the exterior damper moves freely.
Listen for unusual sounds. If noise increases, something’s wrong. Check the ductwork connection. Tighten loose clamps.
Replace the damper if it sticks. If it doesn’t close fully, moisture will be wasted. Order a replacement and swap it out. It’s a 10-minute job.
Vacuum the exhaust hood yearly. The exterior hood collects debris. Pull vegetation away. Clear any lint. Clean the damper flapper.
Troubleshooting Problems
Your fan stops working? Here’s how to fix common issues.
The fan doesn’t turn on. Check the breaker. Confirm power reaches the switch. Test the switch itself with a multimeter. If the switch is bad, replace it. If power doesn’t reach it, you have a wiring problem. Call an electrician.
Poor airflow or weak suction. First, check if the filter is clogged. Some fans have filters. Clean or replace them. Then check the ductwork. Confirm it’s not kinked or crushed. Look for disconnected sections. Verify the exterior damper opens fully.
Excessive noise. Tighten loose clamps. Check the fan mounting brackets. Ensure the fan isn’t touching the ceiling. Confirm flex ductwork isn’t vibrating. Consider damping pads under the fan housing.
Moisture still accumulates. Run the fan longer. Twenty minutes might not be enough. Run it for 30-45 minutes after showers. Confirm your CFM rating is adequate for your bathroom size. An undersized fan won’t work no matter what.
Ice buildup on the exterior hood. This happens in very cold climates. Insulate the ductwork. Ensure the duct isn’t bringing warm air into cold space. Replace the damper if it leaks. Consider a damper with a frost guard feature.
When to Call a Professional
Some jobs are DIY. Some need experts.
Call a professional if:
- You’re uncomfortable working with electricity
- Your bathroom has no attic access
- You need to modify roof framing
- Local codes require licensed installation
- The ductwork runs a long distance
- You have existing HVAC systems to work around
- You’re unsure about anything
Professionals know local codes. They have special tools. They’ve done this hundreds of times. Hiring them ensures the job is done right.
Final Thoughts on Bathroom Fans
A bathroom exhaust fan is one of the best investments for your home. It costs between $100-$400 installed. It prevents mold. It removes odors. It protects your walls and ceilings.
Installation is manageable for confident homeowners. If you’re uncomfortable with any step, hire a professional. A proper installation lasts 10-15 years. When it fails, replacement is simple.
Your bathroom will feel fresher. Your family will stay healthier. Moisture problems disappear. Your home’s resale value goes up.
Don’t delay. Mold grows fast. Moisture damage is expensive to repair. A simple fan prevents all these problems.
Get a quality fan. Properly size it for your space. Install it correctly. Maintain it annually. Enjoy years of fresh, dry, healthy bathroom air.
Your future self will thank you.

Hi, I’m Mary, the founder of Homygear.com. I’m passionate about creating a comfortable, smart, and beautiful home. I share practical insights and real-world experience on home gear that makes everyday life easier. Behind the scenes, my dedicated research team studies products in depth, and our writers craft honest reviews using trusted, authentic sources—so you can choose home gear with confidence.