How to Install Vinyl Plank Flooring?
Installing vinyl plank flooring is one of the easiest flooring projects you can take on as a DIYer. You don’t need special skills or expensive tools. If you can measure, cut, and click pieces together, you can handle this job. Let me walk you through every step so you feel confident from start to finish.
Why Vinyl Plank Flooring Is Perfect for Beginners
Vinyl plank flooring, also called luxury vinyl plank or LVP, has become the go-to choice for homeowners who want a beautiful floor without the headache. Here’s why so many people love it:
It’s budget-friendly. Vinyl flooring costs way less than hardwood or tile. You save money on materials and labor.
Installation is simple. Most modern vinyl plank floors use a click-lock system. You don’t need glue, nails, or special equipment. The planks snap together like puzzle pieces.
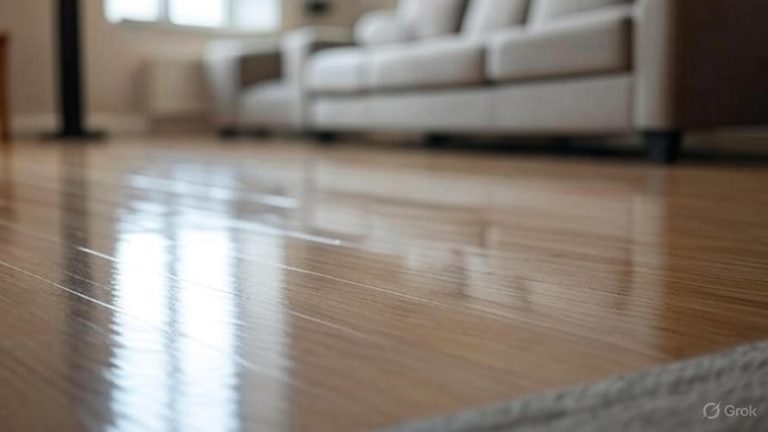
It looks amazing. Today’s vinyl floors mimic real wood, stone, and tile so well that guests often can’t tell the difference.
It’s super durable. Vinyl can handle moisture, scratches, and heavy foot traffic. It’s perfect for kitchens, bathrooms, and basements.
It’s forgiving. If you make a small mistake, you can often pry up the plank and try again.
What You’ll Need Before You Start
Tools Required
You won’t need a huge collection of tools. Here’s what to grab:
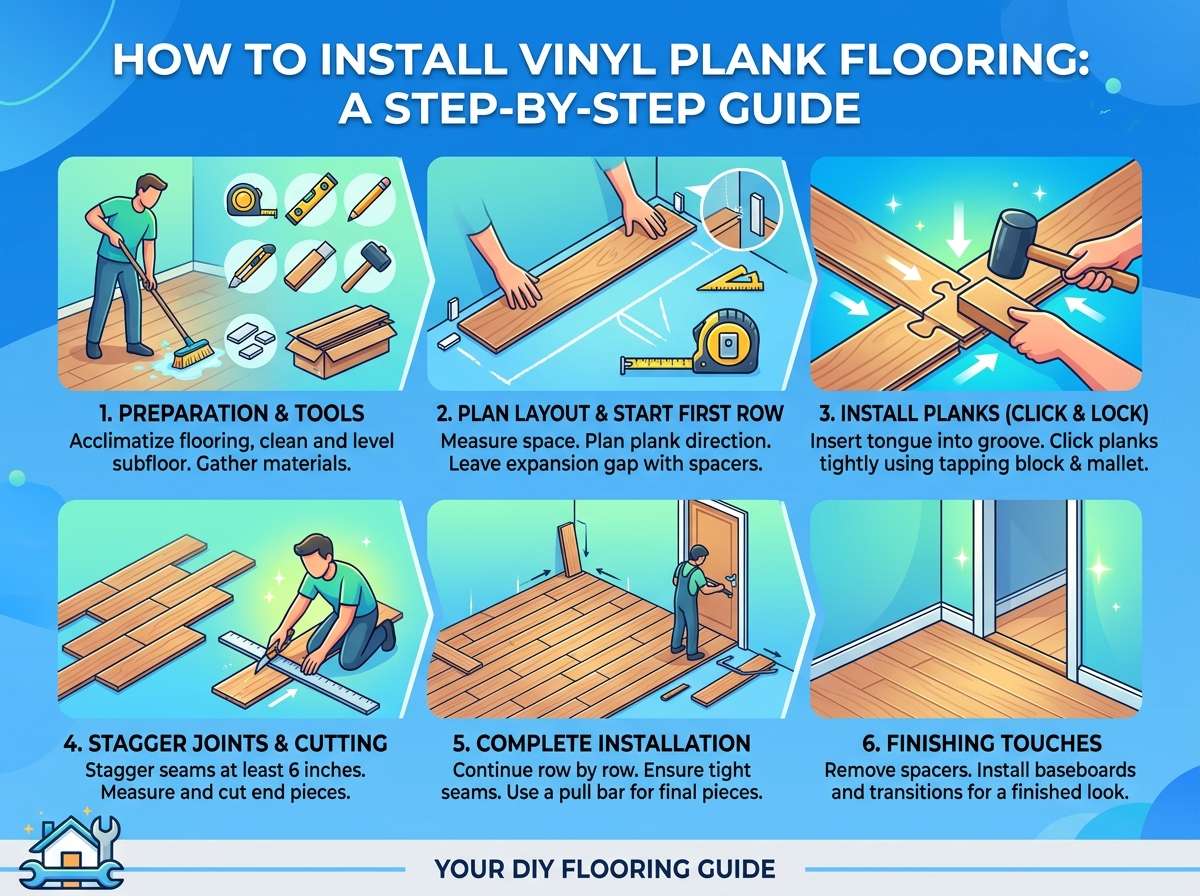
Measuring tape. Get at least a 25-foot tape measure. You need it to measure your room and mark planks.
Handsaw or miter saw. You’ll cut planks to fit edges and doorways. A power miter saw speeds things up, but a handsaw works fine.
Tapping block. This is a small piece of scrap wood. You tap it with a mallet to connect planks without damaging them.
Mallet or hammer. Use it with your tapping block to gently push planks into place.
Pry bar. This helps remove old flooring and adjust planks as you work.
Spacers. These small wedges keep an even gap between your floor and the walls. You can buy them cheap, or use scrap wood.
Utility knife. For cutting planks and trimming underlayment.
Pencil and straightedge. Mark your cuts clearly so they’re straight and clean.
Knee pads (optional). You’ll spend time on your knees. Padding makes it comfortable.
Materials You Need
Vinyl planks. This is the flooring itself. Buy about 10% extra to account for cuts and mistakes.
Underlayment. This goes under your vinyl flooring. It adds cushioning, reduces noise, and helps with moisture protection. Check if your vinyl planks come with attached padding—if not, you need separate underlayment.
Transition strips. These metal or wood pieces cover the edge where your new floor meets other rooms or different floor heights.
Spacers. Small plastic wedges that keep your floor the right distance from walls.
Trim pieces. Quarter-round or baseboards hide the gap between your floor and walls.
Preparing Your Subfloor: The Critical Foundation
The most important step before laying vinyl is preparing your subfloor correctly. This makes or breaks your installation.
Remove Old Flooring
If you’re replacing existing flooring, pull it up completely. Use your pry bar to lift old carpet, tile, or wood. Remove all nails, staples, and adhesive.
For stubborn tile adhesive or old glue, rent a floor scraper from your local hardware store. Scrape the subfloor until it’s smooth.
Check Your Subfloor Condition
Walk across the room. Feel for soft spots, bouncing, or movement. A bouncy subfloor causes problems. If your floor flexes too much, you may need to repair the joists below. This is rare, but it’s worth checking.
Look for cracks, holes, and uneven spots. Use your straightedge to find high and low areas. A subfloor needs to be relatively level.
Level Your Subfloor
Small variations are okay—vinyl is forgiving. But big dips and peaks cause problems. If you have a dip deeper than 1/8 inch over a 10-foot distance, you should level it.
Use a self-leveling floor compound for concrete subfloors. Pour it on low spots and let it dry. It spreads out on its own.
For wood subfloors, sand down high spots or add shims under joists to raise low spots.
Fix Moisture Issues
Moisture is the enemy of all flooring. Check for leaks, dampness, or water damage. Vinyl is moisture-resistant, but the subfloor below it can rot.
In basements, use a moisture barrier under the underlayment. If your subfloor has active moisture problems, address them before you install flooring.
Clean Everything
Sweep or vacuum thoroughly. Dust and debris get trapped under your vinyl and cause bumps. Clean concrete with a damp mop and let it dry completely.
Choosing Your Layout: Plan Before You Plank
The way you arrange your planks affects the final look and how much waste you’ll have.
Decide Your Direction
Planks usually run the length of the longest wall. This makes the room feel bigger and is typically the easiest direction to work.
Run planks parallel to windows to highlight natural light. Run them perpendicular to the main entry direction if you prefer.
The direction really comes down to what looks best to you.
Plan Your Starting Point
Start in the corner of your room. Usually, you begin along the longest wall and work toward the exit door. This way, you don’t box yourself in.
Lay out your first row without clicking planks together. This is called a “dry run.” Measure and see if your planks fit evenly. If the last plank is too narrow (less than 2 inches), cut planks from the first row so the last row is wider.
Arrange for Visual Balance
Stagger the seams between rows. Don’t let planks line up vertically—it looks odd. Offset each row by at least 6 inches, ideally more.
Many installers start the second row with a half-plank or a plank trimmed at an angle. This creates a random offset pattern that looks natural.
Installing Your Underlayment
Underlayment sits directly on your subfloor. It’s a thin cushioning layer.
Unroll and Lay Down
Start at one corner. Unroll your underlayment across the room. It typically comes in rolls that are 3 or 4 feet wide.
Lay rows next to each other, butting the edges together. Don’t overlap—overlapping creates bumps. You want it flat and tight.
Tape the Seams
Use painter’s tape or underlayment tape to connect seams where two rolls meet. This prevents them from shifting as you walk on them.
Trim the Edges
Use your utility knife to cut underlayment at walls and doorways. Leave a small gap (about 1/2 inch) between the underlayment and the wall. This allows air to circulate.
Installing Your Vinyl Planks: The Main Event
Now comes the fun part—actually laying your floor.
Start Your First Row
Place spacers along the wall you’re starting from. Spacers hold your planks exactly 1/4 inch from the wall. This gap allows for expansion and contraction.
Position your first plank in the corner. Make sure it’s straight and pushed snugly against the spacers.
Click Planks Together
Most vinyl planks have a click-lock system. Angle the second plank at 45 degrees and slide the tongued edge into the grooved edge of the first plank. Then drop the plank flat and press down. You hear a click sound when it locks.
Some systems use a different mechanism, so check your floor’s instructions.
Keep Rows Straight
As you add planks, use your straightedge to check that each row is level and straight. Crooked rows are hard to fix later.
Tap gentle taps with your mallet and tapping block if a plank isn’t seating fully. Never force it—forcing damages the locking mechanism.
Stagger Your Seams
After you complete the first row, start the second row with a partial plank. If your first plank is 4 feet long, start the second row with a 2-foot piece (or whatever creates good offset).
This stagger pattern continues throughout the room. Check your flooring instructions for specific stagger recommendations—usually at least 6 inches of offset.
Cut Planks for Edges and Doorways
Measure the space at the end of each row. Cut your plank to length using your miter saw or handsaw. Always cut the grooved end (the end without the tongue).
For doorways and irregular shapes, make a template from cardboard first. Trace the shape onto the plank, then cut carefully.
Undercut doorway trim (cut the jamb slightly) so planks fit under it smoothly. This looks cleaner than resting planks against the trim.
Work Toward the Exit
Install rows working from your starting wall toward the door. This way, you don’t trap yourself in a corner.
Handling Corners, Doorways, and Transitions
These spots need extra attention but aren’t complicated.
Outside Corners
At outside corners (like closet entries), the plank extends naturally around the corner. Just cut it to length on both sides.
Inside Corners
Inside corners (like where two walls meet) require careful fitting. Measure both sides separately. You might need to cut an L-shape into one plank to fit around the corner.
Doorway Transitions
Where your vinyl meets another flooring type, install a transition strip. This metal or wood trim bridges the height difference and looks professional.
Screw or nail the transition strip to the subfloor first (follow the product instructions). Then install your last vinyl plank so it fits snugly against the transition.
Closets and Small Spaces
Install flooring in closets the same way you install the main room. Just work in the same direction and keep seams staggered.
The Final Touches
Once all planks are down, your floor isn’t quite done.
Remove Spacers
After you complete installation, carefully remove all the spacers around the walls. Gently pry them out with your pry bar.
Install Trim
Install baseboards or quarter-round trim around the room perimeter. This covers the gap between your flooring and the wall. It also protects the edge of your vinyl.
Nail trim into the wall, not the flooring. The flooring needs to move slightly with temperature and humidity changes. If trim is nailed to both the floor and wall, it restricts this movement.
Install Transition Strips
Install any transition strips at doorways and between rooms. Follow the specific installation instructions for your transition type.
Acclimate Before Walking
Before you move furniture back in, let your floor sit for 24 hours. This allows the planks to acclimate to your room’s temperature and humidity. Some manufacturers recommend this waiting period—check your instructions.
Common Installation Mistakes to Avoid
Learning from others’ errors saves you time and frustration.
Mistake 1: Not Preparing the Subfloor
A bad subfloor causes buckling, gaps, and squeaks. Spend time getting it right. It’s worth the effort.
Mistake 2: Forgetting Spacers
Vinyl expands and contracts. Without spacers, your floor buckles at the edges. Always use them.
Mistake 3: Not Staggering Seams
Random seam placement looks better and is structurally stronger. Plan your stagger pattern before you start.
Mistake 4: Installing Too Tight
Don’t force planks together. A gentle click is all you need. Forcing damages the locking system.
Mistake 5: Walking on the Floor Too Soon
Let your vinyl acclimate for at least 24 hours before heavy use. Check your manufacturer’s instructions.
Mistake 6: Skipping the Underlayment
Underlayment provides cushioning, reduces noise, and protects against moisture. Don’t skip it.
Mistake 7: Ignoring Room Temperature
Don’t install vinyl in a cold room. Vinyl becomes stiff and brittle in cold temperatures. Install only when your room is between 65-85°F.
Maintenance and Care Tips
Keeping your vinyl floor in great shape is easy.
Daily Care
Sweep or vacuum regularly. This prevents dirt from scratching the surface.
Wipe up spills immediately. Vinyl is waterproof, but standing water can seep through seams.
Weekly Cleaning
Mix a few drops of dish soap in warm water. Use a damp mop to clean your floor. Wring out your mop well—you want it damp, not soaking wet.
What to Avoid
Don’t use abrasive cleaners or scrubbers. They scratch the surface.
Avoid excessive water. Vinyl is moisture-resistant, not waterproof.
Don’t use oil-based cleaners or wax. They leave buildup and make the floor slippery.
Protect the Surface
Use furniture pads under heavy items. They prevent indentation and scratching.
Place rugs in high-traffic areas. They reduce wear and add warmth.
Avoid dragging heavy furniture. Lift and carry instead.
Installation Time and Cost Expectations
How long does installation take? For an average room (150-200 square feet), expect 1-2 days if you’re working alone.
What about costs? Vinyl planks range from $1 to $5+ per square foot, depending on quality. A 200-square-foot room might cost $200 to $1,000 in materials alone. Underlayment adds another $50-100. Transition strips and trim cost another $50-100.
Professional installation costs $3-8 per square foot, but DIY saves all those labor costs.
Troubleshooting Common Issues
Floor Buckles or Warps
This usually means moisture got under the flooring. Ensure your subfloor is dry and use proper spacers to allow expansion room.
Gaps Between Planks
Gaps can mean planks weren’t clicked together fully, the subfloor isn’t level, or the floor has contracted due to low humidity. Most gaps close up once your floor acclimate.
Squeaking or Hollow Sounds
This happens if the subfloor isn’t flat or underlayment isn’t installed properly. The solution depends on the cause.
Planks Won’t Click Together
Check that you’re aligning the locking mechanism correctly. Sometimes the angle is wrong. Try angling a bit more or less steeply.
Do You Really Need a Professional?
Vinyl plank flooring is designed for DIY installation. If you’re handy and willing to take your time, you can do this yourself. You save thousands on labor.
Professional installers work faster and have specialized tools, but they cost money. For a confident beginner, DIY is totally doable.
The key is following your specific flooring’s instructions carefully and not rushing. Take breaks. Measure twice. Cut once.
Final Thoughts
Installing vinyl plank flooring is a rewarding project that transforms a room. You get to design your space, work with your hands, and save money all at once.
The steps are straightforward: prepare your subfloor, install underlayment, lay planks with proper spacing, and add trim. Most people are successful on their first try.
Don’t worry about being perfect. Vinyl flooring is forgiving. Small mistakes aren’t visible once the floor is done and furniture is in place.
Take your time, follow the process step by step, and you’ll have a beautiful new floor that will last for years. You’ve got this.
Quick Reference Checklist
- Before You Start: Gather tools and materials. Check subfloor condition. Let vinyl acclimate to room temperature.
- Prepare Subfloor: Remove old flooring. Clean thoroughly. Level high spots. Fix moisture issues. Let concrete dry completely.
- Plan Layout: Decide plank direction. Plan your starting point. Map out seam stagger pattern.
- Install Underlayment: Unroll across the room. Tape seams. Trim edges.
- Install Planks: Start with spacers. Click planks together. Stagger seams. Cut as needed for edges.
- Final Steps: Remove spacers. Install trim and transitions. Wait 24 hours before heavy use.
- Maintenance: Sweep regularly. Mop with barely damp mop. Protect with furniture pads.
Happy flooring!

Hi, I’m Mary, the founder of Homygear.com. I’m passionate about creating a comfortable, smart, and beautiful home. I share practical insights and real-world experience on home gear that makes everyday life easier. Behind the scenes, my dedicated research team studies products in depth, and our writers craft honest reviews using trusted, authentic sources—so you can choose home gear with confidence.