How to Add Can Lights?
Can lights are one of the easiest ways to brighten up your home. These recessed ceiling lights look sleek and modern, and they give you so much control over your lighting design. The best part? You can actually install them yourself without hiring an expensive electrician.
This guide walks you through everything you need to know about adding can lights to your home. I’ll show you the tools you’ll need, the steps to follow, and the tips that make the whole job easier.
What Are Can Lights and Why Should You Want Them?
Can lights, also called recessed lights or downlights, sit flush with your ceiling. They have a cylindrical shape that looks like a can, which is where they get their name. The light fixture hides inside the ceiling cavity, so you only see the trim ring or bezel from below.
These ceiling fixtures work great in kitchens, bathrooms, living rooms, and basements. They give your space a clean look and work really well for task lighting or general ambient lighting. You can install them in groups to light an entire room evenly, or use just one or two in tight spaces.
Recessed lighting offers real benefits over other light fixture styles. Your options include:
- Flush, modern appearance that doesn’t hang down
- Flexible light direction and spacing
- Works well with low ceilings
- Easy to dim or add on smart bulbs
- Takes up no visual space in your room
What You’ll Need Before You Start
Getting your supplies ready makes the whole installation process smoother. Here’s what you need to gather:
Tools for installing recessed lights:
- Drywall saw or hole saw (the right size matters)
- Drill or impact driver
- Stud finder
- Tape measure
- Level
- Screwdrivers (both Phillips and flat head)
- Utility knife
- Wire strippers
- Electrical tester
Materials for your ceiling light installation:
- Can light housings or fixtures
- Trim rings and bezels
- Bulbs or lamps
- Wire (electrical wire rated for your circuit)
- Wire connectors
- Electrical tape
- Drywall patch (if needed)
Safety gear you should have:
- Work gloves
- Safety glasses
- Dust mask or respirator
Get all your equipment before you start working. You don’t want to stop mid-project to hunt down a missing tool.
Plan Your Layout and Spacing
The right spacing makes a huge difference in how your ceiling lights look and function. Bad placement creates dark spots or awkward shadows, while good placement gives you even, useful light.
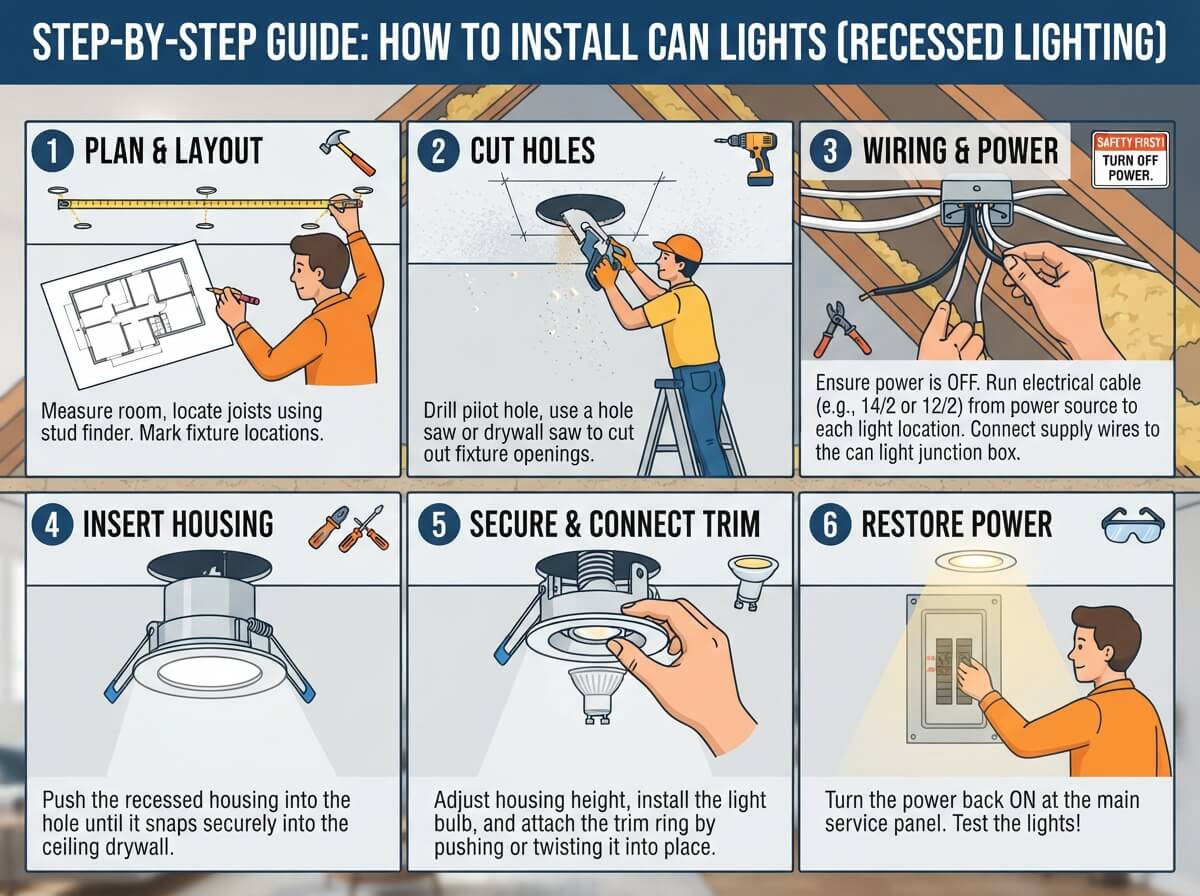
Start by measuring your room and deciding how much light you actually need. A simple rule: aim for about one can light per 4 to 6 square feet of space. So a 12×12 room would need about 6 to 8 recessed lights to get good coverage.
For layout patterns, most people use a grid pattern or a linear pattern down the middle of hallways and kitchens. Mark your ceiling spot using a pencil or chalk line so you know exactly where to cut.
Before you mark anything, walk into the space at different times and see how natural light moves through it. This helps you avoid placing lights where sun already comes in during certain hours. Also, keep can lights at least 12 inches away from insulation in your attic, as this prevents heat buildup around the fixture.
Check your ceiling type too. Popcorn ceilings need different handling than drywall or acoustic tiles. If you have textured or popcorn ceilings, you may need to scrape away some material where the light will go.
Turn Off Power and Check Your Ceiling
Safety always comes first when you work with electrical systems. Go to your breaker box and switch off the power to the circuit where you’ll be working. If you’re not sure which breaker controls which room, flip them one at a time and have someone test the outlets in that area.
Once the power is off, test the outlets or switches with an electrical tester to confirm no power flows through. This simple step takes 30 seconds and saves you from getting shocked.
Next, head into your attic or crawl space if you have access. Look at what’s above your ceiling. You need to know if there are joists, pipes, wires, or ductwork in your installation path. This info helps you avoid drilling into something you shouldn’t and makes your job go faster.
Tap on the ceiling from below while listening for solid or hollow sounds. Solid means there’s a joist or other structure. Hollow means open space. Your can lights need to fit in the hollow spaces between joists.
If you can’t access the space above your ceiling, use a stud finder to locate joists from below. Modern stud finders work great for finding wood framing behind drywall.
Cut Your Holes in the Ceiling
This step often makes people nervous, but it’s really straightforward once you get the hang of it.
Use your tape measure and mark the center point of each light location. Double-check that your marks match your layout plan. Measure twice and mark once—this prevents mistakes.
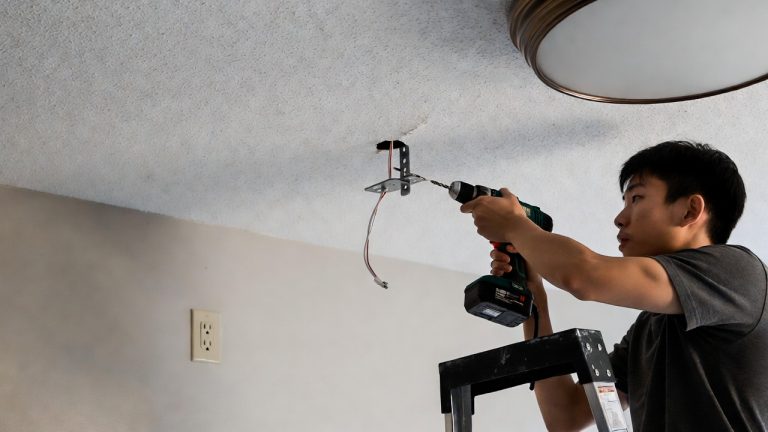
Get a drywall saw or hole saw that matches your fixture size. Most can lights need a 4 to 6-inch hole. Your fixture instructions tell you the exact size. Attach the hole saw to your drill.
Hold the drill straight and start cutting at a medium speed. Let the drill do the work without pushing too hard. Cut through the ceiling material carefully. Watch for dust flying down, so wear a mask.
Once you cut the hole, you’ll see the cavity above. If there’s insulation, gently pull it back from the opening. Just move it aside—don’t rip it out completely.
Install the Can Light Housing
The housing is the part that mounts into your ceiling cavity. It holds the bulb, provides electrical connections, and gives you something to mount the trim ring onto.
Slide the housing up into the hole from below. Most housings have adjustable clips on the sides. These clips let you move the housing until it sits exactly where you want it. The housing should sit flush with your ceiling or just barely lower than the drywall surface.
Tighten the mounting clips so they grip the drywall and hold everything in place. Turn the adjustment screws slowly and check the fit as you go. You want a snug connection without forcing anything.
Some housing types have springs that hold them in place, while others use screw-down brackets. Follow your specific fixture’s instructions for mounting, as different brands work slightly different ways.
Make sure the housing sits level. Use a small level tool to check. A tilted light looks wrong and throws light in odd directions.
Run the Electrical Wire
This is where many DIYers feel unsure, but electrical work for lights is really basic stuff. Your ceiling light runs on simple circuits just like outlets do.
If you’re adding one light to an existing circuit, run wire from the nearest outlet or light switch in that room. Use the right gauge wire—typically 12-gauge for 20-amp circuits or 14-gauge for 15-amp circuits. Your breaker box tells you which you have.
Run the wire through your ceiling cavity to your new light location. Keep the wire away from sharp edges or anything hot. Secure the wire every few feet with clips so it doesn’t sag or get damaged.
Strip about 6 inches of the outer wire covering at each end. Inside you’ll find individual wires: black (hot), white (neutral), and copper (ground). These are the three wires you work with.
If you’re connecting to an existing fixture, turn the power off first. Disconnect the old fixture’s wires. Connect the black wire from your new light to the black wire from the power source using a wire connector. Do the same with the white wires and the copper ground wires. Twist the wires together first, then twist on the connector until it’s snug.
Wrap electrical tape around each connection. This adds extra safety and keeps things organized.
If you’re unsure about any electrical work, hire a licensed electrician for this part. It’s not a big expense, and it keeps your family safe.
Install the Trim Ring and Bulb
Once your housing is mounted and wired, the fun part comes: making it look finished.
The trim ring, also called a bezel or trim, is the visible ring you see from your room. It hides the housing and creates a clean look. Slide the trim ring up into the fixture opening and twist it or screw it into place, depending on your design.
Make sure the trim sits flush with your ceiling. If you see gaps, adjust the housing or trim until everything lines up nicely. This is worth taking time on—sloppy trim looks unprofessional.
Now add your bulb. Can lights use standard bulbs in different styles: incandescent, LED, CFL, and others. LED bulbs run cooler, last longer, and cost less to operate, so they’re usually the smart choice. Just check that your bulb matches the socket type and wattage that your housing supports.
Screw the bulb in gently until it seats all the way. Don’t over-tighten or you risk breaking the bulb.
Connect Everything and Test
At this point, everything should be in place and ready. Go back to your breaker box and flip the power back on to that circuit.
Hit the light switch and see if your new light turns on. If nothing happens, go back and check your wire connections. Make sure everything is tight and the wires are properly connected by color.
If the light still won’t work, turn the power off again and look for loose connections. Wiggle each wire connector gently to make sure it’s seated all the way.
Once your light works, great! Now do the same process for your other can lights. You can chain them together on the same circuit if you want, or run separate circuits to different lights. It depends on how much power you need in that area.
Finish the Gaps and Clean Up
If you made any cuts that left gaps or exposed edges, clean those up now. Use paintable caulk around the trim ring if you see any gaps between the trim and ceiling.
Smooth out any dust, drywall residue, or insulation bits around your work area. Sweep or vacuum the floor to clean up the mess from cutting.
If you damaged the ceiling material around a hole, patch it with drywall spackling or patching compound. Smooth it with a putty knife and let it dry. Sand it smooth and paint to match your ceiling.
Maintenance and Future Upgrades
Can lights don’t need much maintenance, but a few things keep them working great:
Clean the trim rings and lenses every few months. Dust builds up and reduces brightness. Just wipe with a soft cloth—no harsh chemicals needed.
Check your attic occasionally to make sure insulation hasn’t moved back against the housing. Proper clearance prevents heat issues and keeps your fixture safe.
LED bulbs last for years, but when they do burn out, replacement is simple. Just let the bulb cool, turn off the power, and screw in a new one.
If you want to upgrade later, dimmer switches work great with most can lights. Adding a dimmer gives you control over brightness and sets different moods in your space.
Common Problems and Solutions
Sometimes installation hits a snag. Here are the most common issues and how to fix them:
Light won’t turn on: Check your circuit breaker first. Make sure it’s fully on. Then verify all wire connections are tight and correct.
Light is too dim: You might have a bulb with too low wattage. Replace it with a higher wattage bulb, or make sure you’re using LED bulbs with good lumens.
Uneven light coverage: This usually means your spacing is off. You might need to add more lights or move existing ones to different spots.
Light flickers or buzzes: Check for loose connections or a bad bulb. Replace the bulb first, as this is the most common cause.
Housing gets hot: This means insulation is too close. Pull it back at least 12 inches from the housing on all sides.
Know When to Call a Pro
While most people can install can lights, some situations call for professional help:
If your home has aluminum wiring instead of copper, hire an electrician. This type of wiring needs special handling.
If you have no power to the circuit you want to use, you might need to run entirely new circuits from your breaker box. This requires a licensed electrician.
If you hit plumbing or HVAC ducts when cutting holes, stop and hire someone who can work around these systems safely.
If you feel uncomfortable working with electricity at any point, call a pro. There’s no shame in it, and it protects your home.
Wrapping Up
Adding can lights to your home transforms your space and gives you way better lighting control than you had before. The process takes time and patience, but it’s totally doable for beginners.
Start by planning your layout carefully. Take your time cutting holes and installing housings. Do the electrical work right or get help from a pro. Then finish everything neatly.
Once your recessed ceiling lights are installed, you’ll wonder how you lived with the old lighting setup. These fixtures are an investment in your home that pays off every single day.
Take your time, follow these steps, and your can light installation will turn out great. You’ve got this!