How to Add a Ceiling Light?
If you’ve ever looked up at a blank space in your ceiling and thought about adding a light fixture, you’re in the right place. Installing a ceiling light might seem intimidating at first, but it’s actually a doable project for anyone with basic home improvement skills. This guide walks you through every step of the process in plain language so you can tackle it with confidence.
Why Add a Ceiling Light?
Ceiling lights serve multiple purposes in any home. They brighten your space without taking up floor or table real estate. A new light fixture can transform how a room looks and feels. It brings better illumination to dark corners. It also adds style and personality to your space.
Beyond looks, ceiling lights are practical. They make rooms safer by reducing shadows and dark spots. If you work from home, a good overhead light reduces eye strain. It helps you complete tasks more easily. Plus, a well-placed ceiling fixture makes your home more appealing if you ever decide to sell.
Tools and Supplies You’ll Need
Before you start, gather everything you need. Having the right equipment makes the job faster and safer.
Essential tools:
- Screwdriver set (both Phillips and flathead)
- Adjustable wrench
- Wire strippers
- Needle-nose pliers
- Voltage tester (essential for safety)
- Ladder or step stool
- Light fixture of your choice
- Mounting bracket (usually comes with the fixture)
Safety gear:
- Work gloves
- Safety glasses
- Dust mask
Electrical supplies:
- Wire nuts (come with most fixtures)
- Electrical tape
- Mounting hardware
Do a quick check before you buy. Make sure your new light fixture fits your space. Check that it matches your ceiling type (drywall, popcorn, etc.). Verify that it’s compatible with your existing wiring setup.
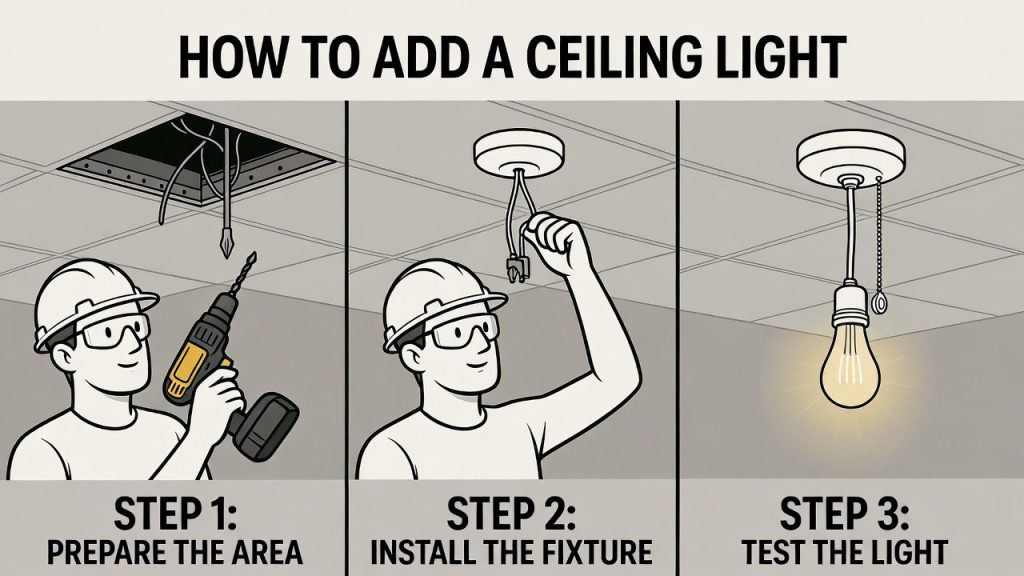
Step One: Safety First – Turn Off the Power
This is the most important step. Never skip it. Always turn off the power at your breaker box before touching any wiring.
Go to your breaker box and find the switch that controls the ceiling light. If you’re not sure which one it is, turn the light on, then flip breakers until it goes off. Mark it with a piece of tape so you don’t forget.
Once you’ve switched off the breaker, test the light switch to make sure it doesn’t work. Flip it up and down. The light should stay off. If it doesn’t, go back and find the right breaker.
For extra safety, use a voltage tester on the existing wiring. Even with the breaker off, you want to be 100% sure there’s no power running to the fixture. Touch the tester to the wires. If it beeps or lights up, don’t proceed. Get help from an electrician.
Step Two: Remove Your Old Fixture (If You Have One)
If you’re replacing an existing light, you need to remove it first. If you’re installing in an empty ceiling hole, skip to step three.
Turn off the power (already did this, right?). Wait a few minutes for any power to fully discharge.
Use your voltage tester again. Touch the existing fixture and wiring to confirm there’s no power.
Unscrew the trim ring (the decorative ring at the base of the fixture). It usually twists off by hand or with a gentle push. Some fixtures have small screws that hold it down.
You’ll see the mounting bracket next. Unscrew the bolts that hold it in place. Have someone hold the fixture while you unscrew it. This prevents it from dropping on your head.
Once the bracket is loose, carefully pull the fixture away from the ceiling. There will be wires connected inside. Don’t yank them.
Look at how the wires are connected. You’ll see three wires twisted together inside wire nuts. The hot wire (usually black), the neutral wire (usually white), and the ground wire (usually copper or bare). Take a photo before you disconnect anything. This helps you remember how to reconnect.
Untwist the wire nuts. Gently separate the wires. Remove the old fixture completely.
Step Three: Prep the Mounting Bracket
The mounting bracket is what holds your light to the ceiling. It’s a metal frame that connects to your ceiling box.
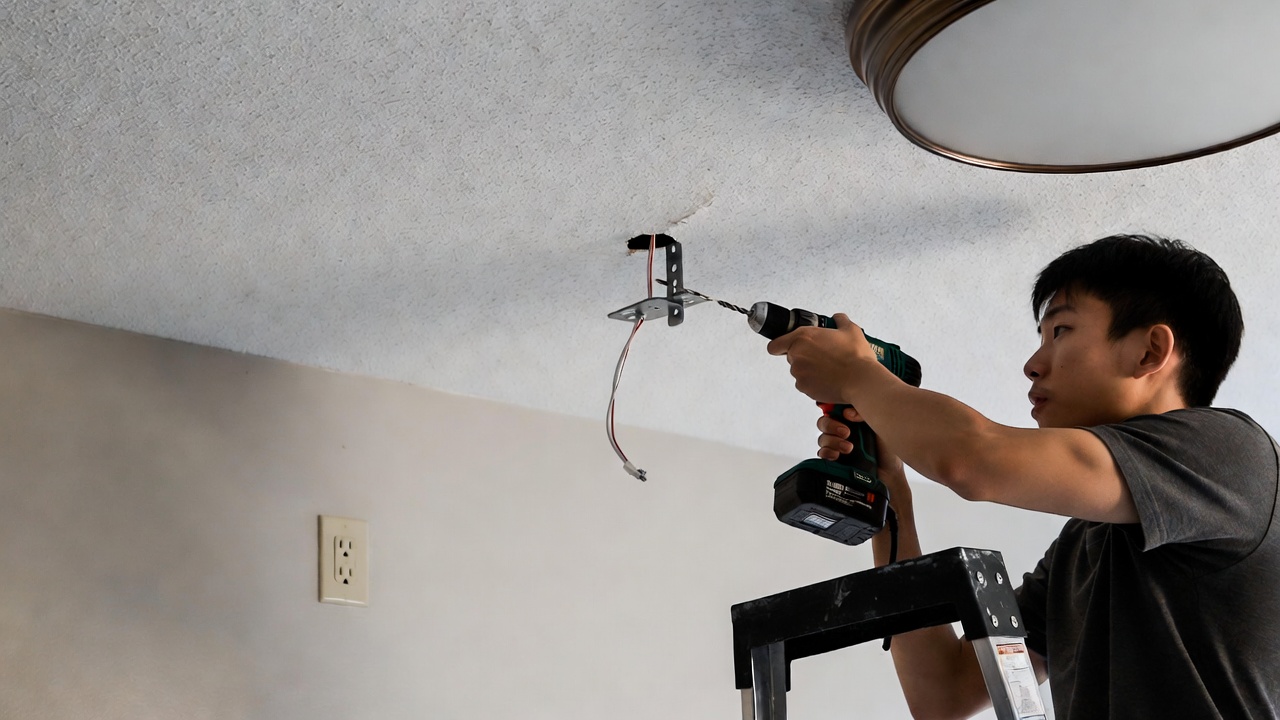
If you’re installing a new fixture, you’ll use a new bracket. Take it out of the box and examine it. Most brackets have two main parts: the strap that goes across your electrical box, and the bracket that sticks down.
The electrical box in your ceiling has threads in the center. This is where the mounting bracket connects. Align the bracket so these threads match up.
Screw the bracket onto the box using the bolts provided. Don’t tighten everything yet. Leave it loose enough to adjust. You’ll need to align the trim ring later.
Once the bracket is positioned right, tighten the bolts. Make sure it’s secure and doesn’t move.
Step Four: Handle the Wiring
Now comes the electrical part. Don’t panic. This is straightforward once you understand the basics.
Inside your ceiling box, you’ll find three wires:
The hot wire carries the power. It’s usually black.
The neutral wire completes the circuit. It’s usually white.
The ground wire protects you from shock. It’s usually bare copper or green.
Your new fixture has matching wires. Check the instructions that came with it.
If your fixture has a black wire, it connects to the black wire in your ceiling box. If it has a white wire, it connects to the white wire. The ground wire connects to the ground wire.
To connect them:
Strip about half an inch of insulation off each wire if needed. Use your wire strippers for this.
Twist the exposed ends together tightly. Black to black, white to white, ground to ground.
Screw a wire nut onto each twisted pair. Turn it clockwise until it’s snug. Give each wire a gentle tug to make sure it doesn’t pull out.
Wrap electrical tape around the wire nuts for extra security.
Tuck all the wires carefully back into the ceiling box. Don’t force them. There should be enough room for everything to fit.
Step Five: Attach the Fixture to the Bracket
Your new light fixture should come with a hanger bar or a special connector that hooks onto the mounting bracket you installed.
Slide the fixture’s mounting piece onto the bracket. Check your instructions for the specific method, as different fixtures connect differently.
Once it’s on the bracket, screw the bolts that hold it in place. Again, don’t over-tighten. You’ll make adjustments after you screw in the trim ring.
Make sure the fixture sits flush against the ceiling. There shouldn’t be any gaps. If there are, check that your bracket is installed straight.
Step Six: Install the Trim Ring and Bulb
The trim ring is the decorative piece that covers the gap between your fixture and the ceiling hole.
Screw the trim ring into place. Usually you’ll screw it into threads on the fixture body, or it will push up and lock into place.
As you tighten the trim ring, the fixture should come flush with the ceiling. Adjust as needed so everything looks even.
Once the trim ring is secure, your fixture is held in place. At this point, you can feel confident that it’s not going anywhere.
Now for the fun part – add your bulb. Most ceiling fixtures use standard screw-in bulbs. Check the wattage limit printed on the fixture. Don’t use a bulb that’s too powerful.
Screw in your bulb. Tighten it until it’s snug, but don’t force it.
Step Seven: Test Your Work
Before you celebrate, turn the power back on and test the light.
Go to your breaker box and flip the breaker back to the on position.
Go back to your room and flip the light switch.
The light should turn on. If it does, congratulations! You’ve successfully installed your ceiling light.
If it doesn’t work, turn the power back off. Check that all wire connections are tight. Make sure you didn’t accidentally reverse any wires. If you’re still having trouble, call an electrician.
Types of Ceiling Lights to Consider
Different rooms need different types of lights. Here are the most common options.
Flush mount lights sit tight against the ceiling. They work great for rooms with low ceilings. They don’t hang down at all. These are ideal for basements or hallways where clearance matters.
Semi-flush lights hang down slightly from the ceiling. They create a small gap. This gives you a bit of style while keeping the fixture compact. Many kitchens and living rooms use these.
Pendant lights hang down more significantly. They’re great for eating areas and work spaces. You can find them in tons of styles.
Chandeliers are decorative statement pieces. They work in dining rooms and entryways. They hang lower and add drama to a space.
Recessed lights fit inside the ceiling itself. They create a sleek, modern look. These require a bit more work to install because you need to modify the ceiling opening.
Track lighting uses a rail mounted to the ceiling with movable light heads. It gives you flexibility to point lights where you need them.
Pick a style that fits your room’s look. Think about how much light you need. Brighter lights work better in kitchens and home offices. Dimmer lights feel cozier in bedrooms and living rooms.
Common Mistakes to Avoid
Learning what not to do saves you time and frustration.
Don’t skip the voltage tester. Even if you turned off the breaker, always verify there’s no power with a tester. This is how electricians avoid injury.
Don’t work alone. Have someone nearby in case something goes wrong. They can also help hold the fixture while you work.
Don’t use the wrong wire gauge. Check your fixture instructions. Using wire that’s too thin can cause overheating.
Don’t over-tighten bolts. Tight is good. Over-tight strips the threads and breaks the bolts.
Don’t ignore the weight limit. Some fixtures are heavy. Make sure your ceiling box is rated for the weight. If you’re not sure, reinforce it before installation.
Don’t mix up the wires. Hot, neutral, and ground all matter. Connecting them wrong creates fire hazards. Double-check before you twist.
Don’t install a fixture that’s too big for your space. A huge chandelier in a tiny room looks odd. Measure your ceiling height and room size first.
Working With Different Ceiling Types
Your ceiling type affects how the fixture installs.
Drywall ceilings are the most common. If there’s already a fixture there, the hole is ready for the new one. If you’re starting from scratch, you may need to cut a hole and install an electrical box.
Plaster ceilings are older. They’re fragile. Work slowly and carefully. Don’t crack the plaster while unscrewing brackets.
Popcorn ceilings are bumpy. Sometimes they contain asbestos (in very old homes). If you suspect asbestos, stop and call a pro. If it’s safe, work gently. The bumpy texture can be damaged easily.
Textured ceilings are similar to drywall but have texture added. They work just fine for light installation.
Drop ceilings have removable tiles. Installation is easier because you can access the space above. Just lift the tile, install your bracket, and lower it back down.
If you’re unsure about your ceiling type, snap a photo and ask an expert at a home improvement store.
Electrical Safety Tips
Electricity demands respect. Follow these rules every time.
Always kill the breaker first. This single step prevents almost all electrical injuries.
Use a voltage tester every time. Don’t rely on memory or guesswork.
Keep the work area dry. Water and electricity are a deadly mix.
Don’t touch exposed wires unless you’re sure there’s no power.
If you see scorching, burning, or smoke, stop immediately. Turn off the power and call an electrician.
Don’t overload circuits. If your light keeps blowing breakers, something’s wrong. Get professional help.
Use approved wire connectors. Those wire nuts exist for a reason. They’re engineered to hold connections tight.
Never splice wires outside of the electrical box. All connections must happen inside that box.
When to Call an Electrician
Some jobs are better left to professionals. Know when to ask for help.
Call an electrician if:
- Your breaker box is unfamiliar or confusing
- You find multiple dead circuits when testing
- The wires look damaged or burnt
- You don’t have an electrical box in the ceiling (you can’t install a light without one)
- The existing wiring looks old, discolored, or loose
- You’re adding a light to a circuit that’s already fully loaded
- Local building codes require a permit for this work
- You feel uncomfortable working with electricity at any point
Electricians exist for good reason. They know how to handle complex situations. The cost of hiring one is worth your safety and peace of mind.
Building Codes and Permits
Depending on where you live, you might need a permit for this work.
Some areas require permits for any electrical work. Others only require them for major jobs. Call your local building department and ask. They’ll tell you what applies to your situation.
If a permit is required, get it before you start. The inspector will check your work when done. This protects you and ensures the job is done safely.
Permits might feel like extra paperwork, but they protect your home’s value. Future buyers want to know electrical work was done properly.
Upgrading to Smart Lights
Modern ceiling light fixtures can work with smart home systems.
Smart lights let you control brightness from your phone. Some change color. Many work with voice commands.
If you want to add smart capability, buy a fixture designed for it. Installation is the same as a regular light. The wiring doesn’t change.
Smart lights cost more upfront but save energy over time. Many people find they’re worth the investment.
Check compatibility with your home system (Google, Amazon, Apple, etc.) before you buy.
Troubleshooting Your New Light
What if something isn’t working right?
Light won’t turn on: Check that the breaker is on. Verify the bulb is screwed in tight. Look at the wire connections inside the box. Make sure nothing is loose.
Light flickers: The bulb might be bad. Try a different bulb. If it still flickers, check all wire connections. Loose connections cause flickering.
Light buzzes or hums: Some fixtures make noise, especially with LED bulbs. This is normal. If the noise is loud, try a different bulb type.
Dimmer switch doesn’t work: Not all bulbs work with dimmers. Check the bulb package. It should say “dimmable.” If it doesn’t, that’s your answer.
Circuit breaker keeps tripping: The circuit is overloaded or there’s a short. Turn off the breaker and don’t use that light. Call an electrician.
Energy Efficiency Considerations
Your new light doesn’t have to drain energy.
LED bulbs use about 75% less energy than old incandescent bulbs. They last longer too – sometimes 25,000 hours or more.
CFLs (compact fluorescent lights) use less energy than incandescent but more than LEDs. They take a moment to reach full brightness.
Incandescent bulbs are the least efficient. Most new fixtures don’t even use them anymore.
When you buy bulbs, check the package. Look for the lumens rating, not just the watts. Lumens measure brightness. You want enough lumens for your space, but you don’t need to waste energy.
Smart bulbs with motion sensors turn off when no one is in the room. This saves energy in seldom-used spaces.
Final Thoughts
Installing a ceiling light is an achievable DIY project. You don’t need to be an expert. You just need to follow the steps, stay safe, and take your time.
The biggest mistake people make is rushing. Don’t rush. Measure twice, cut once. Check the wiring twice, connect once.
When you flip that switch and your new light comes on, you’ll feel a real sense of accomplishment. You did that. You made your space brighter and more beautiful.
If at any point you feel lost or uncomfortable, reach out to someone. Call an electrician. Ask for help from a friend who knows electrical work. Check your fixture’s instruction manual again.
Your safety matters more than doing it yourself. But chances are good that you can do this. Thousands of homeowners just like you install ceiling lights every year. You can too.
Now get out there and brighten your space!