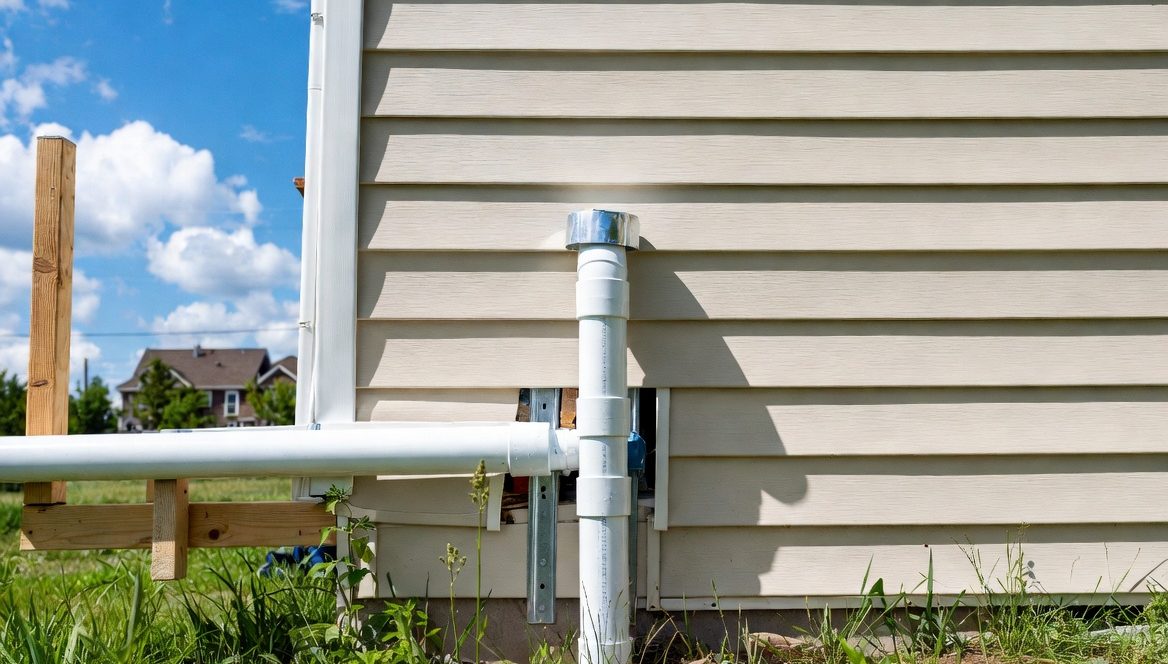
How to Add a Dryer Vent?
You just bought a new dryer. Now you need to vent it outside. Don’t worry – this project is easier than you think.
Most people can install a dryer vent in a few hours. You don’t need to be a professional. You just need the right tools and clear instructions.
This guide walks you through everything. We’ll cover planning, cutting, installing, and finishing your dryer vent. Let’s get started.
Why Your Dryer Needs a Vent
Every dryer produces hot, moist air. This air needs to go somewhere. If it stays inside your home, you’ll face problems.
Trapped moisture leads to mold growth. Your walls get damp. Paint starts peeling. The air feels sticky and uncomfortable.
Lint buildup is dangerous too. Lint catches fire easily. Thousands of house fires start from dryer lint each year. A proper vent prevents this risk.
Your dryer also works better with good venting. Clothes dry faster. The machine uses less energy. Your utility bills go down.
What You Need Before Starting
Let’s gather your supplies first. You’ll need these tools:
- Tape measure
- Pencil or marker
- Level
- Drill with bits
- Jigsaw or reciprocating saw
- Screwdriver
- Tin snips
- Caulk gun
- Safety glasses
- Dust mask
- Work gloves
Now for the materials:
- Rigid metal duct pipe (4 inches in diameter)
- Exterior vent cap with damper
- Duct clamps or foil tape
- Exterior caulk
- Interior caulk
- Screws
Skip the flexible plastic or foil ducts. They trap lint and create fire hazards. Rigid metal duct is safer and more efficient.
Planning Your Vent Route
Walk around your laundry room. Look at where your dryer sits. Find the exhaust outlet on the back of the machine.
The best vent runs straight out through an exterior wall. Short and straight paths work best. Your dryer pushes air more easily through simple routes.
Check outside too. Make sure your vent won’t point at a window, door, or air conditioning unit. Keep it away from plants and walkways.
Measure the distance from your dryer to the outside wall. Write this number down. You’ll need it when buying duct pipe.
Look inside the wall if you can. Open any nearby outlets or switches to peek inside. Check for electrical wires, plumbing pipes, or studs. You need a clear path.
Some homes have crawl spaces or basements. These give you more routing options. You can run the vent down and out instead of straight through a wall.
Avoid running vents through the roof if possible. Roof vents collect more lint. They’re harder to clean. Rain and snow can get inside.
Marking Your Cut Location
Time to mark where the vent will go through the wall. Start inside your laundry room.
Hold your vent cap against the wall. Use your level to make sure it’s straight. Mark the corners with a pencil.
The vent should sit at the same height as your dryer’s exhaust outlet. This makes connecting the duct easier.
Find the center of your marked square. Drill a small hole all the way through the wall. This hole guides your outside marking.
Go outside now. Find the drill hole you just made. This marks the center of your vent opening.
Hold the exterior vent cap against the wall. Center it on the drill hole. Use your level again. Mark around the cap with a pencil.
Double-check your measurements. Measure twice, cut once. This old saying saves you from mistakes.
Cutting the Opening
Put on your safety glasses and dust mask. This gets messy.
Start inside your laundry room. Drill holes in each corner of your marked square. Make these holes big enough for your saw blade.
Use your jigsaw or reciprocating saw. Cut along the lines between the holes. Go slow and steady. Let the saw do the work.
Interior walls are usually easier to cut. Exterior walls have more layers. You’ll cut through drywall or plaster first. Then insulation. Then exterior sheathing. Finally, the outside siding.
Different siding types need different approaches. Vinyl siding cuts easily with tin snips. Wood siding needs a saw. Brick or stucco requires special masonry bits.
Pull out the cut piece. Clear away insulation and debris. You should see daylight from the other side.
Go outside and repeat the process. Cut through the exterior siding. Match your interior opening.
Clean up the edges. Remove any rough spots or splinters. A clean opening makes installation easier.
Installing the Duct Pipe
Slide your rigid metal duct through the opening. Push it from inside to outside.
The duct should stick out past the exterior wall by a few inches. You’ll attach the vent cap here.
Go back inside. Connect the duct to your dryer’s exhaust outlet. Slide the duct over the outlet.
Secure this connection with a duct clamp. Tighten the clamp with your screwdriver. Some people use foil tape instead. Either method works. Just make sure the connection is tight and won’t slip off.
Keep the duct as straight as possible. Avoid kinks or sharp bends. Each bend reduces airflow.
If you need to use elbows, choose gradual curves over sharp angles. Use rigid metal elbows, not flexible ones.
Secure the duct to wall studs if your run is long. Use metal straps or brackets. Support the duct every few feet.
Never use screws inside the duct. They catch lint and create buildup. Use external clamps or brackets only.
Attaching the Exterior Vent Cap
Head back outside. You should see the duct pipe sticking through the wall.
Take your exterior vent cap. These caps have louvers or flaps that open when air pushes through. They close when the dryer stops. This keeps pests and weather out.
Slide the vent cap onto the duct pipe. Push it flush against the siding.
Some caps have flanges with screw holes. Line up these holes. Mark them with a pencil.
Drill pilot holes at each mark. This prevents the siding from cracking.
Run a bead of exterior caulk around the edge of the cap. This seals out water and air leaks.
Press the cap against the wall. The caulk should squeeze out slightly.
Insert screws through the holes. Tighten them until the cap sits firm. Don’t overtighten. You might crack the cap or siding.
Wipe away excess caulk with a damp rag. Clean edges look better and seal properly.
Check that the damper or louvers move freely. Push them open with your finger. They should swing easily and close on their own.
Sealing and Finishing Inside
Go back to your laundry room. Look at the gap around the duct pipe where it enters the wall.
Stuff insulation into any large gaps. Don’t pack it too tight. You want it to fill the space without compressing.
Some gaps are too small for insulation. That’s fine. Caulk will seal them.
Apply interior caulk around the duct where it meets the wall. Use paintable caulk if you plan to touch up the wall later.
Smooth the caulk with your finger or a damp cloth. A neat bead looks professional.
Let everything dry according to the caulk manufacturer’s instructions. This usually takes a few hours.
Testing Your Installation
Time to see if everything works. Move your dryer back into place. Make sure it’s not crushing the duct.
Plug in your dryer. Turn it on to the highest heat setting. Don’t add clothes yet.
Go outside. Stand near your new vent cap. You should feel warm air coming out. The louvers or damper should be open.
Put your hand near the vent. The airflow should be strong and steady. Weak airflow means a blockage or leak somewhere.
Go back inside. Check all connections. Feel around the duct joints. You shouldn’t feel any air leaking.
Listen for rattling or vibrating noises. Loose ducts make noise. Tighten any loose connections.
Run the dryer for several minutes. Everything should stay secure and quiet.
Turn off the dryer. Go back outside. The vent cap should close on its own. This proves the damper works correctly.
Common Mistakes to Avoid
Don’t use flexible plastic or foil duct for the main vent run. These materials trap lint and sag over time. They’re fire hazards.
Never vent your dryer into a garage, crawl space, or attic. The moisture causes damage. Lint creates a mess and fire risk.
Avoid using too many elbows or bends. Each turn slows down airflow. Your dryer works harder and clothes take longer to dry.
Don’t make your duct run too long. Most dryer manufacturers recommend a maximum length. Check your dryer’s manual. Long runs need bigger ducts or extra power.
Skip the screen on your exterior vent. Screens catch lint and block airflow. Modern vent caps don’t need screens.
Never connect multiple dryers to one vent. Each machine needs its own exhaust path.
Don’t use duct tape on dryer vents. Despite the name, duct tape fails in heat. Use metal clamps or foil tape instead.
Maintaining Your Dryer Vent
Clean your lint trap after every load. This simple step prevents most problems.
Inspect the exterior vent every few months. Look for lint buildup around the cap. Make sure the damper opens and closes freely.
Clean the entire duct system once a year. You can do this yourself or hire a professional.
To clean it yourself, disconnect the duct from your dryer. Use a vent brush with flexible rods. These brushes reach deep into the duct. Push the brush through, pull it back, and repeat.
A vacuum with a long hose attachment helps too. Suck out loose lint from both ends of the duct.
Check for damage during cleaning. Look for holes, rust, or loose connections. Replace damaged sections right away.
Watch your dryer’s performance. Clothes taking longer to dry means a blocked vent. The dryer feeling extra hot signals poor airflow. These signs tell you to clean the vent soon.
Dealing with Special Situations
Some installations face unique challenges. Let’s cover a few common ones.
When you can’t go straight out: Sometimes walls have obstacles. You might need to go up or sideways first. Use rigid metal elbows to change direction. Keep the total duct length as short as possible.
For basement dryers: You can vent up through the rim joist. This is the wooden beam on top of your foundation wall. Cut through the joist carefully. Install the vent cap in the siding above.
In apartments or condos: Check your building rules first. Some buildings have shared venting systems. You might need permission before cutting holes. Talk to your landlord or property manager.
With stacked washer-dryer units: These tight spaces need careful planning. Measure precisely. You might need offset fittings to connect the duct. Keep the duct path as simple as possible.
For gas dryers: The process is the same as electric dryers. Just be extra careful not to damage the gas line. Know where it runs before cutting.
Upgrading an Existing Vent
Old vents sometimes need replacement. Maybe your duct is flexible plastic. Perhaps the route has too many bends. Or the exterior cap is damaged.
Start by removing the old duct. Disconnect it from your dryer. Pull it out of the wall.
Inspect the opening. You might be able to use the existing hole. If the hole is damaged or the wrong size, you’ll need to patch and recut.
Clean the opening thoroughly. Remove old caulk, debris, and lint.
Install your new rigid metal duct using the steps above. This upgrade improves safety and efficiency.
Old vent caps often have broken dampers. Replace them with modern caps. New ones seal better and last longer.
Safety Reminders
Always turn off power to your dryer before working on it. Unplug electric dryers. Turn off the gas valve for gas dryers.
Wear protective gear. Safety glasses shield your eyes from debris. Dust masks filter fine particles. Gloves protect your hands from sharp metal edges.
Watch for hidden utilities. Check for electrical wires and plumbing before cutting. Use a stud finder with wire detection. Call a professional if you’re unsure.
Work carefully with power tools. Read tool manuals. Keep your workspace clean and well-lit.
Never leave gaps or holes unsealed. Pests and weather will find them. Seal everything properly.
Test smoke detectors in your laundry room. They provide early warning if something goes wrong.
Cost Breakdown
Installing a dryer vent yourself saves money. Professional installation costs several hundred dollars. Doing it yourself usually costs under one hundred dollars.
Rigid metal duct costs about two dollars per foot. Most installations need ten to fifteen feet.
Exterior vent caps range from fifteen to fifty dollars. Basic models work fine. Fancier caps have magnetic seals or deeper louvers.
Clamps, caulk, and screws add another ten to twenty dollars.
Tools vary. You might already own most of them. Budget for any missing items.
The time investment runs three to six hours for beginners. Experienced folks finish in two hours or less.
Energy Savings
A proper vent makes your dryer more efficient. Clothes dry faster when air flows freely. This cuts your energy use.
Electric dryers are heavy power users. Reducing run time lowers your electric bill. Even small improvements add up over time.
Gas dryers benefit too. Better airflow means shorter drying cycles. You use less gas and save money.
Your dryer also lasts longer with good venting. The motor doesn’t work as hard. Parts wear out more slowly. You’ll replace your dryer less often.
Final Checks
Before you call the job complete, run through this checklist.
Is the duct rigid metal? Check.
Does it run as straight as possible? Check.
Are all connections tight and sealed? Check.
Is the exterior cap secure and caulked? Check.
Does the damper move freely? Check.
Did you test the airflow? Check.
Is everything clean and neat? Check.
Take photos of your finished work. They’re useful for future reference or if you need to troubleshoot later.
When to Call a Professional
Some situations need expert help. Don’t hesitate to hire someone if you face these issues:
You need to cut through brick, stone, or concrete. These materials require special tools and skills.
Your vent route crosses multiple floors. Complex paths need careful planning.
You find extensive mold or water damage during installation. This signals bigger problems that need fixing first.
The existing vent location violates building codes. A pro can help you find a compliant solution.
You’re uncomfortable with any step of the process. Safety matters more than saving money.
Your building requires licensed contractors for modifications. Follow the rules.
Wrapping Up
You now know how to add a dryer vent from start to finish. This project improves your home’s safety and efficiency.
Take your time. Follow each step carefully. Don’t rush through the important parts like measuring and sealing.
Your new vent will serve you well for years. Proper installation means fewer problems and better dryer performance.
Remember to maintain the vent regularly. Clean it once a year. Check the exterior cap every few months. These simple tasks keep everything working smoothly.
Congratulations on completing this home improvement project. You’ve made your home safer and more efficient. That’s something to feel proud about.
Now go enjoy your properly vented dryer. Your clothes will dry faster. Your home will be safer. And you did it yourself.