How to Add Electricity to a Shed?
You finally built your dream shed. It’s got solid walls, a sturdy roof, and plenty of shelves. But every time you step inside after dark, you’re fumbling for a flashlight. Now you’re thinking: wouldn’t it be nice to have power out there?
Adding electricity to a shed might sound intimidating, but it’s totally doable. You don’t need to be an electrician to wire your shed for power. This guide walks you through the entire process, from planning to flipping the first switch.
Why You Might Want Shed Electricity
Before you start, let’s talk about why powering your shed matters. Electricity in your shed opens up a world of possibilities. You can run tools without dragging cords from your house. You can install lights that actually help you work instead of relying on shadows and headlamps. You can charge your batteries, run a mini fridge, or power a small heater during cold months. Some people even set up their sheds as workshops, studios, or hobby spaces that actually function like real rooms.
Plus, having power out there increases your property value. It makes the shed actually useful for work and projects instead of just storage.
Safety Comes First: The Golden Rule
Here’s the thing about electrical work: doing it wrong can hurt. It can burn your house down. It can injure you or someone visiting your property. So before we talk about anything else, let’s be crystal clear about safety.
If you feel uncomfortable at any point during this process, stop and call a licensed electrician. That’s not weakness. That’s wisdom. Electrical codes exist because people died learning what works and what doesn’t.
Some areas require a licensed electrician to do all electrical work. Others let homeowners do it themselves but require an inspection afterward. Check your local building codes and regulations first. Seriously. Call your city or county building department and ask what’s legal where you live. You might need permits. You might need inspections. These rules protect you, so follow them.
Gather Your Tools and Materials
You’ll need basic tools and specific electrical supplies. Let’s go through what to grab.
Tools you’ll need:
- Screwdrivers (both Phillips and flathead)
- Hammer
- Voltage tester (absolutely essential; this checks if power is running)
- Wire strippers
- Utility knife
- Drill with bits
- Measuring tape
- Shovel (if running underground wire)
- Stapler or wire clamps for securing wires
Materials you’ll need:
- Electrical wire (outdoor-rated)
- Circuit breaker
- Wire connectors
- Light fixtures
- Outlets (weatherproof)
- Switches
- Breaker panel or subpanel
- Conduit (protective tubing for wires)
- Ground rod and clamps
- Nuts and bolts
The exact quantities depend on how much power you want and how many outlets you plan to install. Start with your plan before buying anything.
Plan Your Electrical Setup
Running power to your shed requires a real plan. You can’t just plug things in randomly and hope for the best. You need to think about what you’re actually powering.
Count everything you want to run: lights, outlets for tools, maybe a heater or fan. Write down the wattage for each item. Add them up. This total tells you how much power you need. Most sheds get by with 15 or 20 amps of service, but bigger operations might need 30 or 50 amps.
You’ll also need to decide how to run the wire from your house to the shed. Two main options exist: underground and above ground. Underground wiring stays hidden but costs more and takes more work. Above ground wiring is easier to install but visible, so it might not match your shed’s style.
The distance from your house to your shed matters too. Longer distances need thicker wires to handle the electrical load properly. This is where knowing your needs upfront really helps.
Running Power from Your House
Your shed’s electricity starts at your main panel. Yes, the one in your house that probably has a lock on it. Don’t panic. You’re not messing with the main panel itself. You’re adding a new circuit.
First, turn off power to the section where you’ll work. Use your voltage tester to make absolutely sure the power is off. Never assume. Test it. Then test it again.
Now you’re installing a new breaker in your main panel. This breaker will protect your shed’s circuit just like other breakers protect circuits in your house. The breaker shuts off power if something goes wrong, preventing fires and injuries.
Connect your shed’s wire to this new breaker. The wire runs from your house to your shed. That’s your main power line. Everything else plugs into this.
Underground and Above Ground Options
Both methods work. Both have pros and cons.
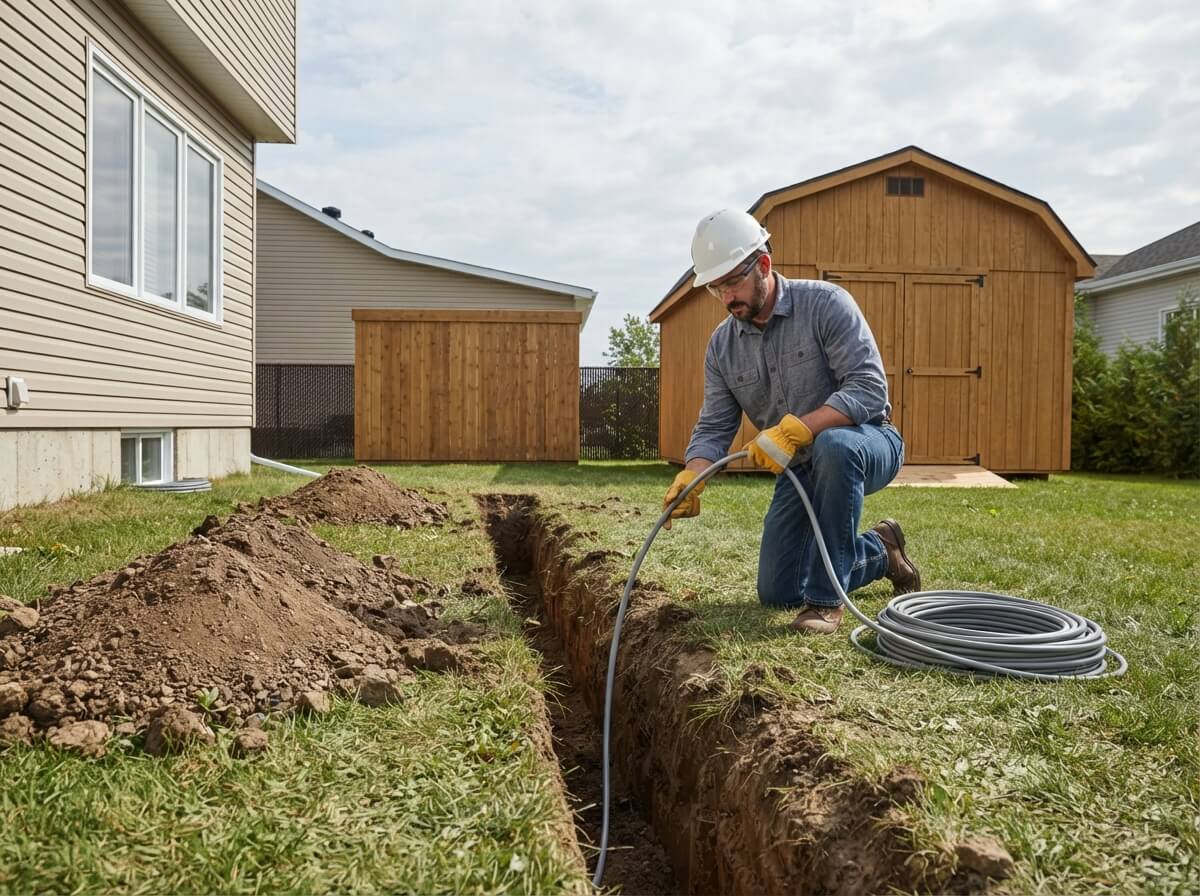
Underground wiring hides beneath the ground. It looks neater. Animals can’t chew on it. But digging trenches takes time and effort. Underground wire needs special protection called conduit. It costs more money. If you ever need to fix something, you have to dig everything up.
Above ground wiring runs on the outside of buildings through conduit mounted to walls. It’s faster to install. You can see it if problems develop. It costs less. The downside? It’s visible, and you need to protect it from weather and damage.
Most DIYers choose above ground for their first project. It’s simpler, faster, and cheaper. You can always upgrade later.
Installing Your Shed Subpanel
Your shed needs its own electrical panel. Think of it as a smaller version of your house’s main panel. This subpanel controls all the power flowing into your shed. Every outlet and light in the shed connects to circuits that branch from this panel.
Mount your subpanel on the inside wall of your shed, somewhere easy to access. It should be high enough that curious kids can’t mess with it, but low enough that you can reach it. Secure it firmly to the wall with proper mounting hardware.
Connect your main power line from the house to the subpanel’s main breaker. This is the line coming through your house’s breaker box. Make sure it’s the right size for the job. Too small, and you’ll overload it. Too large, and you lose protection.
Running Wires Through Your Shed
Now you’re adding individual circuits for lights, outlets, and other equipment. Each circuit branches off from your subpanel.
Run your wiring through conduit. This protects the wire from damage and makes everything look neat. Mount the conduit to your shed’s walls using clamps every 18 inches or so. This keeps everything secure and tidy.
Plan your wire routes before you start. Think about where outlets need to go. Think about light locations. Draw it out on paper. This saves time and prevents mistakes.
Wire gauge matters. Thicker wires handle more power. If you’re running high-power tools on a long circuit, you need thicker wire than you’d use for a light right next to the panel. Your electrical code guide or a quick online lookup tells you the right size for each situation.
Installing Outlets and Switches
Outlets in a shed should be weatherproof. Regular indoor outlets can fail if moisture gets inside. Weatherproof outlets have rubber gaskets that seal around plugs, keeping water out.
Install outlet boxes in the conduit system as needed. Mount them at standard height, usually around 18 inches from the ground for work benches and lower areas, or 48 inches for regular use. Space outlets every 6 feet or so around your shed. This keeps cords from being stretched too thin.
For switches, weatherproof matters again. Mount them near doors or at the main work area so you can easily turn lights on and off.
Connect outlets to the correct circuit breaker. A 15-amp circuit handles standard outlets. A 20-amp circuit handles higher-demand stuff like electric heaters or power tools.
Grounding Your Shed Properly
Grounding sounds technical, but it’s not. Grounding protects you if something goes wrong. It gives electricity a safe path to the earth instead of through your body.
Your subpanel needs a ground. This is a thick copper wire that connects to a ground rod driven into the earth. The ground rod goes at least 8 feet into the ground. This creates a path for electricity to escape safely.
Some situations need a bonding jumper too. This connects water pipes, metal frames, or other metal parts to your grounding system. These metal pieces could carry electricity if something fails. The bonding jumper makes them safe.
Your electrical code spells out exactly what needs grounding in your situation. Follow it closely. Proper grounding is what separates a safe shed from a dangerous one.
Lighting Your Shed
Lights make your shed actually usable. Darkness is the enemy of productivity.
Install light fixtures on the ceiling or high on walls. Put them where they shine on your work areas, not in your eyes. LED fixtures save energy and last forever compared to old bulbs.
Plan for enough light. A single bulb in the corner isn’t enough. Multiple fixtures spread throughout the space work better. Think about task lighting too—a bright light right where you work makes details visible.
Wire lights to a separate circuit from outlets if you can. This way, if you overload a circuit with power tools, your lights stay on. You’re not left working in the dark.
Testing Your Work
Before you declare victory and start plugging things in, you need to test everything.
Use your voltage tester to confirm power is flowing where it should be. Check outlets. Check switches. Make sure lights work. Flip breakers on and off to confirm they respond.
Look for any loose wires, exposed connections, or anything that looks wrong. Tighten screws. Make sure conduit is secure. Check that outlet and switch covers fit properly.
Call a professional inspector if your area requires it. They’ll spot things you might miss. This inspection protects you and validates that your work is safe.
Troubleshooting Common Problems
Breaker keeps tripping? You’re probably drawing too much power. Unplug some things. Run high-demand tools on separate circuits. If it still happens, you might need a bigger subpanel.
Outlets or lights not working? Check the breaker first. Make sure it’s switched on. Use your voltage tester to confirm power is reaching the outlet. Loose wires cause intermittent problems. Check all connections.
Outlets trip immediately? A ground fault circuit interrupter (GFCI) outlet detected a problem. These are actually protecting you. Reset it. If it trips again immediately, something is wrong. Turn that circuit off and find the problem before using it.
Flickering lights? Loose connections cause flicker. Check all wire connections, particularly at the panel and outlet terminals. Tighten everything.
Keeping Everything Maintained
Your shed’s electrical system isn’t a set-it-and-forget-it situation. It needs basic maintenance.
Every few months, visually inspect your wiring and conduit. Look for cracks, damage, or signs of wear. Spiders and insects like to nest in conduit—clear it out. Make sure nothing is loose or corroded.
Test your GFCI outlets monthly by pressing the test button. It should cut power immediately. That means it’s working right. Press reset to turn power back on.
Keep your subpanel accessible and clear. Don’t stack tools or boxes in front of it. You need to reach it quickly if something goes wrong.
When to Call a Professional
Some parts of this project might be beyond your comfort level. That’s okay. Call a professional electrician if:
- Your local code requires a licensed electrician
- You’re not confident working with your main panel
- You can’t pass the inspection
- Something seems dangerous or confusing
Electricians exist because this work matters. Using one is smart, not lazy.
Final Thoughts
Adding electricity to your shed transforms it from storage space into a functional workspace. You can actually work out there. You can build things, tinker with projects, or just hang out with real lights and power tools.
This project takes time and care. Rush it, and you create danger. Do it right, and you create years of reliable power. Read your local codes, follow them exactly, and don’t skip safety steps. Get an inspection if required.
Your future self will thank you every time you flip a switch in your shed and light floods the space. Every time you plug in a tool without running a cord from your house. Every time you work comfortably in a powered space instead of fumbling in the dark.
Take your time. Do it right. You’ve got this.

Hi, I’m Mary, the founder of Homygear.com. I’m passionate about creating a comfortable, smart, and beautiful home. I share practical insights and real-world experience on home gear that makes everyday life easier. Behind the scenes, my dedicated research team studies products in depth, and our writers craft honest reviews using trusted, authentic sources—so you can choose home gear with confidence.