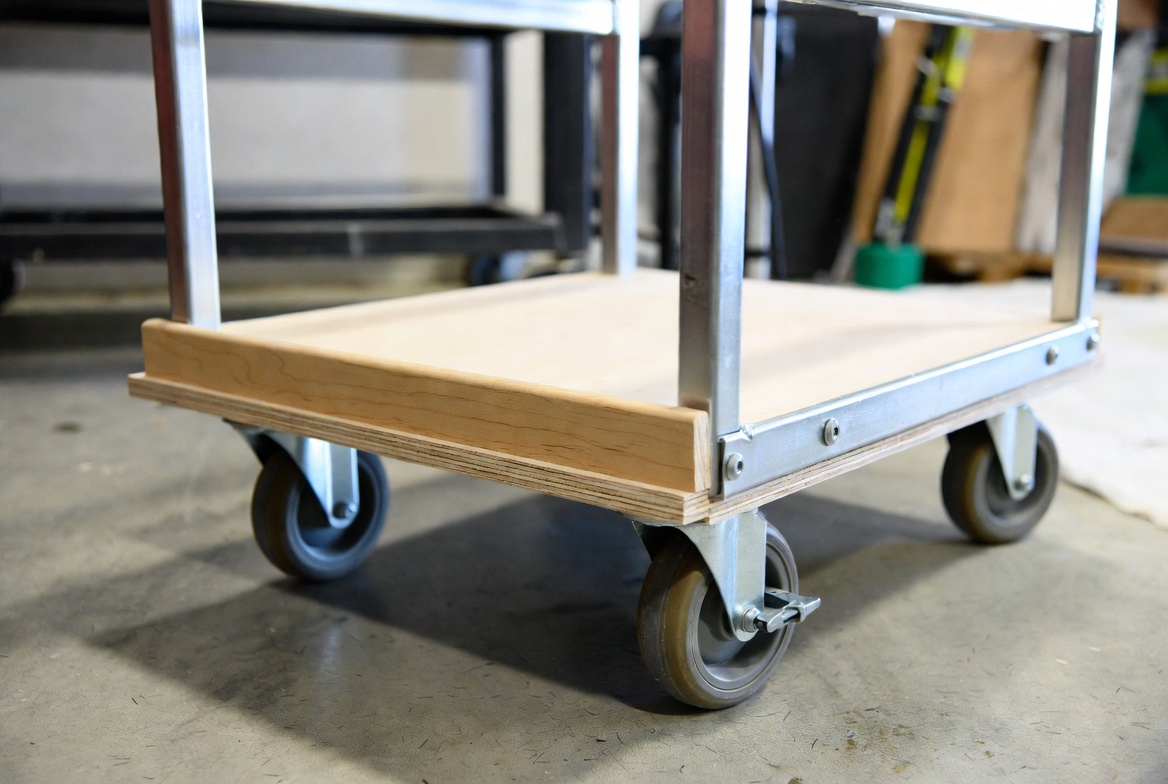
How to Add a Lip to a Rolling Cart?
Adding a lip to your rolling cart is easier than you might think. This simple upgrade stops items from sliding off when you push your cart around. Whether you need to haul supplies in your garage, move things around your workshop, or organize your kitchen, a lip makes your cart work much better.
The good news? You don’t need fancy skills or expensive tools. Just follow along, and you’ll have a functional cart that keeps everything safe and in place.
Why Your Rolling Cart Needs a Lip
Before we get into the how-to part, let’s talk about why a lip matters in the first place.
A rolling cart without a lip is like a tray without edges. Every time you move it, push it, or turn a corner, things tumble off the sides. You end up chasing items across the floor. You waste time picking things up. You might break something fragile.
A lip is a raised edge or barrier that sits on top of your cart’s surface. It keeps stuff from falling off. Think of it as a safety wall for your items.
The best part about adding a lip is that it’s affordable. Most people spend between ten and thirty dollars on supplies. Compare that to buying a new cart, and you’re way ahead.
Types of Lips You Can Add to Your Cart
There are several ways to add a lip to your rolling cart. Let’s look at the most popular options.
Metal Edge Banding
Metal edge banding is a thin strip of metal that you attach along the perimeter of your cart’s top. It usually comes in aluminum or steel. You can find it at any hardware store.
Metal edge banding works well if you want something tough and durable. It handles heavy use and lasts for years. The downside is that it can be sharp if not installed right, and it costs a bit more than other options.
Rubber or Vinyl Edging
Rubber and vinyl edging strips offer a softer solution. They attach along the edges of your cart and provide a cushion for your items. Plus, they look cleaner and feel safer to touch.
This option is great for delicate items. The padding prevents damage to your products. Many people love rubber edging because it’s easy to install and affordable. You can get soft rubber edging for just a few dollars per foot.
PVC Pipe as a Lip
Some folks use PVC pipe to create a lip. You can buy PVC pipe at any hardware store, cut it to size, and attach it around the edges of your cart. This works especially well if you want a higher lip or a more industrial look.
PVC is cheap, lightweight, and simple to work with. You can paint it whatever color matches your cart. The main thing to keep in mind is that PVC can crack if it gets too cold, so this works best indoors.
Wood Strips or Boards
A wooden lip gives your cart a rustic or natural look. You can use thin wood strips, hardwood edges, or even leftover trim pieces. Many woodworkers and DIY fans choose this route because they have scrap wood lying around.
Wood absorbs moisture, so it’s not ideal for wet environments. Still, if your cart stays indoors, wood works great and costs almost nothing.
L-Shaped Metal Angle Iron
Angle iron is a strong choice for heavy-duty carts. It’s L-shaped, which means one side sits flat on your cart’s surface while the other points up as your lip. It’s super strong and handles rough treatment without bending.
Angle iron does cost more, but it lasts forever. Use it when you need maximum durability and don’t care about appearance.
Tools You’ll Need
The good news is that most of these projects don’t require many tools. Here’s what you should have on hand.
Measuring tape – You’ll use this to measure your cart’s dimensions and figure out how much lip material you need. Get one that’s at least 25 feet long.
Scissors or utility knife – For cutting most materials, scissors work fine. If you’re cutting through tough rubber or vinyl, a utility knife with a fresh blade is your friend.
Adhesive or fasteners – Depending on your chosen material, you might use strong adhesive like construction adhesive or silicone caulk. You might also use screws, bolts, or pop rivets. More on this later.
Drill – If you’re using fasteners like screws or rivets, you’ll need a basic drill. A cordless drill makes the job easier.
Saw – If you’re working with PVC pipe, wood, or angle iron, a simple hand saw or circular saw cuts these materials. A hacksaw works great for metal.
Sandpaper – After cutting, rough edges need smoothing. Keep some 120-grit and 220-grit sandpaper nearby.
Safety glasses and work gloves – Always protect yourself. Metal edges and sharp corners deserve respect.
Cleaning cloth – Before you attach anything, clean the surface where the lip goes. Dirt and dust reduce adhesive strength.
How to Measure Your Cart
Getting accurate measurements is the most important step. Bad measurements lead to wasted materials and frustration.
Start by measuring the length and width of your cart’s top. Use your measuring tape and write down these numbers. Measure twice to make sure they’re correct.
Next, measure the height of your cart’s sides or rims if it has them already. This tells you how tall your new lip should be to look right.
Finally, check the thickness of your cart’s edge. Some carts have thick borders, while others have thin ones. This affects how you attach your lip.
Once you have these numbers, add them up. If your cart is 24 inches long and 18 inches wide, you need enough material to go around the entire perimeter. That means: (24 x 2) + (18 x 2) = 84 inches of material. Always buy a bit extra in case you make mistakes during installation.
Preparing Your Cart for the Lip
Before you start installing, your cart needs prep work. This doesn’t take long, but it’s essential.
Clean the surface – Use a damp cloth to wipe down the entire top edge of your cart. Remove dust, dirt, and any debris. Let it dry completely. A clean surface helps adhesives bond better.
Sand any rough spots – If your cart has rough edges, scrape them smooth with sandpaper. Run your hand along the edge to feel for any sharp points. These need to come off.
Check for damage – Look at your cart carefully. Do you see dents, cracks, or rust? Small issues are okay. Large problems might mean you need a new cart. Metal carts with surface rust can be sanded down to bare metal before you add your lip.
Plan your attachment method – Decide now whether you’ll use adhesive, fasteners, or both. Some materials need fasteners because adhesive alone isn’t strong enough. Others work fine with just glue.
Installation Methods
The way you install your lip depends on what material you’re using and what kind of cart you have.
Using Adhesive
Adhesive is the easiest method. Construction adhesive or silicone caulk bonds materials to your cart in minutes.
Clean the surface first. Run a bead of adhesive along the top edge of your cart. Press your lip material into place. Hold it there for thirty seconds. Some adhesives dry fast, others take longer. Check the label on your specific product.
The advantage of adhesive is simplicity. No tools needed. The downside is that once it’s dry, you can’t easily remove it. Make sure your placement is right before you press it down.
Using Screws and Bolts
Fasteners provide a permanent, super-strong hold. This method works well for metal lips, PVC, and wood.
Mark where your screw holes will go. Space them about four to six inches apart for even pressure. Drill pilot holes (smaller holes made before the actual screw goes in) to prevent splitting or cracking.
Drive your screws or bolts through the lip material into the cart. Tighten them snugly, but don’t over-tighten. Over-tightening can strip threads or pull the material out of shape.
Combination Method
Many pros use both adhesive and fasteners. This creates an incredibly strong bond. Apply adhesive along the surface, then secure it with fasteners. You get the best of both worlds.
Step-by-Step Installation Guide
Now let’s walk through installing a lip on your rolling cart. We’ll use rubber edging as our example since it’s the most popular choice for beginners.
Step 1: Gather your materials
You’ll need rubber edging (buy enough to go around your entire cart plus a little extra), a measuring tape, scissors or utility knife, construction adhesive or silicone caulk, and a clean cloth.
Step 2: Clean your cart
Wipe down the top edge where the lip will attach. Use a damp cloth and let it dry. Any dirt or dust will weaken the bond.
Step 3: Measure and mark
Measure the length you need for each side of your cart. Mark these measurements on your edging material using a marker. Start at one corner and work your way around.
Step 4: Cut your pieces
Cut the edging to size using scissors or a utility knife. Cut straight across for clean edges. If you’re using corner pieces (which is a smart idea), prepare those too.
Step 5: Apply adhesive
Run a thin, even bead of adhesive along the top edge of your cart. Don’t go crazy with the glue. A thin line is all you need.
Step 6: Attach the edging
Starting at one corner, press your first piece of edging into place. Push firmly for about thirty seconds. Work your way around your cart, corner by corner.
Step 7: Check your work
Once all pieces are attached, walk around your cart and inspect the joints. Make sure everything sits flush. No gaps or lifted edges.
Step 8: Let it cure
Read the instructions on your adhesive. Most glues need anywhere from a few hours to overnight to fully cure. Don’t use your cart until the adhesive has set.
Dealing with Corners
Corners can be tricky. Your lip needs to turn smoothly at each corner, or it looks sloppy.
For rubber edging, you have a few options. Some corner kits come with pre-made corner pieces that connect two sides neatly. You can also miter cut your edging, which means cutting it at a 45-degree angle so the pieces fit together like picture frame corners.
Another option is to overlap the pieces slightly. Let one piece extend past the corner, then lay the next piece on top. It’s not the fanciest look, but it works and looks intentional if done right.
For metal or PVC, cutting corners at 45-degree angles gives the best appearance. A miter box helps you make accurate angle cuts. If you don’t have a miter box, take your time with a hand saw and use a speed square as a guide.
Reinforcing High-Traffic Areas
Some spots on your cart get more wear than others. Corners take abuse. Spots where you often grab the cart to move it need extra durability.
Add extra fasteners in these areas. If your first plan was fasteners every six inches, move them to every three inches in corners. This prevents the lip from lifting or peeling off.
You can also apply adhesive on top of fasteners. Cover the fastener holes with a bead of caulk once everything is dry. This seals out moisture and looks finished.
Protecting Your Installation from Weather
If your cart sits outside or in a damp garage, weatherproofing matters.
Metal edging holds up great in wet conditions. Paint it or use stainless steel to prevent rust.
Wood needs protection. Seal it with wood stain, polyurethane, or outdoor paint. This keeps moisture out and extends its life.
Rubber and vinyl are naturally weather-resistant, but they can fade in direct sunlight. Consider storing your cart indoors or in shade when it’s not in use.
PVC can become brittle in very cold temperatures. If you live somewhere with harsh winters, store your cart inside during the cold months.
Maintenance and Repairs
Your lip will last for years with minimal care.
Check it every few months. Look for peeling, cracks, or loose fasteners. Tighten any fasteners that have loosened. If adhesive starts peeling, clean the area and reapply new adhesive.
Clean your lip regularly. Dust and debris can accumulate. A quick wipe with a damp cloth keeps it looking good and prevents buildup.
If a section gets damaged, you don’t have to replace the entire lip. You can cut out the damaged piece and install a new section. Cut through the damaged area, remove it, and glue or screw in a replacement piece.
Creative Lip Ideas
Want to get fancy? Here are some creative ideas for your lip.
Two-tone edging – Use different colors for the top and sides. This looks modern and helps you spot your cart quickly.
Textured surface – Some rubber edging comes with grip texture. This gives your items extra hold so they don’t slide at all.
Branded lip – If this is a work cart, add your business name or logo to the lip using vinyl lettering or paint.
Modular sections – Build your lip from separate pieces that you can remove and replace. This makes maintenance super easy.
Height variation – Make one side taller to hold tall items while keeping other sides lower. It’s functional and different.
Common Mistakes to Avoid
Learning from others’ mistakes saves you time and frustration.
Measure just once – This is the biggest mistake. Always measure twice. Better yet, measure three times. An extra minute of measuring saves hours of grief later.
Cheap materials – Don’t skimp on adhesive or fasteners. Buy quality products. They cost a few dollars more but last much longer.
Skipping the clean – Dirt and dust cause adhesive to fail. Spend two minutes cleaning the surface. It makes a huge difference.
Rushing the cure time – Glue needs time to set properly. Using your cart too soon weakens the bond. Wait the full time recommended on the adhesive label.
Ignoring safety gear – Wear glasses and gloves. Metal shavings, sharp edges, and strong chemicals deserve respect. Protect yourself.
Poor corner planning – Think through corners before you start installing. Measure and mark them carefully. Bad corners ruin an otherwise good installation.
Testing Your New Lip
Once your adhesive has cured, it’s time to test your work.
Load your cart with various items. Stack some boxes. Place some lighter items. Put some heavy items in the middle.
Push your cart around. Move it in different directions. Make sharp turns. Does anything slide? Does the lip hold everything in place?
If something shifts, your lip might not be tall enough for that type of item. You can add a second layer or switch to taller edging. Most people find that standard lip height works for 90% of their items.
Upgrading Different Types of Carts
The method changes slightly depending on your cart type.
Metal utility carts – Metal bonds well to adhesive and fasteners. You have lots of options here. Drills through metal easily, so fasteners work great.
Plastic carts – Plastic requires strong adhesive. Mechanical fasteners can crack plastic if over-tightened. Use adhesive as your main method with light fasteners if needed.
Wooden carts – Wood loves fasteners. Screws hold great in wood. Adhesive works too. Combine both for maximum strength.
Shop carts with existing rails – Some carts have rails or bumpers already. You can still add a lip. Make sure your new lip doesn’t interfere with existing features.
Budget-Friendly Options
Broke but want to upgrade? Here are cheap ways to add a lip.
Rope trim – Heavy-duty rope glued around the edge creates a soft barrier. Cost is minimal.
Pool noodles – Cut pool noodles in half lengthwise and attach them around your cart. They’re colorful and cost just a few dollars.
Old garden hose – Cut old hose and use it as edging. Recycle something that would otherwise be thrown away.
Scrap wood – If you’re handy, use leftover wood from other projects. Sand it smooth and paint it.
Foam pipe insulation – This material is cheap, lightweight, and surprisingly effective. Slit it and snap it around your cart’s edge.
When to Call a Professional
Most people can do this project themselves. Sometimes, though, professional help makes sense.
Call a professional if your cart is extremely valuable or rare. If you have a vintage cart or one with special features, you might want an expert to handle the upgrade.
Also, if you’re uncomfortable using tools or working with adhesives, let someone else do it. The cost is worth peace of mind.
Final Thoughts
Adding a lip to your rolling cart is a smart upgrade. It costs very little and delivers huge benefits. Your items stay in place. Your cart works better. You save time and money.
The process is straightforward. Pick your material, measure carefully, and follow the steps. Take your time with each stage. Most installations take an afternoon from start to finish.
Once you’re done, you’ll wonder why you didn’t do it sooner. Your cart is now more functional, safer, and ready for serious work.
So grab your materials, clear off a work surface, and get started. Your rolling cart is about to become your favorite workspace accessory.
Happy building!