How to Add an Exhaust Fan in Your Bathroom
Are you tired of stepping out of the shower only to find your bathroom mirror fogged up? Does the air feel thick and humid? Is there a musty smell lingering in the space? You’re not alone. Bathrooms collect moisture every single day, and that moisture causes real problems. It can damage your walls, create mold, and make the whole space feel uncomfortable.
The good news is simple: an exhaust fan solves all of these issues. And the even better news? You can install one yourself without being a professional contractor. This guide walks you through everything you need to know to add a bathroom exhaust fan from start to finish.
Why Your Bathroom Needs an Exhaust Fan
Before you pick up a wrench, let’s talk about why this project matters so much.
Your bathroom creates a ton of moisture. Every time someone showers, the steam rises. Every time someone takes a bath, water vapor fills the air. This happens constantly, and that moisture has to go somewhere. If it doesn’t leave through proper ventilation, it stays trapped in your bathroom. That’s where problems start.
Excess humidity damages your home in several ways. It creates the perfect environment for mold and mildew to grow. These aren’t just gross to look at—they can actually make you sick. The moisture also warps wood, peels paint, and weakens drywall over time. Bathroom fans help you avoid all of this damage.
A good exhaust fan pulls the wet air out of your bathroom and sends it outside or into your attic. This keeps the humidity level down. Your bathroom stays fresh, your walls stay strong, and you avoid expensive repairs down the road. That’s why home experts always recommend proper bathroom ventilation.
Understanding Exhaust Fan Basics
Let’s talk about what an exhaust fan actually is and how it works.
An exhaust fan is a pretty simple device. It has a motor, some blades, and a duct. The motor spins the blades, which pull air into the fan. That air travels through the duct and exits your home. Some fans vent straight through the roof. Others go through an exterior wall. The best option depends on your home’s layout.
You’ll see exhaust fans in different sizes. The size you need depends on the square footage of your bathroom and how much moisture it creates. A small powder room needs a different fan than a master bath with a steam shower. We’ll talk more about sizing later.
Most exhaust fans also come with a damper. This is a flapper that closes when the fan isn’t running. It stops outside air from flowing backward into your home. This is important because you don’t want cold air leaking in through your vent during winter.
Some fans include a light. Others have a humidity sensor that turns on automatically when moisture levels get too high. You can go simple or fancy, depending on your budget and needs.
How to Size Your Exhaust Fan Correctly
Getting the right size fan matters more than you might think.
If your fan is too small, it won’t remove enough moisture. Your bathroom stays humid, and you don’t get the benefits you’re looking for. If your fan is too large, you waste energy and money running more powerful equipment than necessary.
The standard rule is straightforward: you need 1 CFM (cubic feet per minute) of airflow for every square foot of bathroom space. Some experts say 1.5 CFM per square foot if your bathroom is very steamy. CFM tells you how much air the fan moves.
Here’s the math: If your bathroom is 50 square feet, you need a fan that moves at least 50 CFM. If it’s 100 square feet, aim for 100 CFM. Write down your bathroom dimensions and multiply length by width to get square footage.
Most hardware stores label fans with their CFM rating right on the box. This makes shopping easy. If you’re not sure about your bathroom size, bring a tape measure to the store and ask a staff member to help you calculate.
Noise matters too. Fans are rated in sones, which measure how loud they are. A quiet fan is around 0.5 to 1 sone. A loud one might be 4 sones or more. For a comfortable bathroom experience, aim for 1 sone or less. You want a fan that works well without sounding like a jet engine.
Tools and Materials You’ll Need
Before you start, gather everything you need. This prevents annoying trips back to the hardware store halfway through the job.
Tools:
- Screwdriver (both Phillips and flathead)
- Drill with bits
- Reciprocating saw or drywall saw
- Tape measure
- Pencil
- Ladder or step stool
- Utility knife
- Wrench or socket set (optional, depending on your ductwork)
- Caulking gun
- Drywall saw or hole saw for the opening
Materials:
- The exhaust fan unit itself
- Flexible duct or rigid duct depending on your setup
- Duct clamps to secure the ductwork
- Duct tape or mastic sealant for sealing joints
- Roof flashing or wall cap (depending on where you vent)
- Caulking suitable for your roof or exterior wall
- Drywall patch kit if you’re making a new hole
- Wire nuts for electrical connections
- Electrical wire if you need to extend circuits
- A damper (many fans include one)
Read the instruction manual for your specific fan. Different models might have slightly different requirements. The manual is your best friend here—keep it nearby while you work.
Step 1: Plan Your Vent Location
This step sets up your entire project. You can’t skip it.
First, decide where the duct will exit your home. Most bathrooms vent through the roof or through an exterior wall. Roof vents work well if the roof is easy to access. Wall vents might be easier if you have a convenient exterior wall nearby.
Check for obstacles before you decide. Don’t vent near your air intake. Don’t vent where ductwork will cross through cold attic spaces if you can avoid it. Don’t create a tight corner that the duct has to bend around sharply.
Go into your attic or crawl space and look around. Check what’s above your bathroom. You need a clear path from the bathroom ceiling to the outside. If there are joists, insulation, or other structural elements in the way, you might need to plan a route around them.
Mark your exit point. If it’s on the roof, measure the distance from your bathroom to that spot. If it’s a wall, do the same. This helps you understand how much duct you’ll need and which direction the main duct will run.
Step 2: Turn Off the Power and Prepare the Space
Safety comes first. Always.
Turn off the power to the bathroom at your circuit breaker. Wait a few minutes to make sure the power is truly off. Test the light switch to confirm. You don’t want to touch live wires while working.
Next, prepare the bathroom. Clear out personal items. You’ll need space to work and move around. Put down drop cloths if you’re concerned about dust and debris falling on your floors.
Check the ceiling in your bathroom. Most ceiling-mounted fans go in one of the corners. This helps ducting run more easily to the roof or wall. Look at your ceiling and pick a spot that’s not directly above the toilet or sink. A spot toward a corner near your planned exit point works best.
If your bathroom already has a light fixture in that spot, you might need to relocate it first. If you’re replacing an existing exhaust fan, remove the old one now.
Step 3: Cut the Opening in Your Ceiling
This is where things get real. You’re about to create a hole in your ceiling.
Find a stud or joist near your planned location. Your exhaust fan needs something solid to attach to. Look at your ceiling and check where the joists run. They’re typically spaced 16 inches apart.
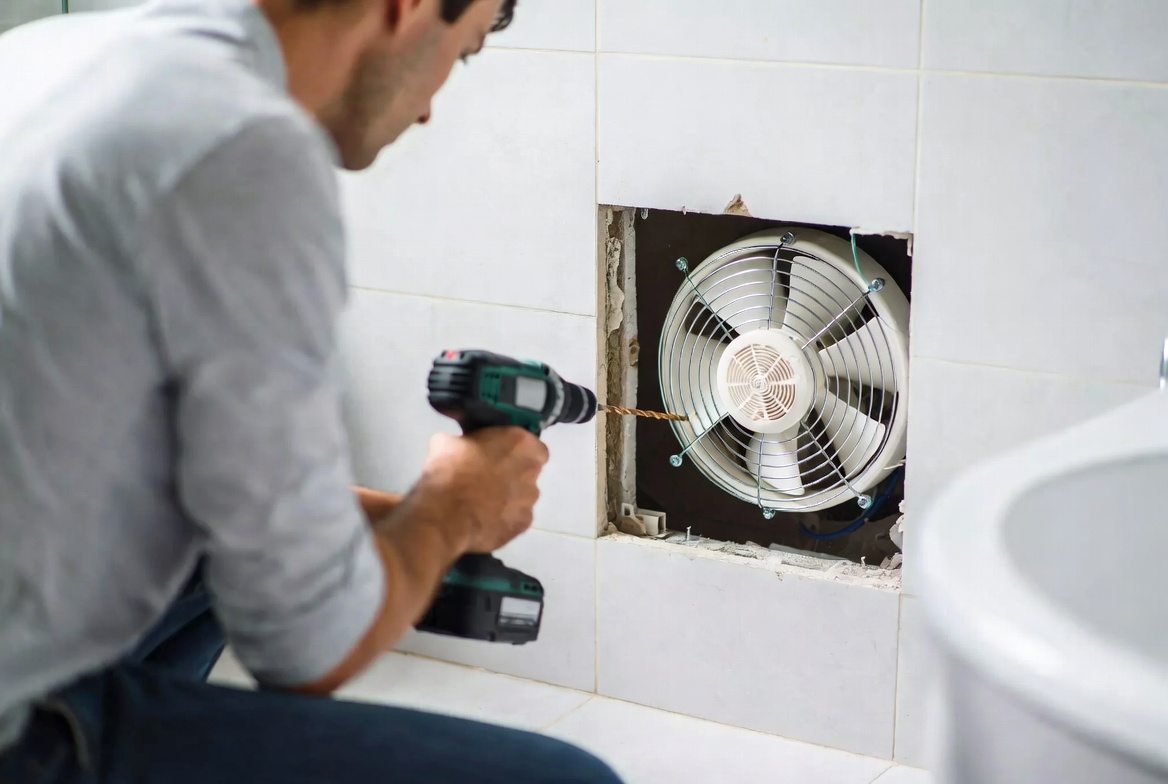
Use a drywall saw to cut an opening that matches your fan size. Most fans come with a template showing the exact dimensions. Trace this template onto your ceiling with a pencil. Then carefully cut along the lines.
Take your time here. Rushing leads to mistakes and messy openings. Use steady, controlled pressure. Let the saw do the work rather than forcing it. If you hit resistance, you’ve probably hit a joist. Stop and adjust your opening.
Once the hole is cut, have someone stand below to catch the drywall piece as it falls. This prevents a loud crash and keeps drywall dust contained better.
Clean up the edges of the hole. You might need a utility knife to smooth them a bit.
Step 4: Connect the Electrical Wiring
Now you need to power the fan.
You have two options: connect to existing bathroom electrical circuits or run a new circuit. Most people connect to existing circuits if they’re available and have capacity. A new circuit is safer if you’re unsure, but it requires running wire through walls, which is more complex.
Read your fan manual for its electrical requirements. Most residential exhaust fans need standard 120-volt household power. Check the wire gauge required and breaker size recommended.
Turn off power at the breaker again. Use a voltage tester to confirm the power is off. This is not a step to rush or skip.
Run your electrical wire from the breaker box or existing outlet to your fan location. Secure the wire with clamps every 16 inches or so. Follow local electrical codes. If you’re not comfortable working with electrical wiring, hire a licensed electrician. This isn’t something to guess about.
Connect the wires using wire nuts. Twist the wires together first, then screw the wire nut on firmly. The fan should have a ground wire, a neutral wire, and a hot wire. These must go to the correct terminals. Your manual shows exactly where each wire goes.
Don’t power anything back on yet. We’ll do that at the end after everything is connected.
Step 5: Install the Fan Housing in the Ceiling
This is where the fan actually goes in place.
Slide the fan housing up through the ceiling opening. Have someone help you from above if you’re in an attic. The housing should fit snugly into the opening.
Secure the housing to your ceiling joists using the brackets that come with your fan. Most fans have flanges that screw down. Line these up with your joists and drive screws through them. Use the screw holes provided—don’t make new ones.
Make sure the housing is level and centered in the opening. Tighten the screws firmly but don’t overtighten, which can crack the flange or pull it out of shape.
The damper should hang freely from the fan housing. Check that it opens and closes smoothly. It shouldn’t stick or drag.
Step 6: Run the Ductwork
Now the duct connects the fan to the outside.
Start with the main duct run from the fan to your exit point. You’ll use either flexible duct or rigid duct. Flexible duct is easier to work with, especially around tight spaces and corners. Rigid duct is more durable long-term and looks more professional.
Connect the duct to the outlet on the fan housing. Use a duct clamp to secure it tightly. The duct should slip over the outlet and the clamp should squeeze around both. Tighten the clamp bolt firmly so air doesn’t leak out.
Run the duct toward your exit point. Avoid sharp kinks and bends if possible. Tight bends slow airflow. Go around obstacles gradually rather than sharply.
If you’re venting through the roof, route the duct to the hole you’ll cut in the roof. We’ll do that next. If you’re venting through a wall, route it to that wall.
Wherever you have joints between duct sections, use duct clamps to secure them. Seal all joints with duct mastic or duct tape. This prevents air from leaking out into your attic.
Support the duct with hangers every 3 feet or so. Don’t let it hang and put stress on the fan housing. Proper support reduces noise and keeps airflow steady.
Avoid running ductwork through unconditioned spaces if you can help it. Insulation is especially important if ducts pass through cold attics. Use insulated duct or wrap regular duct with insulation tape. This prevents condensation from forming inside the duct, which can lead to water damage.
Step 7: Install the Roof or Wall Cap
Your duct needs to exit your home, and that exit needs protection.
If you’re venting through the roof, go up to the roof where the duct terminates. Mark where you need to cut a hole. Most roof caps are 4 inches in diameter, but check your cap measurements.
Carefully cut a hole through the roofing material and sheathing. Use a reciprocating saw or a hole saw. Work slowly and deliberately.
Slide the roof flashing under the shingles above the hole and over the hole area. You might need to loosen shingles to get the flashing positioned properly. Use roofing nails to secure the flashing. Then put a dab of roofing cement under the shingle edges to seal them back down.
Connect your duct to the roof cap. Use a duct clamp to make it secure and tight. Seal around the connection with roofing cement or caulk rated for roofs.
If you’re venting through a wall, the process is similar but simpler. Cut a hole through the wall where the duct terminates. Attach the wall cap over the hole. Seal around it with caulk. Make sure the damper opens freely and closes fully.
The exterior cap has a damper that prevents outside air from blowing back into your home. Check that it moves smoothly and isn’t blocked by insulation or debris.
Step 8: Seal Everything and Insulate
Air leaks waste energy and reduce efficiency.
Seal all duct joints with mastic sealant or approved duct tape. Mastic is better for permanent seals, but quality duct tape works fine too. Go over every joint. Even small leaks add up.
If your ducts run through an unheated attic, insulate them. Wrap duct with fiberglass insulation and secure it with tape. This prevents moisture from condensing on cold duct surfaces. Condensation in ducts is bad—it can drip back into the bathroom or damage your ductwork over time.
Seal any gaps around the fan housing where it meets the ceiling. Use caulk designed for the ceiling material. This prevents air leaks and keeps dust from entering the space above the ceiling.
Check for any other gaps or air leaks along the duct path. Seal them with caulk or foam sealant as appropriate.
Step 9: Test the Fan
Before you finish completely, make sure everything works.
Turn the power back on at the breaker. Flip the light switch or control for your exhaust fan. The fan should start running smoothly. Listen for strange noises. The motor should sound like a steady hum, not rattle or grind.
Feel the airflow at the ceiling vent. You should feel air moving through the opening. Go outside to your roof or wall cap. You should feel air coming out of the cap. If you don’t feel much airflow, check your ductwork for kinks or blockages.
Run the fan for a few minutes. Feel your ceiling for warm air being released—you shouldn’t feel much heat leakage. The whole system should run quietly and steadily.
If something doesn’t seem right, turn the power off and troubleshoot. Common issues include blocked ducts, loose connections, or damper problems.
Step 10: Finishing Touches and Cleanup
You’re almost done. Time to make everything look nice and clean.
If you had to cut drywall around the ceiling opening, patch it up with spackling or joint compound. Sand it smooth once it dries. Paint it to match your ceiling.
Replace any trim or molding you removed. Touch up paint if needed.
Clean up all your tools and materials. Sweep up drywall dust and debris. You’d be amazed how much dust a ceiling project creates.
Test your damper one more time. Open a window in your bathroom and run the fan. The damper should be wide open. Close the damper manually to confirm it moves freely.
Maintenance Tips for Long-Lasting Performance
Your fan will keep working well if you maintain it.
Clean the vent grille every couple of months. Dust builds up on the intake, and a clogged intake reduces airflow. Just wipe it down or vacuum it gently. Turn off the fan first.
Check your roof or wall cap occasionally from the outside. Make sure the damper isn’t blocked by debris or ice. In winter, check that snow isn’t blocking the cap.
Listen to your fan. If it starts making strange noises or sounds louder than usual, something might be wrong. Vibrations can mean loose connections. Grinding sounds could indicate bearing problems. Address issues promptly before they get worse.
Feel the exterior damper. It should move easily in both directions. If it sticks, clean off any dust or insect nests and work it gently back and forth.
Every few years, check your ductwork from the attic if you can safely access it. Look for disconnections, kinks, or damage. Insulation should still be in place.
Replace the damper if it breaks or becomes corroded. This is usually an inexpensive part that’s easy to swap out.
Common Problems and How to Fix Them
Even with perfect installation, issues sometimes pop up.
Poor Airflow: Check for blockages in the duct. Look for crushed sections or kinks. Make sure the damper opens fully. Feel the exterior cap to confirm air is exiting. Clogged intake grilles reduce flow too. Clean them out.
Moisture Still Building Up: Your fan might be too small for your bathroom. Run it longer after showers, or consider upgrading to a larger model. Also make sure you’re running it long enough. Let it run for 20 minutes after showers.
Noisy Fan: Vibration often means loose connections. Check all duct clamps and fan mounting bolts. Make sure ducting isn’t vibrating against joists or framing. Add clamps to support the duct better. A worn bearing sounds like grinding and usually means you need a new fan.
Water Dripping in Bathroom: You have condensation in the duct. Insulate uninsulated ducts, or improve roof pitch so water doesn’t pool. Make sure the duct slopes slightly downward toward the exit point so gravity helps.
Damper Won’t Close: Check for debris or ice blocking it. Clean it out. Make sure it’s not installed backward.
Moisture in Attic: Your duct probably isn’t insulated. Add insulation around the duct to prevent condensation.
Final Thoughts
Installing an exhaust fan in your bathroom is a project you can absolutely do yourself. It takes time and careful attention to detail, but the steps are straightforward. You’ll end up with a dry, healthy bathroom that stays fresh and mold-free.
The key to success is taking your time, following instructions carefully, and not cutting corners on sealing and insulation. A well-installed exhaust fan works quietly and efficiently for years. Poor installation leads to problems.
If at any point you feel unsure or run into complications with electrical work, don’t hesitate to call a professional. Your safety and your home’s integrity matter more than pride. Licensed electricians and HVAC technicians can handle any part of this project.
But for most homeowners, this is absolutely doable. You’ll feel proud every time you use your bathroom and see that mirror clear up instantly. You’ll know you’ve helped protect your home from moisture damage. And you’ll have saved yourself hundreds of dollars in labor costs.
So grab your tools, take a deep breath, and get started. Your bathroom is about to get a whole lot better.

Hi, I’m Mary, the founder of Homygear.com. I’m passionate about creating a comfortable, smart, and beautiful home. I share practical insights and real-world experience on home gear that makes everyday life easier. Behind the scenes, my dedicated research team studies products in depth, and our writers craft honest reviews using trusted, authentic sources—so you can choose home gear with confidence.